8
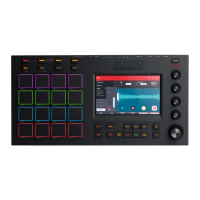
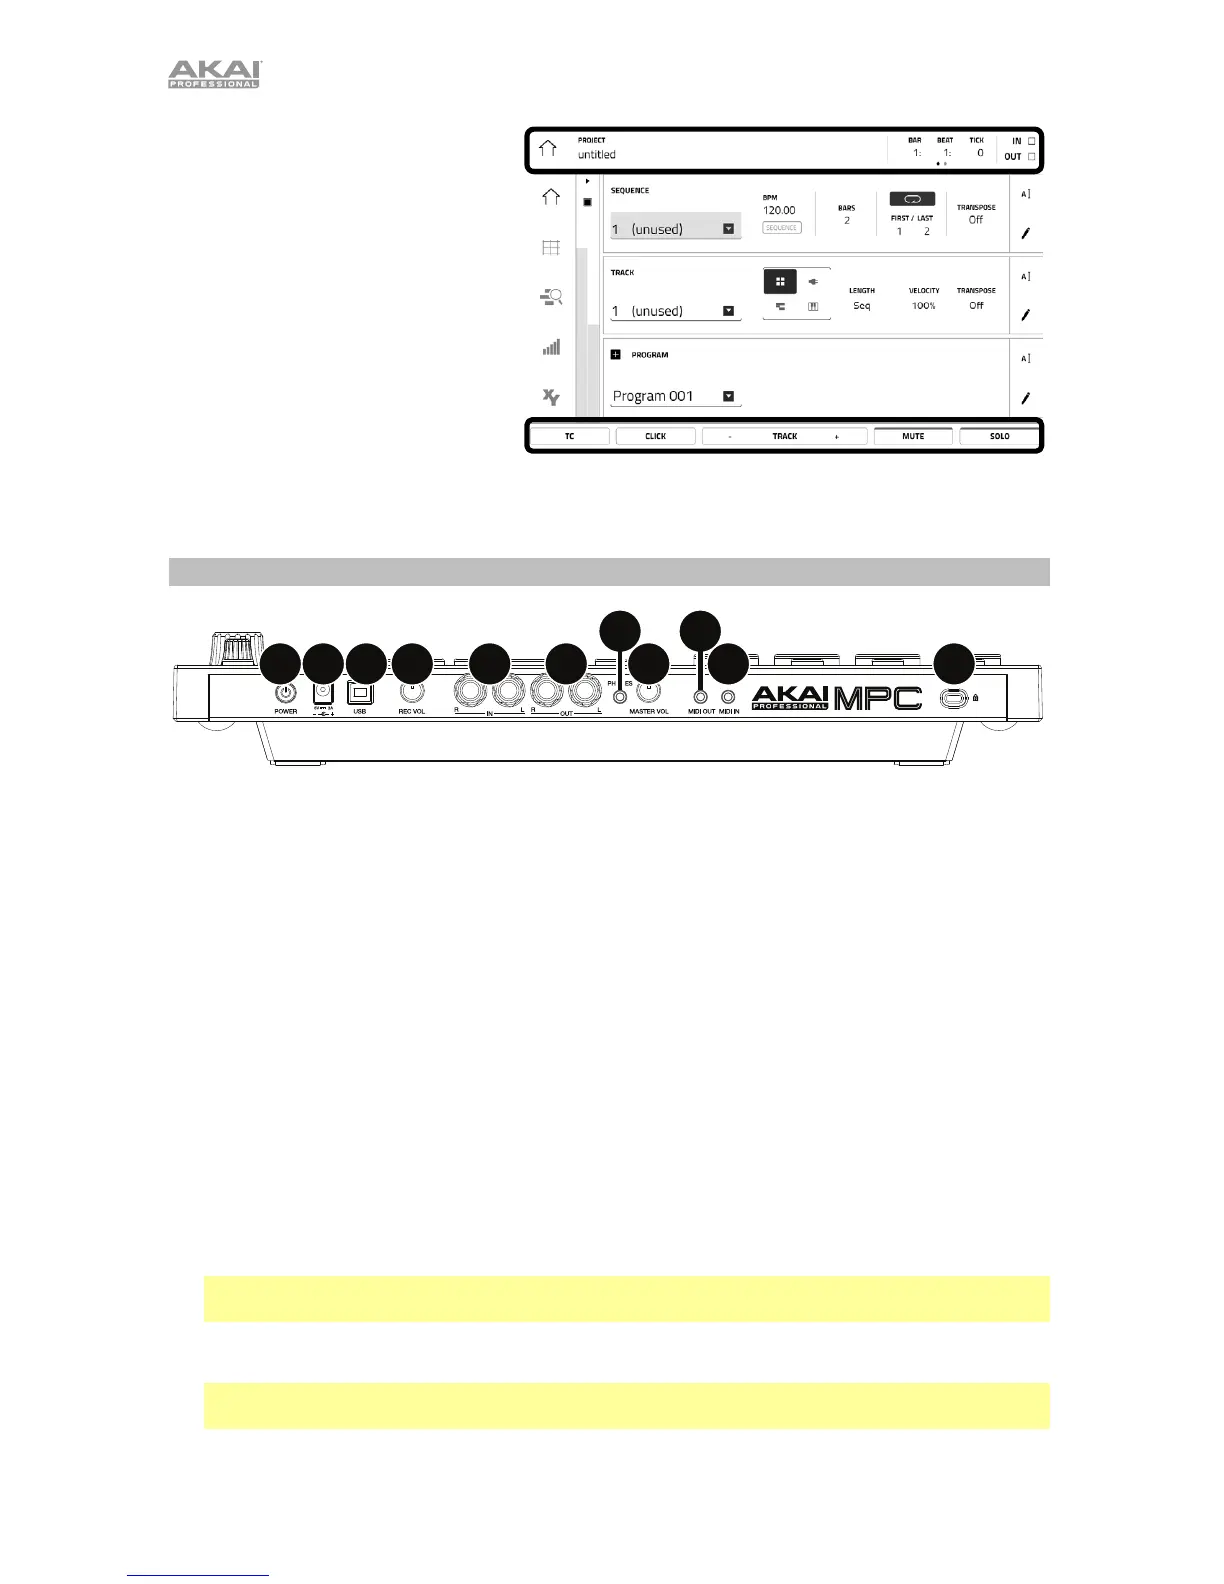
The upper edge of the display shows
the toolbar, which contains
information about the current view
(often the name of the current track,
sequence, audio pointer position,
etc.). Tap an item to select it.
The lower edge of the display shows
various buttons that you can use in the
current view. Tap a button to press it.
To return to a previous view, either tap
outside of the window currently in the
display or tap the left arrow () in the
upper-left part of the display.
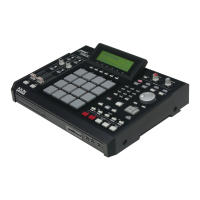
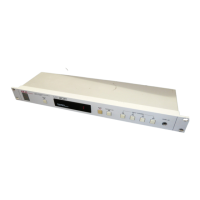
Rear Panel
1
2
34 56
7
89
10 11
1. Power Input: Use the included power adapter to connect MPC Touch to a power outlet.
Alternatively, you can power MPC Touch via the USB port only, but the display will be disabled.
2. Power Switch: Turns MPC Touch’s power on/off.
3. USB Port: Use the included USB cable to connect this high-retention-force USB port to an
available USB port on your computer. This connection allows MPC Touch to send/receive MIDI
and audio data to/from the MPC software.
You can power MPC Touch via the USB port only, but the display will be disabled.
4. Rec Vol: Turn this knob to adjust the volume of the inputs.
5. Master Vol: Turn this knob to adjust the volume of the outputs and phones output.
6. Inputs: Use standard 1/4” (6.35 mm) TRS cables to connect these inputs to an audio source
(mixer, synthesizer, drum machine, etc.). In the software, you can select whether you want to
record either channel or both channels in stereo or in mono.
7. Outputs: Use standard 1/4” (6.35 mm) TRS cables to connect these outputs to your monitors,
mixer, etc.). In the software, you can select whether you want to record either channel or both
channels in stereo or in mono.
8. Phones: Connect standard 1/8” (3.5 mm) stereo headphones to this output.
9. MIDI Out: Use the included 1/8”-to-5-pin adapter and a five-pin MIDI cable to connect this
output to the MIDI input of an external MIDI device (synthesizer, drum machine, etc.).
Important: Do not connect audio devices (e.g., headphones, monitors, etc.) to the MIDI Out.
Use the included 1/8”-to-5-pin adapters to connect MIDI devices only.
10. MIDI In: Use the included 1/8”-to-5-pin adapter and a five-pin MIDI cable to connect this input
to the MIDI output of an external MIDI device (synthesizer, drum machine, etc.).
Important: Do not connect audio devices (e.g., headphones, monitors, etc.) to the MIDI In. Use
the included 1/8”-to-5-pin adapters to connect MIDI devices only.
11. Kensington
®
Lock Slot: You can use this slot to secure your MPC Touch to a table or other
surface.
 Loading...