7
7
Calibration –in detail for each routing (copied from earlier product , for general info
and reference)
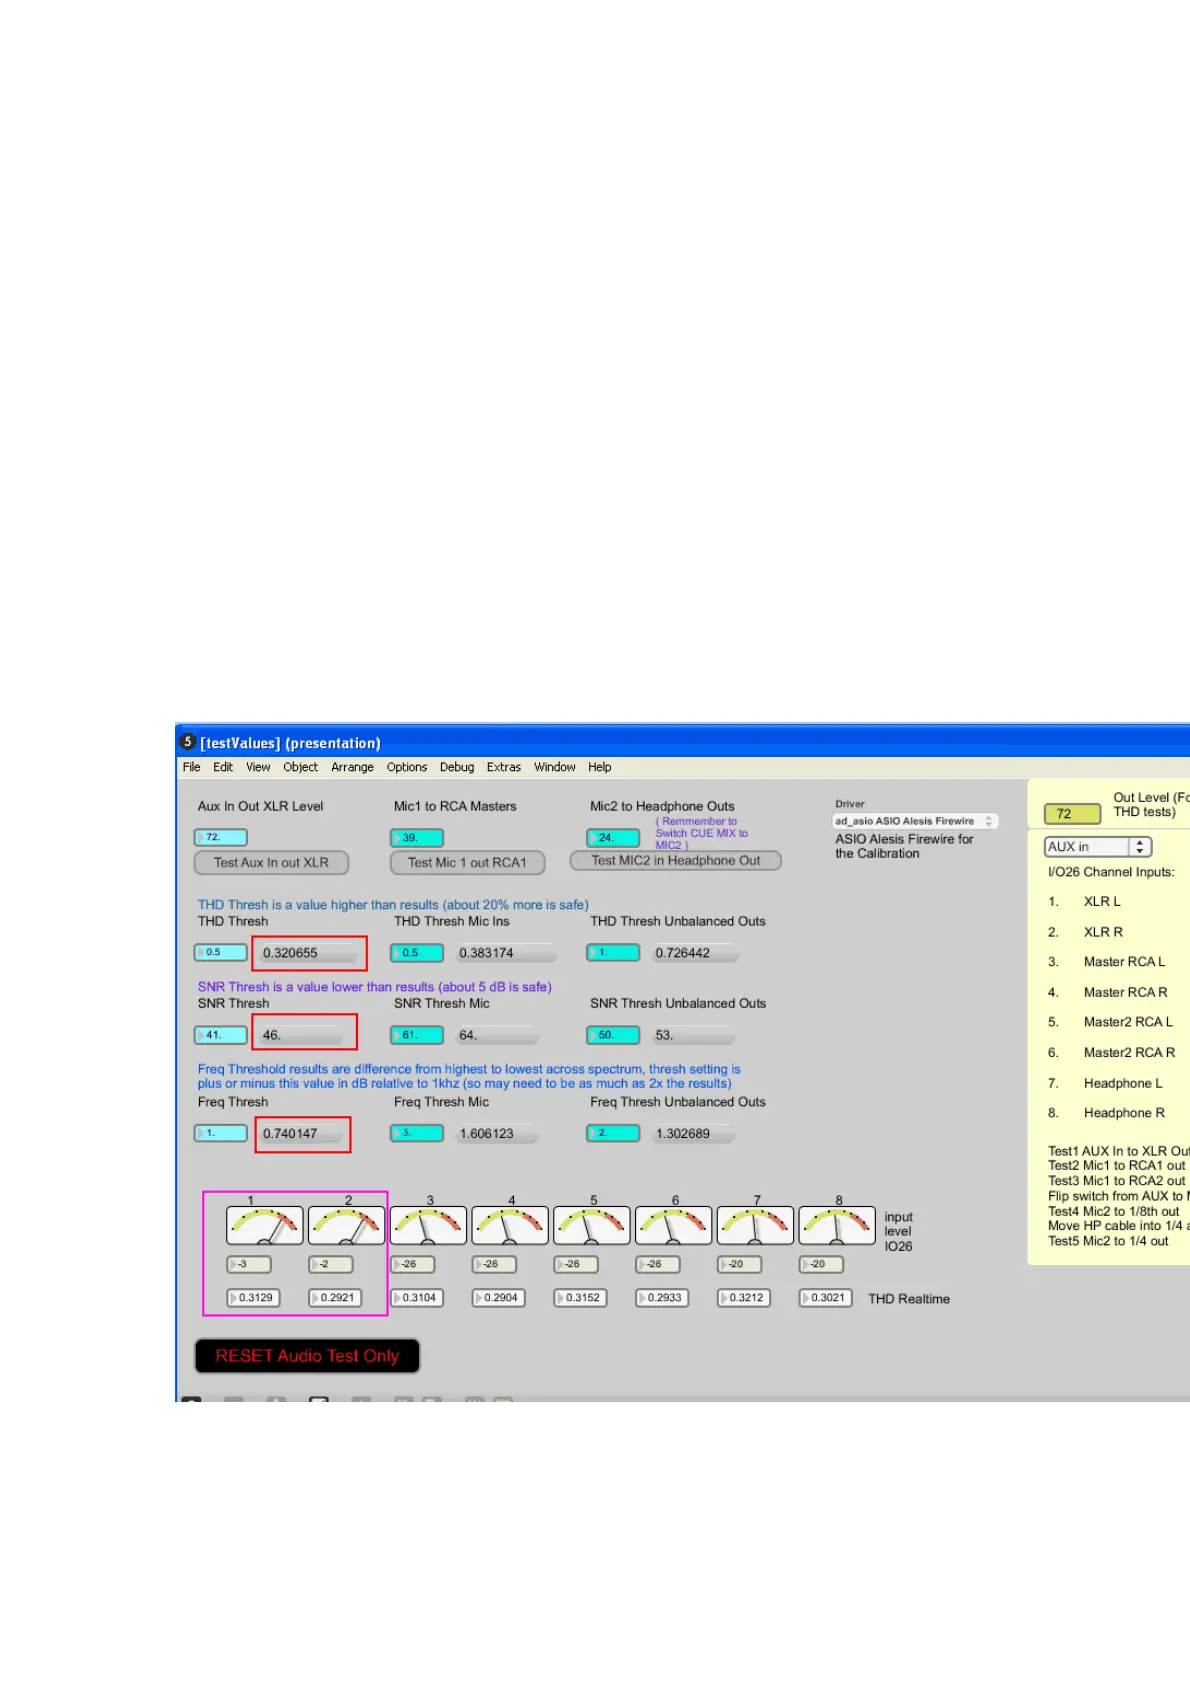
The pale blue boxes in the top row allow you to set the levels for each routing. You will
wish to raise or lower the value in the yellow box “Out Level (For THD Tests)” to get the
best (lowest) values in the THD Results boxes at the bottom.
The dropdown allows you to select the active routing (I am highlighting AUX In in the
screenshot)
In the screenshot below on my older unit I find the best (lowest) THD Realtime reading I
can get. This reading is obtained when my Yellow box for the output level is at 72 for the
“Aux in Out XLR Level”, yours may be different. You can move 1 number at a time to
fine tune by using the up and down arrow keys on the keyboard. You will find that there is
a “sweet spot”, where setting higher or lower causes the THD to increase. You want to
set it in this spot, but still with some headroom on the input level. -3dB is usually a good
level to be at.
You see that I have already set my “AUX in Out XLR Level” to 72 (top left blue box),
because that is the best level in this grouping for my setup.
 Loading...