62
PANORAMICA PANNELLO POSTERIORE
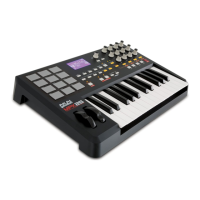
1. INGRESSO ADATTATORE DI ALIMENTAZIONE
CC – Inserire un adattatore di alimentazione MP6–1
nel caso in cui non si desideri alimentare l’MPK25
tramite il collegamento USB.
2. SICURA PER L'ADATTATORE DI
ALIMENTAZIONE – Si può fissare un cavo
dell’adattatore a questa sicura per evitare che si
scolleghi accidentalmente.
3. PORTA USB – Inserire un cavo standard USB a
livello di questa presa e nella porta USB del
computer. La porta USB del computer fornirà
l’alimentazione all’ MPK25. Questo collegamento
serve per inviare e ricevere dati MIDI da e verso il
computer e può anche essere utilizzato per l’invio di
dati MIDI dal computer ad un dispositivo collegato
alla porta MIDI OUT dell’MPK25.
4. USCITA MIDI OUT – Servirsi di un cavo MIDI a
cinque poli per collegare l’uscita MIDI OUT
dell’MPK25 all’ingresso MIDI IN di un dispositivo
esterno.
1
2
3
4 5
6 78
5. INGRESSO MIDI IN – Servirsi di un cavo MIDI a
cinque poli per collegare l’uscita MIDI OUT di un
dispositivo esterno all’ingresso MIDI IN dell’MPK25.
6. PEDALE SUSTAIN – Collegare un pedale sustain
TS da ¼” a questo ingresso.
7. INGRESSO PEDALE DI ESPRESSIONE –
Collegare un pedale di espressione TRS da ¼” TRS
a questo ingresso.
8. SLOT PER LUCCHETTO KENSINGTON – Servirsi
di questa apertura per lucchetto Kensington per
fissare l'MPK25 a un tavolo o ad altre superfici.
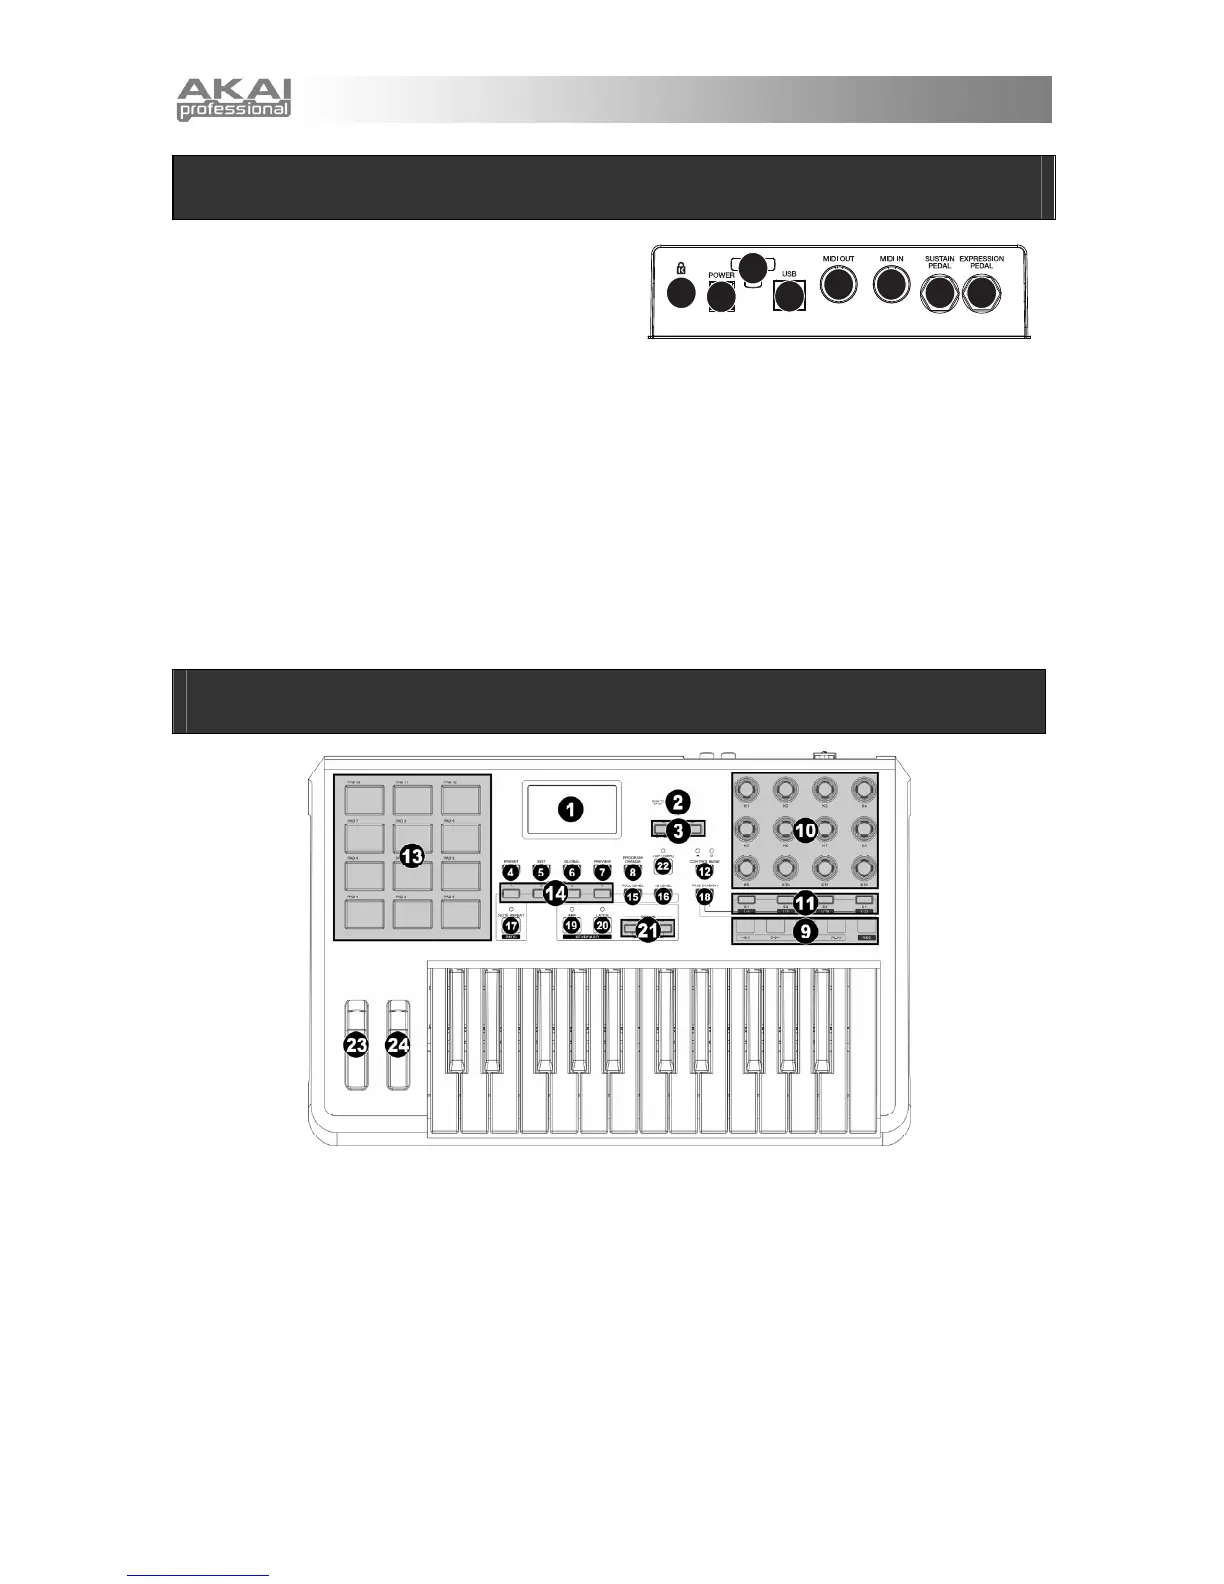
1. LCD – Il display serve per navigare tra i menu,
visualizzare i dati ed apportare modifiche alle opzioni
e ai parametri dell’MPK25.
2. [VALUE] (Push to Enter) – This dial is used to
increment and decrement Presets, parameter values
and settings. Quando premuta, serve anche da tasto
[ENTER] (invio).
3. TASTI [<] e [>] – Questi tasti servono per navigare
tra i campi dei menu e le opzioni. Il tasto [<] serve
anche come tasto [CANCEL].
4. [PRESET] – Questo tasto richiama la modalità
Preset. In questa modalità si possono selezionare e
lanciare diversi programmi Preset.
5. [EDIT] – Questo tasto attiva la Modalità Edit, che
permette di modificare il comportamento di tastiera,
pad, manopole, pulsanti e impostazioni predefinite di
ciascun preset.
6. [GLOBAL] – Questo tasto attiva la Modalità Global,
in cui vengono impostati i comandi di reset MIDI e le
preferenze generali di sistema.
7. [PREVIEW] – Questo tasto permette di visualizzare
l’ultimo valore inviato da un controller, senza inviare il
valore stesso. Tenere premuto questo tasto e
regolare il controller in modo da visualizzare il valore
sullo schermo LCD. A questo punto è possibile
modificarlo su un nuovo valore o farlo tornare
all’ultimo valore inviato.
8. [PROGRAM CHANGE] – La pressione di questo
tasto fa entrare in modalità Program Change. In
questa modalità si può inviare un messaggio di
modifica Program Change o Program with Bank
Change ad un modulo hardware o software.
PANORAMICA PANNELLO ANTERIORE
 Loading...