4. If
you press the REC key again, the PROG. NO./DATA display will show rapid
movement,
and
formatting will begin.
When
formatting
is completed, the SOI will return
to step 1. You can continue formatting
another
disk.
*
White the
disk is being
accessed (the disk drive LED will
be lit),
do
not turn off the
power
or
attempt removing the
disk
from
the disk drive. This will
damage the disk
as
well
as the disk
drive.
*
If
the disk
is damaged and formatting
is impossible, the PROG.
NO./DATA display will
show
"-F". In
this case, exchange
the disk for
a good one and
retry
formatting.
*
If
formatting is over
and
the
PROG. NO./DATA
display shows "bAd", the disk is
partially
damaged and likely
to cause errors when
used.
Saving
Procedure
1
.
Place
the
formatted disk in the drive,
select "SAVE" in the DISK index in Edit
mode, and press
the REC
key. The
REC LED will
start blinking.
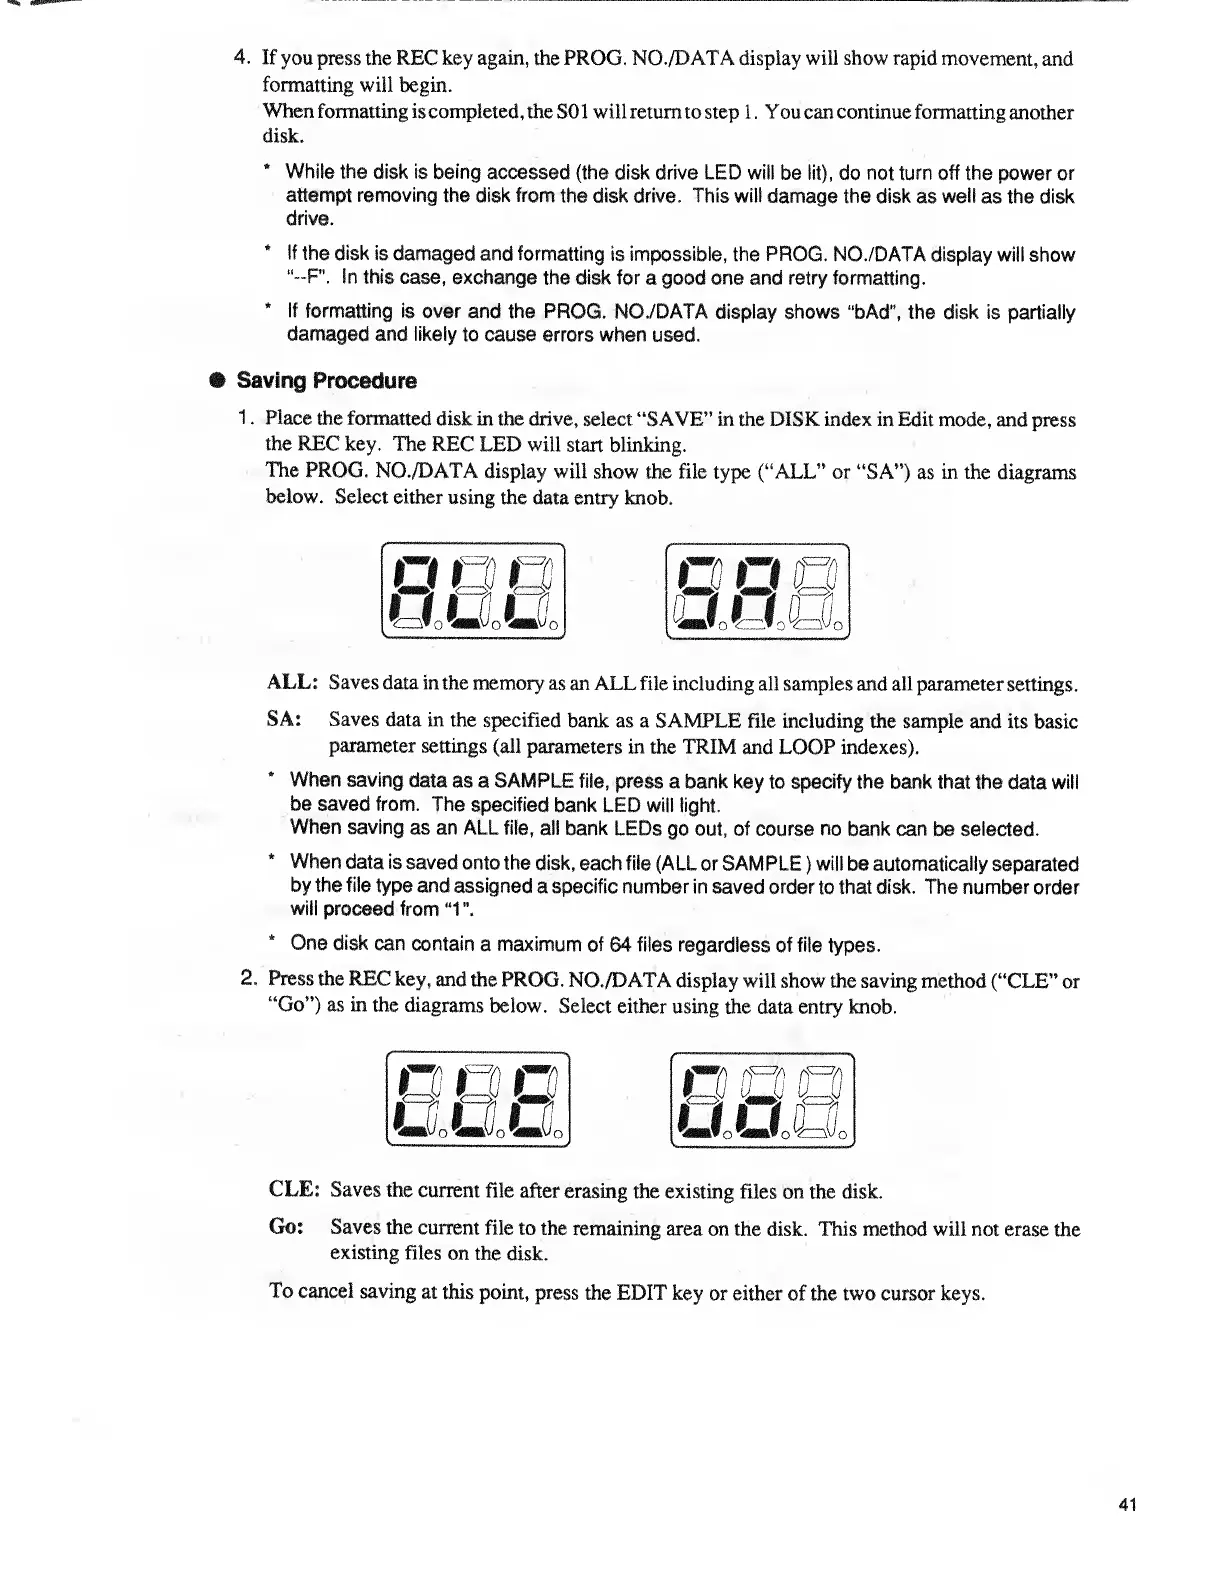
The PROG.
NO./DATA
display will
show the file
type
("ALL" or
"SA") as in the diagrams
below. Select
either using
the data entry knob.
U,XM
($=?/)
ALL:
Saves data in
the memory
as an ALL
file including all samples and all
parameter
settings.
SA: Saves
data in
the specified
bank as a SAMPLE file
including the sample and
its basic
parameter
settings (all
parameters
in the TRIM
and
LOOP
indexes).
*
When saving
data
as a
SAMPLE
file,
press a bank key
to
specify the
bank that the
data
will
be saved from.
The
specified
bank LED will light.
When saving
as
an
ALL file, all
bank
LEDs go out, of course no bank
can be selected.
*
When
data is
saved onto the
disk,
each file (ALL or SAMPLE ) will
be automatically
separated
by the file
type and
assigned
a specific number in
saved order
to
that disk. The number
order
will
proceed from
"1
",
*
One disk
can contain
a
maximum
of 64 files
regardless of file
types.
2.
Press the REC
key,
and the PROG.
NO./DATA
display will
show the saving method ("CLE"
or
"Go") as in
the diagrams
below.
Select either
using the
data entry knob.
fU
fU JR)k—Sj
r_aj
Rj—a;
l fi
ttl lHi
^.M.IU.IM.NI^
ftp
rf=^A
(f^
7
/)
tt tl til
CLE: Saves
the
current file
after erasing
the existing
files on the disk.
Go: Saves the
current
file to
the remaining
area
on the disk.
This method will
not erase
the
existing
files
on the
disk.
To
cancel saving
at this
point,
press the EDIT key
or either of the two cursor keys.
41