21
PART
8:
THE
REC
BUTTON
(SAMPLING)
FUNCTIONS
STEP41
SPECIFY
AUDIO
BANDWIDTH
RECORDING
(SAMPLING) FUNCTIONS
Sampling is the
process
of recording sounds into the
S900
memory.
Once in
memory,
these sounds can
be edited or
grouped together
into
programs.
If
you are sampling
with
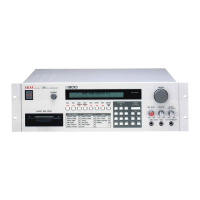
a microphone, plug into the front
panel
MIC INPUT jack.
If
you are sampling
a
line level signal,
plug
into
the
front panel
LINE INPUT
jack.
Unlike other functions,
the
REC
function has
no
page numbers
because
pages are always
accessed in
the
same order.
After
completing one
page,
move to the next page with the
PAGE
(down arrow)
button.
STEP 1 1 NAME SAMPLE
The LCD says
"Name of
sample to be
recorded."
Name
as de-
scribed in Chapter
2,
Part
1
. Press ENT when
done. We
suggest
you include
the
sample's
original pitch
(e.g.
C#,
E, etc.)
as
part
of the name. Example:
GUITAR
D5.
I
STEP
2
[
SELECT
PROGRAM
FOR
MOWdRING
The
LCD says "Name of
program for monitoring."
Use
the
control
to select an
existing
program (to hear the sample in
context with
the program
after recording) or monitor
(for monitoring
the
sample
by
itself
through the output). If
the latter,
adjust monitor
level with the monitor
control.
STEP 3 SPECIFY SAMPLE
TYPE
You have
three
choices:
(1)
Normal.
When
playing
a
velocity keyboard,
the
keys
as-
signed to this sample will
play
only this
sample
regardless
of velocity.
(2)
Velocity crossfade
-
soft. When using velocity
crossfade
(EDIT PROGRAM
Page
04)
with a velocity-sensitive
key-
board,
the harder
you
play the
keys assigned
to this sample,
the softer
its level. When using velocity
switch (EDIT
PROGRAM Page
04),
this
sample will
play
when
velocity
data is
below
the specified velocity switch threshold,
(3)
Velocity crossfade
-
loud. When
using
velocity
crossfade
(EDIT PROGRAM
Page
04)
with
a
velocity-sensitive
key-
board, the harder
you play the keys assigned
to
this
sample,
the louder its level. When
using velocity switch
(EDIT
PROGRAM
Page
04),
this sample will play when
velocity
data
is above the
specified velocity switch threshold.
By
sampling
a soft instrument sound as
(2)
and
a loud instru-
ment
sound as
(3),
playing
harder will
produce the
timbral
changes associated with playing an instrument
dynamically.
The
sound
will
crossfade smoothly
from the
soft
sample to the
loud
sample with velocity crossfade, or switch with
velocity
switch.
The
sample's
frequency
response
can
be
set from
3000 Hz to
1 6000 Hz. Enter a
five-digit number with
the
0—9
keys; you can
also turn the CONTROL
but this is more
time-consuming.
Higher bandwidth signals
(i.e. towards
16000 Hz) have
better
high frequency
response
but
also
take
up more
memory than
lower bandwidth
signals. To conserve memory,
use
the
minimum
bandwidth necessary
for
acceptable sound
quality.
STEP
5
SPECIFY
RECORDING
TIME
The
sample's
overall
time can
be
set from
250
ms
(1
000 ms
=
1
second) to the
maximum allowed
by
the
amount
of memory re-
maining. This
maximum time will vary
depending
on how much
memory has been
used and the audio
bandwidth
selected in
step 4. Maximum sample
length
at 16000 Hz
bandwidth with
a
clear memory is 1 1 878
ms; at
3000
Hz
bandwidth with
a clear
memory,
63351 ms
(that's over one minute!!).
Enter
the five-digit number
for recording
time.
Use the
minimum
time
possible
to
conserve
memory and leave
room
for other sam-
ples.
STEP61 ASSIGN
SAMPLE PITCH
The
LCD says
"Pitch of sound being recorded."
Play the key-
board
note
that corresponds to
the
sample's pitch;
we do
not
recommend
using the
CONTROL,
and
numeric
entry
will
not
work
in
this
case.
STEP
7
SELECT
TRIGGER
Use
the
0—9
keys
to
enter a
number as
follows:
(1
)
Sampling begins
when you
press any keyboard
key.
(2)
Sampling begins
when you
press
a
footswitch
plugged into
the
rear
panel footswitch
jack.
(3)
Sampling
begins
when
a
particular
audio
threshold is ex-
ceeded (as set in
the next step).
If
you press 1 or 2 then
change
your mind, exit the
REC function
by pressing another function
button,
then try again.

 Loading...