PLAYSNG
BACK
SOUNDS
We
know
you can't wait
any longer
to
hear the
S900, so
grab
one
of the factory
disks and let's
go. Follow these instructions exact-
ly
as
given.
1
.
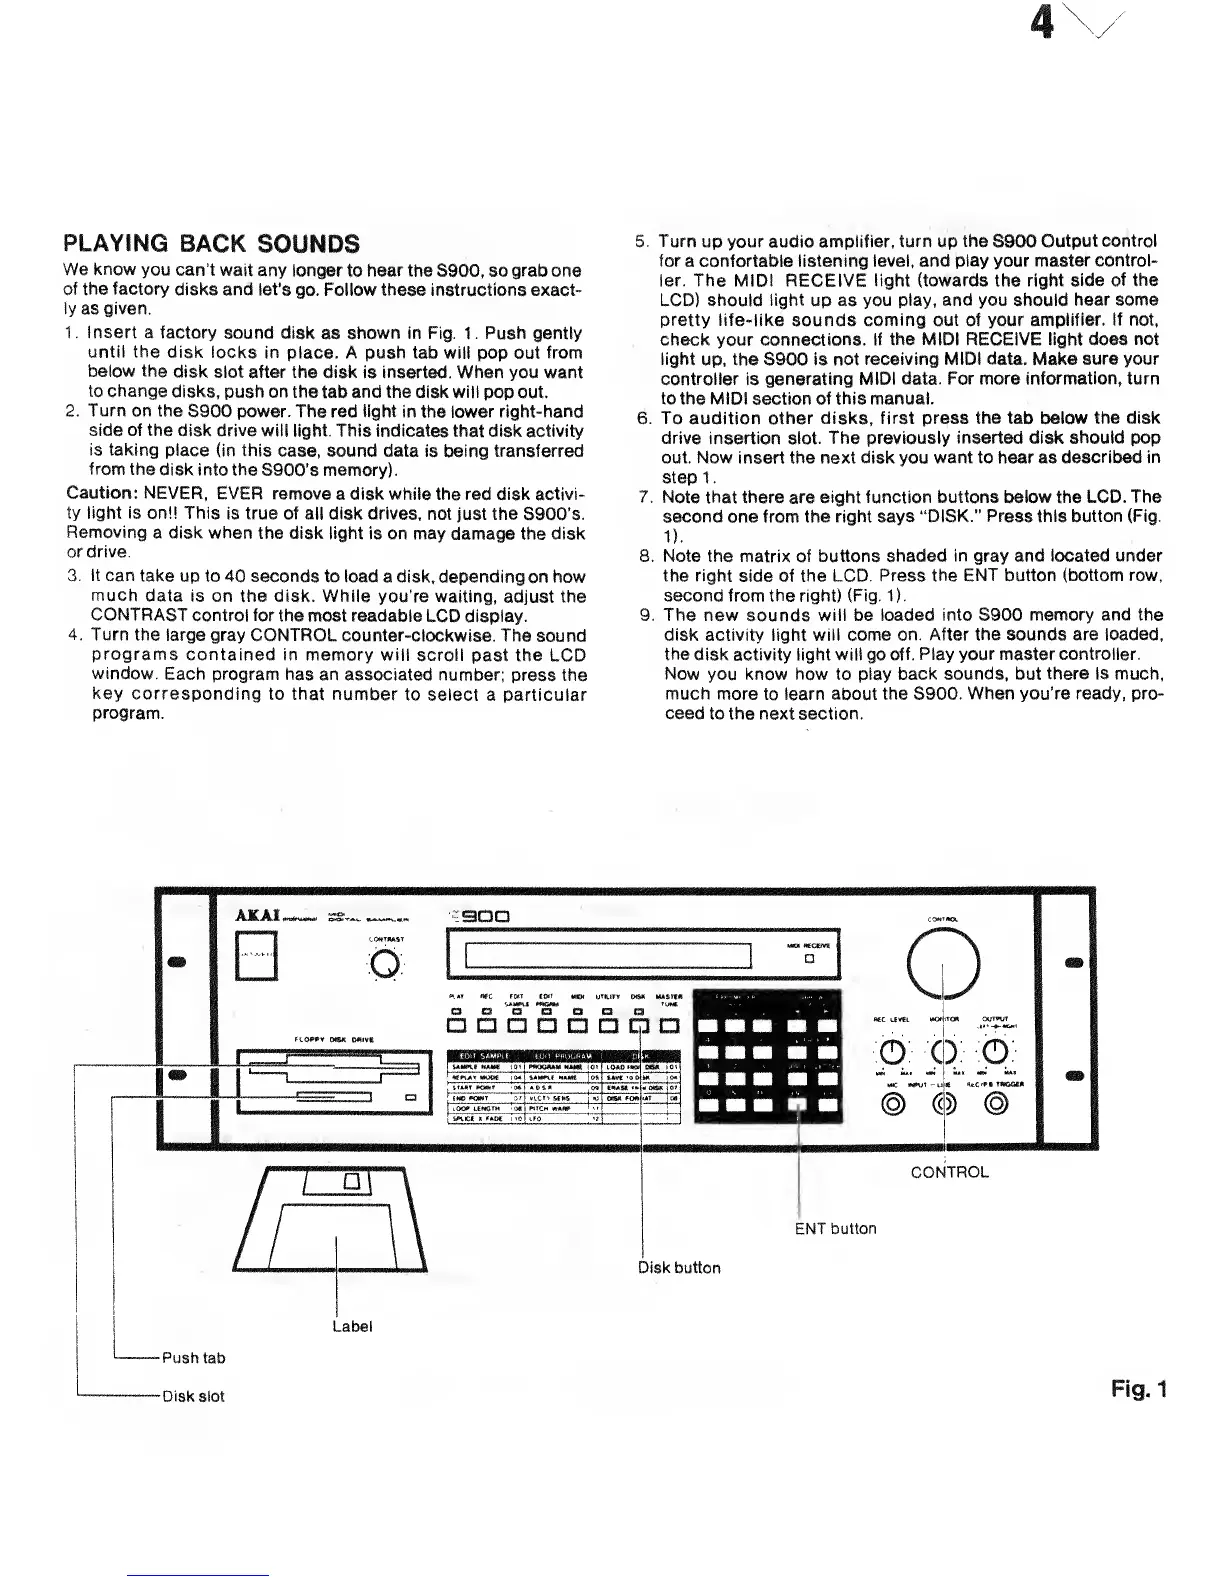
Insert a factory
sound
disk
as
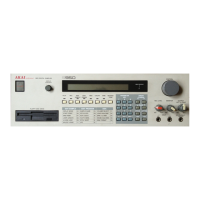
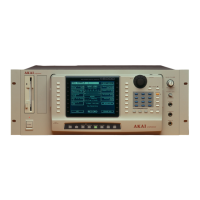
shown in Fig. 1. Push
gently
until the
disk
locks in place. A push tab
will pop out
from
below the
disk
slot after the disk
is
inserted. When
you want
to change
disks,
push
on the
tab
and the disk will
pop out.
2. Turn on
the
S900 power. The red light in the lower right-hand
side of the
disk
drive
will
light.
This
indicates that disk activity
is taking
place
{in this
case, sound data is being transferred
from
the
disk into the
S900's memory).
Caution:
NEVER,
EVER remove
a disk while the red disk activi-
ty
light is
on!! This
is true of all disk drives,
not just the
S900's.
Removing
a disk when
the disk light
is on may
damage
the disk
or drive.
3. It can
take
up to 40 seconds
to load a disk,
depending on
how
much
data is
on the disk. While
you're waiting,
adjust
the
CONTRAST
control for
the
most
readable
LCD display.
4.
Turn the
large gray CONTROL
counter-clockwise. The
sound
programs
contained in memory will
scroll
past the LCD
window.
Each program has
an associated number;
press the
key
corresponding
to that number
to select
a particular
program.
5. Turn
up your audio amplifier,
turn
up
the
S900
Output control
for
a confortable
listening level, and play your master
control-
ler. The MIDI
RECEIVE
light (towards the right side
of the
LCD)
should light
up as
you play, and you should
hear some
pretty life-like
sounds
coming out
of your
amplifier, if not,
check
your
connections. If the MIDI RECEIVE light does
not
light
up, the S900 is not
receiving MIDI data. Make sure your
controller
is
generating MIDI data.
For
more
information, turn
to the MIDI
section
of this manual.
6. To
audition
other disks, first press the tab below
the disk
drive
insertion slot.
The previously inserted disk
should
pop
out. Now insert the next disk
you
want to hear as
described in
step 1
.
7. Note that there
are
eight function buttons below the LCD. The
second one from the right says "DISK."
Press this button (Fig.
1).
8. Note the matrix of buttons shaded
in
gray and
located under
the right
side of
the LCD. Press
the ENT button (bottom row,
second from the right) (Fig.
1
)
.
9. The new
sounds
will be loaded
into
S900
memory and the
disk
activity light
will
come
on. After the sounds are loaded,
the
disk activity light will go
off. Play your master controller.
Now
you know how to play back
sounds,
but
there is much,
much
more to learn about
the
S900.
When you're ready, pro-
ceed to the next section.
AKAI^—
ss™
3DD
O
D
a
a
"S"
"8"
a a
.
-a
nn
p^
LlftSLi^Sl.
«™
o
O
..: i.
o: o:
CONTROL
ENT
button
Disk
button
Label
-Push
tab
-Disk slot
Fig.1
 Loading...