1 2 3 4
DC HD
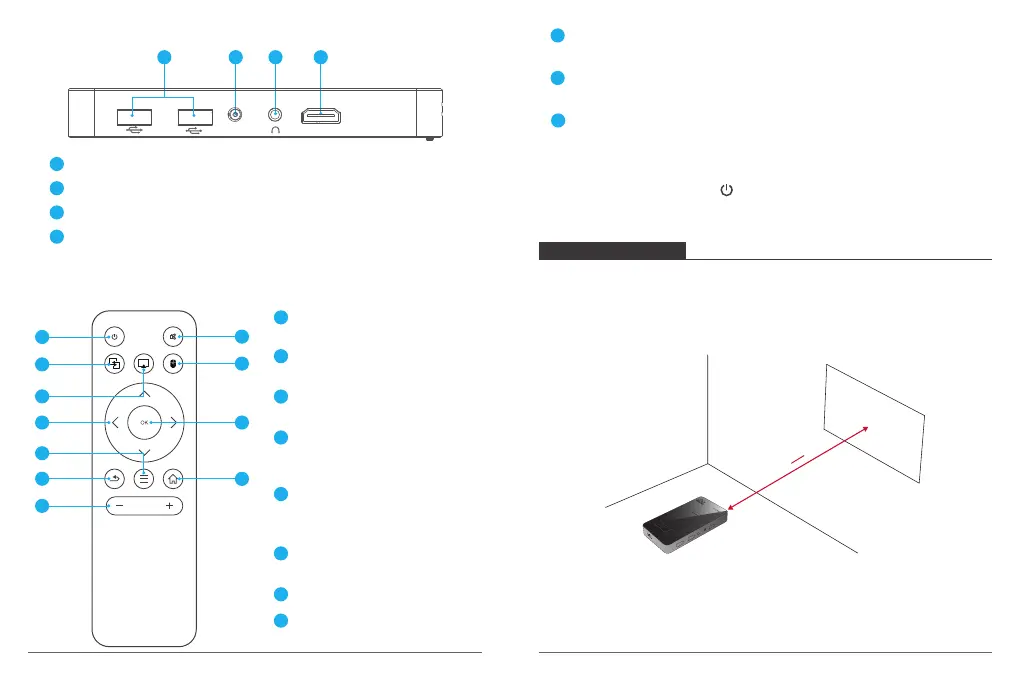
4. Right View
5. Remote control
USB: Support USB flash drive data read.
1
DC: Connect to power supply.
2
Earphone Aux-In Port: Connect to an external speakers/earphones .
3
HD: Connect to a playback device via HD output
4
1
2
3
4
5
6
7
8
9
10
11
ON/OFF
Press to select an option: shutdown.
Same Screen
Press to enter same screen mode.
Airplay
Press to enter Airplay.
Navigation Buttons
Navigate menus or adjust the
selected content.
Menu
Access more options during play
(available depend on the source).
1
2
3
4
5
Return
Return to the previous menu.
Volume + / -
Mute
Press to enter mute mode.
Mouse Key Mode
Press to enter/exit mouse key mode.
OK
Press to confirm a selection or entry. Pause/resume play.
6
7
8
9
10
Home
Open the home menu.
11
Note: When using the IR remote control, you should aim at the red light on the projector
bottom rather than screen. And the on the remote control can only shutdown the
projector(cannot turn on the projector) without charging.
Note:
• It is unnecessary to tilt it towards the projection surface. You can correct the projection
image with the built-in keystone correction.
• The distance between the device and the projection surface determines the projection
image size.
GETTING STARTED
1. Placement
Place this device on a surface table or somewhere else, flat place in front of the projection
surface. For best results, the projection surface should be white and flat. The best
projection distance between this device and the projection surface is 1-1.5 m. Recommend
for use in dimmer environments.
1m
1.5m
05
06