Technical Help line 01905 560219
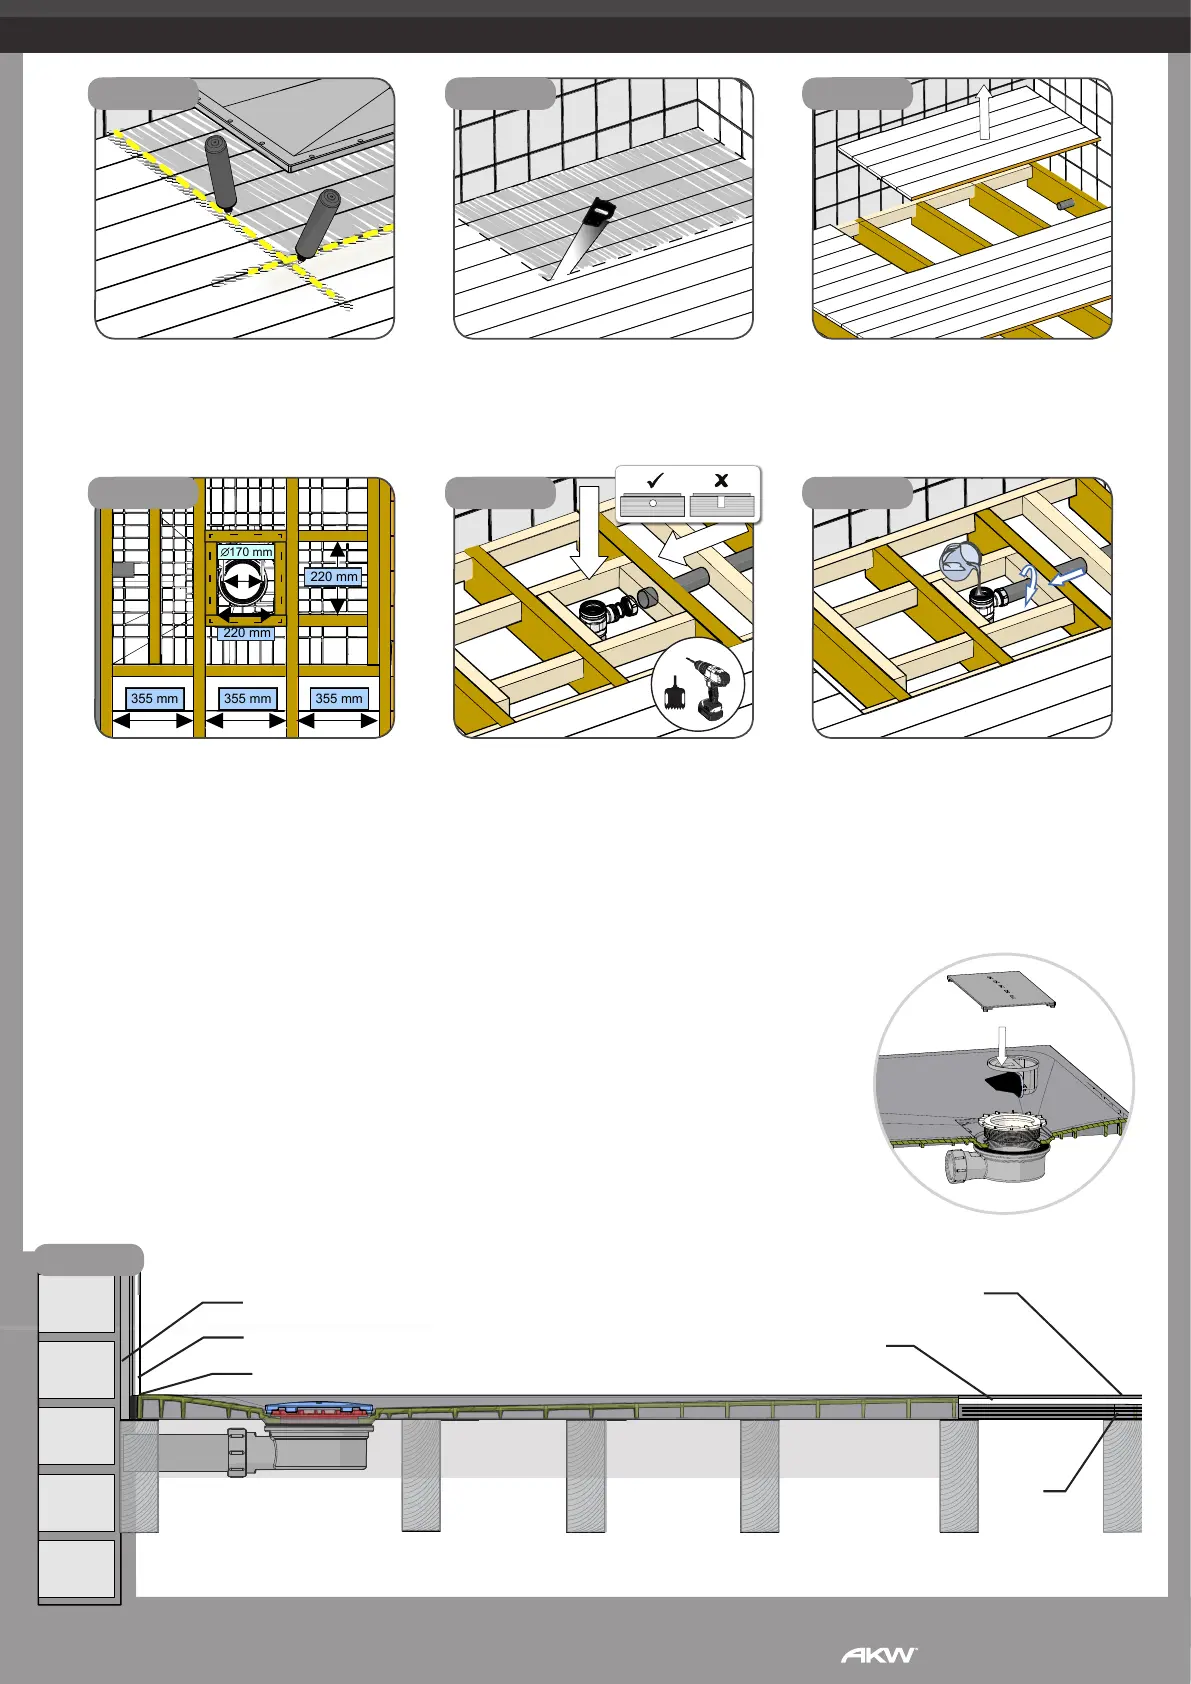
Installing into Wooden Floors
Step 1
Step 4
Step 2
Step 5
Step 3
Step 6
Position the tray over the
desired location for the shower
and mark around the edge of
the shower former.
Cut into the flooring, taking
care not to cut through
supporting joists or any
plumbing or electrical wiring.
The waste area must be supported
with additional noggins 220
mm
around the waste. Additional
noggins or joists must be used on
all edges and between joists
centres at a minimum of 350mm.
Do not cut into the joists,
always drill through when
installing the waste drain trap
and waste outlet pipe.
Carefully remove the floor
boards. Locate the waste
outlet pipe.
Water test the waste drain
trap for flow and for any
leaks and ensure that the
rubber seals are in place.
Floor
Boards
Joist
Wall
75x50mm
Noggins
On all external edges
Plaster
Waterproof wall covering
Tiles or Vinyl Floor Covering
Marine Ply
Flush
Silicone Sealant
7. The tray should be bedded onto flexible adhesive on the joists and checked it is level
and supported on all 4 sides.
The waste clamping ring should now be fitted to secure and seal the waste to the tray.
Install the waste trap to the tray, see separate waste instructions. The waste cover
should now be secured in place.
Re-check tray is level and test for water drainage efficiency of tray.
Vinyl floor covering or tiles should finish flush and upto the tray as shown below.
The flooring should be laid up to the edge of the tray and sealed with silicone sealant.
The walls should be covered with the waterproof wall covering and then sealed to the
tray with silicone sealant.
Step 7
1.
4.
2.
5.
3.
6.
 Loading...