EasyManua.ls Logo

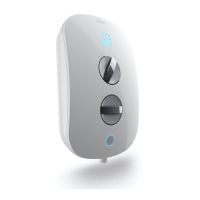
Akw Itherm User Manual

Akw Itherm
36 pages
To Next Page IconTo Next Page
Page #1 background imageLoading...
Page #1 background image
Installer - please read all instructions carefully before installation
and leave this manual with the end user for future reference
Smart App
8
Electrical Cable
Entry Points
3
Spray Patterns
8
Water Inlet
Entry Points
Warranty
3yr
150kg
Rail Rating
3
Spray Patterns
2m
Smooth Hose
8
Water Inlet
Entry Points
8
Electrical Cable
Entry Points
Optional
Easy Grip
Adjuster
2m
Smooth Hose
Optional
Easy Grip
Adjuster
Smart App
8
Electrical Cable
Entry Points
3
Spray Patterns
8
Water Inlet
Entry Points
Warranty
3yr
150kg
Rail Rating
3
Spray Patterns
2m
Smooth Hose
8
Water Inlet
Entry Points
8
Electrical Cable
Entry Points
Optional
Easy Grip
Adjuster
2m
Smooth Hose
Optional
Easy Grip
Adjuster
5
Intertek BEAB Control
Intertek EMC Verified
(Europe)
Intertek GS
Intertek S
Intertek Blue
Pantone 281
C100/M72/Y0/K32
Reversed
White
C0/M0/Y0/K0
Colour Variant
Pantone 354Pantone 354
Pantone 185
Intertek ETL
(Europe)
Pantone 185
Electric Shower
Installation and Instruction Manual
Patents Pending, Registered Design

Questions and Answers:

Akw Itherm Specifications

General IconGeneral
BrandAkw
ModelItherm
CategoryPlumbing Product
LanguageEnglish

Summary

Product Features Overview

Thermostatic Temperature Control

Ensures consistent outlet water temperature for user comfort and safety.

Automatic & Phased Shut Down

Shower automatically turns off after 30 mins; phased shut-down prevents scalding.

Flexible Installation Options

Offers multiple water inlet and cable entry points for easier fitting.

Warranty and Model Options

Includes a 3-year warranty and 8.5kW/9.5kW model availability.

User Safety Guidelines

Safe Operation Warnings

Avoid operating with frozen tanks, damaged hoses, or blocked spray heads to prevent damage or injury.

User Operating Instructions

Understanding the Controls

Explains the digital display for temperature/flow, control knobs, and power button.

Starting and Stopping the Shower

Guide on powering the shower on, off, and the phased shut-down process.

Setting Cold Water Flush Mode

Step-by-step guide on how to set the shower to cold water flush mode for priming.

User Volume Setting

Audible Tone Configuration

Details enabling/disabling audible tones and the circumstances under which they occur.

Cleaning and Maintenance

Recommended Cleaning Methods

Clean periodically with a soft cloth and mild domestic cleaners, then rinse.

Cleaning Material Restrictions

Avoid abrasive pads, cloths, or harsh chemicals that could damage or discolor the product.

User Troubleshooting Guide

Common Faults and Solutions

Lists issues like no water flow or temperature problems with their respective remedies.

Shower Reset Procedure

Instructions to switch off, wait 30 minutes, and switch back on if the shower malfunctions.

User Warranty Information

Warranty Coverage Details

Covers manufacturing defects for 3 years from purchase; repair or replacement at AKW's discretion.

Warranty Exclusions List

Excludes damage from misuse, incorrect installation, accidents, freezing, or unauthorized repairs.

Main Components Identification

Shower Unit Internal Parts

Diagram identifies key internal components like the water heater can, PCBs, and terminal blocks.

Product Specifications

Plumbing & Water Specifications

Covers water pressure, temperature limits, and connection types.

Electrical & Supply Specifications

Details voltage, fuse/RCD requirements, and supply cable guidelines.

Physical Dimensions & Entry Points

Provides unit dimensions and lists water/cable entry point options.

Critical Installation Safety

Qualified Personnel Requirement

Mandates installation and servicing by competent, qualified persons per BS7671 and Building Regulations.

Essential Safety Precautions

Always isolate power/water before maintenance; never block flow or crush hose.

Installation Requirements Guide

Water Supply & Connection

Must connect to mains cold water only; avoid freezing conditions.

Mounting Surface Criteria

Requires mounting on a flat, waterproof tiled surface or wall board.

Pre-Installation Site Checks

Check contents, wall integrity, and cleanliness before commencing installation.

Hard Water Area Consideration

Suggests fitting a scale inhibitor if operating in hard water areas.

Shower Unit Positioning

Clearance and Mounting Surface

Maintain 120mm clearance; ensure flat surface contact, do not seal unit to wall.

PRD Vent Obstruction Warning

Do not obstruct the back and sides to ensure Pressure Relief Device (PRD) function.

Showerhead Placement

Position showerhead to direct spray away from the unit.

Unit Disassembly Procedures

Removing the Front Cover

Unscrew 4 screws, unplug ribbon cable, and carefully lift off the front cover.

Accessing the Bottom Cover

Unscrew 3 screws, pull outlet pipe, and slide out the bottom cover plate.

Wall Fitting Instructions

Using the Fitting Template

Use template to mark fixing points, check for hidden services before drilling.

Securing the Unit to Wall

Insert wall plugs, screw top two fixings; bottom screw fitted during final installation.

Bottom Cover Reassembly

Outlet Connector Reinstallation

Pull outlet connector up, slide back bottom cover, push connector down, and fasten.

Bottom Cover Fastening

Secure the outlet connector and bottom cover by tightening the screws.

Front Cover Reassembly

Ribbon Cable Connection Check

Ensure all connectors are properly inserted before refitting the front cover.

Attaching the Front Cover

Carefully refit front cover, avoiding trapping cables, and use supplied screws only.

Water Supply Requirements

Cold Water Feed Specification

Connect to mains cold water supply; minimum 0.5 bar, optimal 1 bar dynamic pressure.

Installation Location Restrictions

Avoid freezing conditions and never connect to the hot water supply.

Isolation Valve Recommendation

Fit an isolation valve on the cold feed close to the inlet for service access.

Plumbing Connection Guidelines

Regulatory Compliance

Ensure plumbing complies with Water Fitting Regs, Building Regs, and BS 6700.

Pipework Preparation

Flush pipes thoroughly to remove debris before connecting to prevent filter blockage.

Prohibited Plumbing Practices

Do not solder near appliance, fit outlet flow control, or use excessive force on connections.

Plumbing Inlet Options

Side and Rear Inlet Configuration

Details side and offset rear inlet options, use blanking plugs for unused entries.

Bottom and Top Inlet Configuration

Shows bottom and top inlet options, use blanking plugs for unused entries.

Plumbing Installation Checklist

Wall Mounting & Sealing Checks

Verify wall soundness, surface cleanliness, and avoid sealing PRD vents.

Water Pressure & Leak Test

Check for leaks after turning on water; verify pressure meets minimum 0.5 bar.

Post-Test Drying

Dry the appliance and surrounding area thoroughly before reconnecting electricity.

Electrical Connection Requirements

Dedicated Circuit & Consumer Unit

Connect to an independent circuit; ensure consumer unit has adequate rating and spare way.

Cable Sizing & Separation

Use appropriate cable size based on regulations and maintain separation from other circuits.

Mandatory RCD Protection

A 30mA residual current device (RCD) must be installed for safety.

Electrical Safety and Isolation

Circuit Protection Devices

Use correct MCB/fuse, 30mA RCD, and a 45A double-pole isolating switch.

Isolating Switch Placement & Safety

Place switch accessibly, out of reach of users in shower cubicle.

Electrical Entry Point Options

Side & Rear Cable Entry

Guides for left/right side and rear cable entry, may need plastic modification.

Bottom & Top Cable Entry

Illustrates left/right bottom and top cable entry points.

Electrical Installation & Waste Pump

Waste Pump Connection Guide

Diagram shows how to connect the pump using wired connectivity.

Electrical Installation Checklist

Verify secure fixings, earth, circuit integrity, RCD, cable capacity, no other devices.

Sealing and Fitting Restrictions

Do not seal unit to wall with silicone; do not connect other fittings.

Commissioning: Cold Water Flush

Priming the Shower Unit

Procedure to prime with cold water using cold flush setting and dip switch.

Dipswitch Location Reminder

Notes the dipswitch is located on the inside of the shower cover.

Temperature and Mode Configuration

Factory Default Settings

Details the default temperature, sound, and pump settings upon delivery.

Adjusting Max Temperature

Set maximum water temperature (41/43/47°C) using DIP switches on the PCB.

Understanding Mode Settings

Explains STD, COLD FLUSH, and SOUND modes for shower operation.

Functional Checks and Testing

Power Button Functionality

Check power button operation and reversion to standby mode.

Control Knob Responsiveness

Verify temperature and flow controls adjust correctly and all indicator lights are working.

Importance of Commissioning Tests

Record test results to establish a performance baseline for future reference.

Commissioning Test Record

Performance Data Entry

Record essential data like SN, date, max temp, pressure, voltage, and water temp.

Test Equipment Documentation

Document details of test equipment used during commissioning.

Troubleshooting Fault Codes

Interpreting Fault Displays

Explains fault codes: LP (Low Flow/Pressure), E1, E2, E3.

Troubleshooting Fault Resolution

Resolving LP Faults

Steps for LP faults: COLD FLUSH, check plumbing, clean filters.

Addressing Thermistor & Temp Faults

Guidance for E1, E2, E3 faults: COLD FLUSH, reset, or repair.

Contact and Support Information

AKW Contact Details

Provides orderline, general, and technical enquiry phone numbers and emails.

Company Website & Social Media

Links to the official AKW website and social media channels.

Related product manuals