10
PASOS PROGRAMACIÓN - PROGRAMMING STEPS - ETAPES DE PROGRAMMATION
1 Desplace el interruptor PROG a la posición OFF (1.1); el tono desaparacerá. Vuelva a poner el interruptor en la posición ON (1.2).
2 Pulse el botón de abrepuertas. Se activará el audio y el video entre el monitor y la placa de calle principal. El monitor estará
preparado para recibir un código.
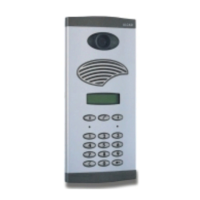
3 Situado en la placa de calle principal, presione el pulsador de la placa de calle correspondiente a la vivienda. La placa emitirá
un sonido de confirmación. El soporte está programado.
4 Compruebe el funcionamiento del monitor (verificación de llamada, audio y abrepuertas). Si el monitor no funciona correctamente
vuelva al paso 1.
Nota : Tiempo máximo de 1 minuto entre los pasos 1 y 2 y entre 2 y 3. El sistema avisa mediante pitidos del fin del tiempo máximo
entre 2 y 3; repita el paso 2 para tener otro minuto. Pasado el tiempo máximo deberá iniciar la programación desde el paso 1.
1 Turn the PROG switch to the OFF position (1.1), the tone stops. Turn the switch back to the ON position (1.2).
2 Press the lock release button. The audio and the video will be activated between the monitor and the main panel. The monitor is
ready to receive the code.
3 From the main entrance panel, make the call to the house or flat when monitor to be programmed is installed. The panel emits a
confirmation tone. The connection bracket has been programed.
4 Check the operation of the monitor (call, audio and door opening). If the monitor does not function correctly then repeat the process
from Step 1.
Note: Maximum time limit of 1 minute between Steps 1 and 2 and between 2 and 3. The system warns by means of a series of beeps
of the end of the time limit between Steps 2 and 3; repeat Step 2 to have another minute. If the time limit is exceeded the process must
be repeated from Step 1.
1 Mettez linterrupteur PROG sur OFF (1.1); la sonnerie disparaîtra. Repositionnez linterrupteur sur ON (1.2)
2 Appuyer sur le bouton douverture de porte. L'audio et le vidéo seront activées entre la plaque principale et le moniteur. Le support
de connexions est préparé pour recevoir le code.
3 Situé sur la plaque de rue principale, réalise l'appel à l'appartement, là où le moniteur à programmer est installé. La plaque émettra
un signal sonore de validation. Le support de connexions est programé.
4 Vérifier le fonctionnement du moniteur (appel, audio et ouvertures des portes). Si le moniteur ne fonctionne pas correctement
retournez au point 1.
Note: Temps maximal 1 minute entre les points 1 et 2 et entre 2 et 3. Le système prévient par une série de signaux sonores la fin du
temps maximal entre les points 2 et 3; répétez le point 2 pour obtenir une minute en plus. Si vous excèdez le temps maximal il faudra
de nouveau programmer à partir du point 1.
INSTALACIÓN EN VIVIENDA UNIFAMILIAR CON 2 ACCESOS
INSTALLATION IN DETACHED HOUSES WITH 2 POINTS OF ENTRY
INSTALLATION INDIVIDUEL AVEC 2 ACCÉS
VIDEOPORTERO DIGITAL - DIGITAL VIDEODOOR ENTRY SYSTEMS - VIDÉOPORTIER NUMÉRIQUE
INSTRUCCIONES DE PROGRAMACIÓN
PROGRAMMING INSTRUCTIONS
INSTRUCTIONS DE PROGRAMMATION
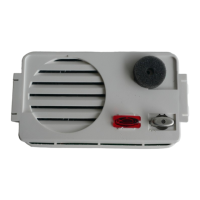
La programación del soporte de conexiones debe realizarse desde la placa de calle del sistema que este configurada como principal
(puente J1 del grupo fónico colocado, vea esquema página 8).
Para programar el soporte de conexiones deberá estar preparado para recibir el código. Para ello conecte un monitor al soporte de
conexiones a través del latiguillo y monte el auricular al monitor (consulte pasos 1 y 4 de la página 18) y siga los pasos que se indican
a continuación:
To program the connections bracket, it must first be made ready to receive the code. To do this, connect a monitor to the connections
bracket using the connecting strip, mount a receiver on the monitor (see steps 1 and 4 on page 18), and follow these steps:
Pour programmer le support de connexions, il faudra être préparé pour recevoir le code. Pour cela connecter le moniteur au support
de connexions à travers les pontets et installer le combiné sur le moniteur (voir points 1 et 4, page 18), suivez les indications suivantes:
The programming of the connections bracket must be carried out from the entrance panel which is configured as the main panel of
the system (with J1 jumper in place: see wiring diagram on page 8).
La programmation du support de connexions doit se réaliser de la plaque de rue du système que celui-ci configure comme principal
(pont J1 positionné, voir schéma du câblage, page 8).

 Loading...