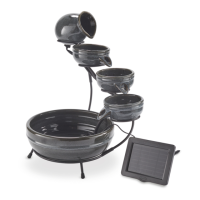
Optimal use of the solar panel
11
7. Fill the small bowls and large bowl with clean water. The water in the large bowl
must cover the pump.
8. Insert the ground stake
17
onto the pole
16
and the pole onto the bottom of the
solar panel
15
(see step 1 in Fig. E).
9. Insert the solar panel into the ground as far as the ground stake allows.
If necessary, use a shovel to loosen hard ground before inserting the solar panel.
Do not use any force (e.g. hammer blows) to insert the solar panel as this will
cause damage.
See chapter “Optimal use of the solar panel” for more details.
10. Insert the power plug
14
into the power connector
13
(see step 2 in Fig. E).
Slightly twist the power plug and power connector during insertion to ensure a
water-tight connection (see Fig. F).
The pump starts working as soon as it receives sufficient solar power.
Water must be regularly topped up in the bowls during use.
Optimal use of the solar panel
− Position the product in such a way that the solar panel
15
can absorb maximum
sunlight. A shady position will affect its operating capacity (see Fig. G).
− The product is designed primarily to operate in summer months but will also
work in spring and autumn provided that there is good sunshine. Performance
is directly related to the amount and strength of sunlight received (see Fig. H).
Troubleshooting
Some problems may be caused by minor faults that you can fix yourself. To do so,
follow the instructions in the following table. If it is still not possible to resolve the
problem, contact customer service. Do not repair the product yourself.
Problem Possible reason and solution
The product
does not
operate, or the
performance
drops.
− Make sure the solar panel
15
is correctly positioned.
− Make sure there is sufficient water in the bowls
6
/
7
.
− Make sure the filter
19
of the pump
12
is clean (see chapter
“Cleaning the pump”).
− Make sure there is no debris in the bowls blocking the pump.
 Loading...