Disconnecting the cutting units
- To disconnect the cutting units, lift the rotary cutter until it is vertical (at 90°) to
the guillotine (Fig. 1, page 10) and remove the unit from theconnecting
components.
Note: The cutting units may only be disconnected or connected
at an angle of 90°.
Storing the office cutter
To store the office cutter, you may fold it down to save space. To do this, fold the
connected rotary trimming unit down onto the guillotine unit. The rotary
trimming unit snaps cleanly into place on the catches of the guillotine and is now
safely locked for transport (Fig. 1, page 10).
Operation
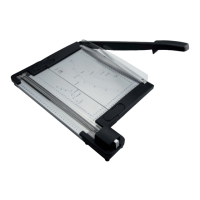
How to cut with the guillotine cutter
1. The guillotine cutter
7
is located on the right-hand side of the machine. The
safety lock is located under the handle of the guillotine cutter. Unlock the
blade by pushing the locking slide bar
9
carefully away from the handle to
the right. Use the handle to raise the blade.
2. Place the material (paper or similar) into the correct position under the blade
guard. The measuring gauge on the lateral stop shows you the correct cutting
width. Fix the material that is to be cut in place using the paper clamp
8
.
Tip: Before you cut your final material, perform a few test cuts using
other pieces of the same material.
Attention: While using the guillotine, never cut more than a max.
of 10 sheets (80 gsm paper) together.
NOTICE!
Attention! Important!
Press the paper clamp
8
firmly downwards, thus fixing the paper in
the desired position. To cut the paper, now push the guillotine down
from top to bottom in one movement.
Operation
8