5
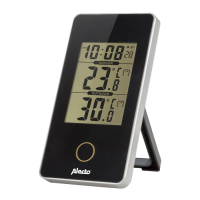
1. Open the battery compartment at
the back of the indoor unit.
2.
all the way to the left.
3. Insert the second battery and
slide it again to the left.
4. Insert the third battery.
5. Finally, replace the battery cover.
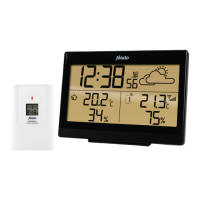
Hang or stand:
The indoor unit can either be placed freestanding on a cabinet or desk (fold
out the stand on the back of the indoor unit for this purpose) or the unit can
be hung on the wall (see keyhole openings on the back).
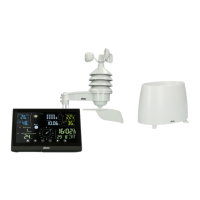
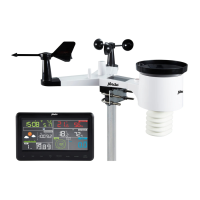
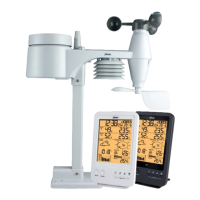
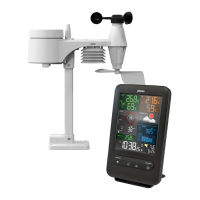
4.2 Outdoor units:
General installation and placement tips:
• First, check that the outdoor units are within reach of the indoor unit
before permanently mounting the outdoor units. Keep the distance
between the outdoor units and the indoor unit to within 30 meters.
• Ensure that the outdoor units are placed at least 1,5 meters above the
ground and freely exposed to the rain and wind.
• In order for the outdoor units to work as accurately as possible, they
must stand as horizontal as possible. For the outdoor rain unit, check
that the surface is level before mounting.
• To indicate which direction the wind is coming from, the outdoor wind
unit must be oriented to the South. See the S designation at the
bottom of the outdoor unit for this. Use the compass on the outdoor
wind unit to correctly orientate the unit.
• Make sure the outdoor units hang and/or stand freely. The wind speed
meter and the wind vane, in particular, should hang in direct wind.
AAA 1,5V AAA 1,5V AAA 1,5V
• Find a location where the likelihood of blowing leaves is minimal.
measurement results. In any event, we advise you to place the outdoor
units in such a way that it is fairly easy to remove any leaves and to
replace the batteries.
• Perhaps the outdoor units can be located within reach for a week to try
out all functions. Check that everything is functioning properly before
placing the outdoor units in their permanent location.
4.3 Outdoor unit wind:
Registration:
First register the outdoor units with the indoor unit before permanent
placement of the outdoor units Once the indoor unit batteries are installed, it
After the 5 minutes, the indoor unit can be manually set to receive. To do
this, press the channel button for 2 seconds to set the indoor unit to
receive mode.
Insert 4 x 1,5V AA batteries in the outdoor wind unit. See diagram. Set the
Channel switch to the same channel selected on the indoor unit. Then press
the TX key. Check that the indoor unit has received the signal. Press the
TX button once more, if necessary. The outdoor temperature and humidity
are displayed on the indoor unit via the outdoor wind unit.
The outdoor wind unit is registered
when the information appears on
the display.
reception, press the “WAVE” key.
To turn the DCF-77 reception on
again, register the outdoor unit
and reinserting the batteries
and repeating the registration
procedure.
S
AA 1,5V
AA 1,5V
AA 1,5V
AA 1,5V
TX
WAVE
1 2 3
TX
WAVE