EasyManua.ls Logo

Alesis STRIKE PRO KIT User Manual

Alesis STRIKE PRO KIT
2 pages
To Next Page IconTo Next Page
Page #1 background imageLoading...
Page #1 background image
alesis.com
Manual Version 1.0
A
ssembly Guide Guía de armado Guide d’assemblage
Guida di montaggio Montageanleitung
A
B
D/E
D E
D D
B
B
B
F
B/C
F
F
F
G
F
B
G G
G
H
H
H
G
I/J/K/L
I
J
K
O/P
H
O
P
1 2
3 4
5 6
C
F
F
G
H
H
L
O
O
“inside” or “outside”
“hacia adentro” o “hacia afuera”
« intérieur » ou « extérieur »
“verso l’interno” o “verso l’esterno”
„innen“ oder „außen“
Note: You can insert the L-rod (G) into the clamp (F) in either direction (“inside” or “outside”).
Nota: Puede insertar la varilla en el L (G) en la abrazadera (F) en cualquier dirección (“hacia
adentro” o “hacia afuera”).
Remarque : Vous pouvez insérer la tige en L (G) dans la bague (F) dans l’une ou l’autre direction
(« intérieur » ou « extérieur »).
Nota bene: l’asta a L (G) può essere inserita nel morsetto (F) in qualsiasi direzione (rivolta “verso
l’interno” o “verso l’esterno”).
Hinweis: Sie können die L-Stange (G) von beiden Richtungen in die Klemme (F
)
einbringen
(„innen“ oder „außen“).
Question and Answer IconNeed help?

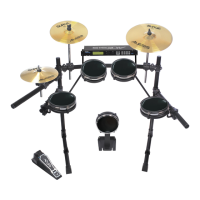
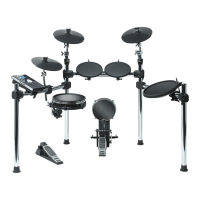
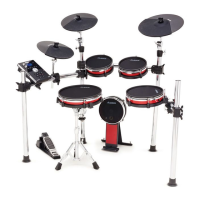
Do you have a question about the Alesis STRIKE PRO KIT and is the answer not in the manual?

Alesis STRIKE PRO KIT Specifications

General IconGeneral
TypeDrum system
Hi-hat cymbalYes
Number of pieces11 pc(s)
Ride cymbal size16 \
Display typeLCD
Drum kits quantity110
Sound module included-
Compatible memory cardsSD
Instrument sounds quantity1600
Power source typeAC

Summary

Initial Frame and Cymbal Stand Assembly

Attaching Main Frame Components

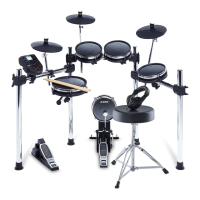
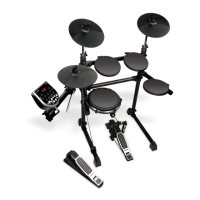
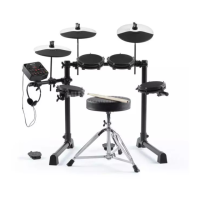
Connect main frame pieces B, D, and E to the base.

Securing Cymbal Stands

Mount cymbal stands F and related parts.

Installing L-Rod Clamp

Insert L-rod into clamp in either direction.

Attaching Drum Mounts and Hardware

Connect drum mounts H and other hardware.

Attaching Drum L-Rods

Connect drum L-rods I, J, K, L to main assembly.

Final Drum and Pedal Setup

Position drum pads and O/P components.

Advanced Assembly and Accessories

Hi-Hat and Stand Components

Assemble hi-hat stand components S, T, and M.

Rack and Pad Connections

Connect rack parts W, U, X, and N.

Kick Pedal and Pad Setup

Notes on kick pedal attachment and stability.

Module and Cable Connections

Connect module Y, AA, and C; identify unused parts.
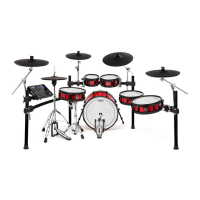
Related product manuals