Do you have a question about the ALIBI ALI-QVR4108H and is the answer not in the manual?
Contains legal disclaimers, trademarks, and copyright information.
Describes the on-screen keyboard interface for data input.
Explains how to use a USB mouse for navigation and control.
Guides the user through the initial setup process using a wizard.
Details how to access the main menu system from the live view.
Covers managing cameras, including adding IP cameras and configuring analog cameras.
Explains basic image and OSD settings for analog cameras.
Describes how to apply labels to video images for identification.
Details how to adjust image quality settings like brightness and contrast.
Configures motion detection parameters and zones within the video.
Describes how to block areas of the video image for privacy.
Sets up alarms for video tampering detection.
Configures alarms for video loss detection.
Allows analysis and configuration of video quality thresholds.
Detects faces and triggers actions when they appear in the field of view.
Detects objects crossing a virtual line in the image.
Detects objects entering a predefined virtual area in the image.
Detects objects entering a predefined virtual region in the field of view.
Detects objects exiting a predefined virtual region in the field of view.
Detects unattended objects left in a predefined area.
Detects when an object is removed from a predefined area.
Detects abnormal sound intensity changes in the surveillance area.
Senses image blur caused by lens defocus.
Detects changes in the surveillance environment due to external factors.
Triggers an alarm when heat energy from a person or animal is detected.
Allows quick analysis of data generated from VCA analysis.
Analyzes suspicious behavior based on VCA analysis.
Displays occurrences of the VCA Face Detection feature.
Determines the number of objects entering or leaving a designated area.
Presents a graphical representation of heat data using colors.
Covers the procedures for powering on, shutting down, and rebooting the QVR.
Details the steps for starting up the QVR system.
Explains how to properly shut down the QVR.
Guides the user on how to reboot the QVR.
Explains how to set the monitor resolution for VGA and HDMI outputs.
Describes the pop-up menu accessed by right-clicking the mouse.
Details support for multiple monitors and their configurations.
Configures the menu output mode for monitors.
Explains mouse operations within the Live View interface.
Describes icons indicating record and alarm status.
Provides quick access to common settings and functions.
Allows customization of Live View display settings.
Reduces bandwidth for viewing multiple channels remotely.
Covers settings for continuous and event recording parameters.
Configures main and sub-stream recording parameters for cameras.
Allows configuring different recording schedules for holidays.
Sets up automatic start and stop times for recording.
Enables or disables H.264+/H.265+ for analog cameras.
Configures motion detection sensitivity and zones in specific areas.
Allows manual initiation and cancellation of recording.
Assigns HDDs to groups for camera recordings.
Protects recorded files from being overwritten.
Covers various methods for playing back recorded video.
Plays back recorded video of a specific channel from live view.
Allows playback of recorded video files by channel and date.
Plays back video files recorded within a specified time duration.
Searches and plays back record files based on event types.
Uses tags to identify, find, and replay video clips.
Plays back files associated with channels after searching system logs.
Bypasses unimportant information by analyzing motion or VCA data.
Divides video files into segments for playback based on split-screen configuration.
Plays back video files from external devices like backup disks or flash drives.
Allows playing video files frame by frame for detailed inspection.
Enables digital zoom functionality during playback.
Covers exporting recorded files to external devices.
Exports specific video clips found via video search.
Searches and exports video recordings triggered by events.
Backs up video segments by exporting them during playback.
Configures RS-485 communication parameters for PTZ cameras.
Provides access to PTZ features and controls for cameras.
Details the items available in the PTZ Live View menu.
Configures preset positions, patrols, and movement patterns for PTZ cameras.
Sets specific camera positions to be saved as presets.
Moves the camera to a pre-configured preset position.
Defines sequences of preset movements for PTZ cameras.
Executes pre-configured patrol sequences for PTZ cameras.
Records and replays PTZ camera movement patterns.
Executes recorded movement patterns for PTZ cameras.
Enables horizontal scanning within a predefined range.
Executes a pre-configured linear scan.
Moves the camera to a home position after a period of inactivity.
Describes the process for removing user accounts.
Explains how to modify existing user account settings.
Configures basic network settings like IP address and DHCP.
Sets up Dynamic DNS for remote access to the QVR.
Configures the Network Time Protocol server for accurate time sync.
Enables multicast functionality for connecting multiple cameras.
Configures the Real Time Streaming Protocol for media servers.
Changes default server and HTTP port numbers.
Sets up email notifications for alarm events and system changes.
Enables Universal Plug and Play for network device discovery.
Details the process of initializing HDDs before they can be used.
Covers adding NAS or IP SAN devices for storage.
Enables saving camera data to cloud servers like OneDrive or Dropbox.
Describes adding NAS or IP SAN storage via the HDD Add function.
Allocates HDD space using Partition or Group modes.
Assigns properties like redundancy or read-only to HDDs.
Includes monitoring HDD status and detecting bad sectors.
Configures daily reporting of HDD status.
Displays status reports for the QVR, cameras, network, and HDDs.
Details how system logs are generated, saved, and searched.
Describes how to search for specific log entries.
Explains how to export log files to a backup device.
Allows exporting and importing QVR configuration files.
Provides instructions for upgrading the QVR firmware.
Options to revert QVR configuration to original settings.
Tools for checking network traffic, delay, and packet loss.
Displays real-time network traffic information.
Tests network delay and packet loss.
Exports captured network data packets to a USB device.
Checks the network status and parameters.
Views real-time network status and bandwidth usage.
Guides on accessing the QVR remotely via a web browser.
Describes the remote live view interface and its controls.
Allows reviewing recorded video remotely.
Provides access to QVR configuration settings remotely.
Sets Live View parameters and storage locations locally.
Displays and allows export of QVR log reports.
Shows device model, serial number, and firmware versions.
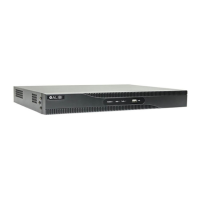
| Video Output | 1 x HDMI, 1 x VGA |
|---|---|
| Compression Format | H.264 |
| Power Supply | DC 12V |
| Operating System | Embedded Linux |
| Video Inputs | 8 channels |
| Recording Resolution | 1080p |
| Storage Capacity | Up to 6TB HDD |
| Network Interface | 1x RJ45 10/100/1000 Mbps |
| Hard Drive Support | 1 x SATA HDD |
| Audio Input | 1 channel |
| Audio Output | 1 channel |
| Operating Temperature | -10°C to 55°C (14°F to 131°F) |