EasyManua.ls Logo

Allen-Bradley 1756-PA75R User Manual

Allen-Bradley 1756-PA75R
16 pages
To Next Page IconTo Next Page
Page #1 background imageLoading...
Page #1 background image
Installation Instructions
Original Instructions
ControlLogix Redundant Power Supply
Catalog Numbers
1756-PA75R, 1756-PB75R, 1756-PSCA2, 1756-PBXTR, 1756-PSCA2XT, 1756-PAXTR, 1756-PA75RK, 1756-PB75RK, 1756-PSCA2K
The redundant power supply system provides additional uptime protection for chassis that are used in critical applications. The two remotely
mounted supplies are designed to share the current required by the chassis. Two supplies are available in AC (catalog number 1756-PA75R/A or
1756-PAXTR) and DC (catalog number 1756-PB75R/A or 1756-PBXTR) versions that can be mixed or matched when used in tandem.
If one power supply fails, the remaining supply accommodates the entire load of the chassis without disruption to chassis activity.
The ControlLogix® redundant power supply system is designed to account for operational anomalies in only the power supply
(the chassis adapter and power supply cables are excluded).
The 1756-PSCA2 chassis adapter is a passive device. The chassis adapter funnels power from one or two ControlLogix redundant power supplies to
the single power connector on the ControlLogix chassis backplane.
Redundant Power Supply and Chassis Compatibility
Your chassis series determines the redundant power supply that you can use. This table lists the chassis that can be installed with each redundant
power supply.
Topic Page
Summary of Changes 5
Components of the Redundant System 5
Tools Required 6
Parts Required 6
Install the Chassis Adapter 6
Install the Redundant Power Supplies 6
Connect the Power 7
Remove the Protective Label 9
Troubleshoot the Redundant Power Supplies 10
Remove or Replace a Redundant Power Supply 11
Remove or Replace a Chassis Adapter 11
Specifications 12
Additional Resources 13
Power Supply Cat. No. Chassis Cat. No.
1756-PA75R 1756-A4/B, 1756-A7/B, 1756-A10/B, 1756-A13/B, 1756-A17/B
1756-A4/C, 1756-A7/C, 1756-A10/C, 1756-A13/C, 1756-A17/C
1756-PB75R
1756-PAXTR
(1)
(1) The 1756-PAXTR and 1756-PBXTR redundant power supplies are only rated from 0…60 °C (32…140 °F) when used in non-XT chassis.
1756-A4/B, 1756-A7/B, 1756-A10/B, 1756-A13/B, 1756-A17/B, 1756-A4LXT/B, 1756-A5XT/B, 1756-A7LXT/B, 1756-A7XT/B
1756-A4/C, 1756-A7/C, 1756-A10/C, 1756-A13/C, 1756-A17/C, 1756-A7XT/C
1756-PBXTR
(1)
Question and Answer IconNeed help?

Do you have a question about the Allen-Bradley 1756-PA75R and is the answer not in the manual?
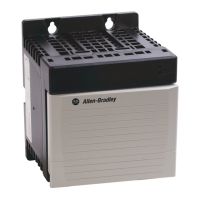
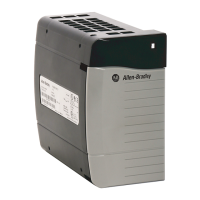
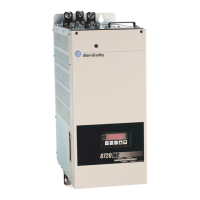
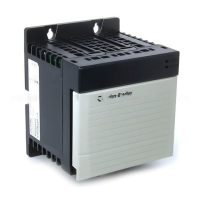
Allen-Bradley 1756-PA75R Specifications

General IconGeneral
Model1756-PA75R
TypePower Supply
Input Frequency47-63 Hz
Output Voltage5.1V DC and 24V DC
Power Rating75W
Isolation Voltage1500V AC
Module LocationChassis
Operating Temperature0 to 60 °C
Input Voltage85-265V AC

Summary

Redundant Power Supply and Chassis Compatibility

Before You Begin

General Safety and Installation Precautions

Covers critical safety warnings, installation, and maintenance guidelines for proper use.

Environment and Enclosure

North American Hazardous Location Approval

European Hazardous Location Approval

IEC Hazardous Location Approval

Prevent Electrostatic Discharge

Removable Terminal Blocks (RTBs) for I/O Connections

Summary of Changes

Components of the Redundant System

Installation Procedures

Tools and Parts Required

Lists the essential tools and hardware components needed for installation.

Install Chassis Adapter

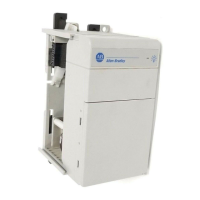
Step-by-step instructions for mounting the chassis adapter to the equipment.

Install Redundant Power Supplies

Detailed steps for physically mounting the redundant power supply units.

Connect the Power

Power Connection Steps and Specifications

Details wiring steps, cable requirements, torque, and fuse specifications for power connection.

Connect the Solid-state Relay

Solid-state Relay Function and Connection

Describes the relay's operation, failure indication, and wiring for monitoring.

Solid-state Relay Connection Configurations

Configuration 1: Different Voltages

Wiring for annunciator cable when voltage differs from input voltage.

Configuration 2: Same Voltages

Wiring for annunciator cable when voltage matches input voltage.

Remove the Protective Label

Troubleshoot the Redundant Power Supplies

Power Supply Status Indicators

Explains the meaning of power and non-red indicators for troubleshooting.

Chassis Adapter Status Indicator

Remove or Replace a Redundant Power Supply

Remove a Redundant Power Supply Steps

Step-by-step guide to safely detach a redundant power supply unit.

Replace a Redundant Power Supply Steps

Step-by-step guide to safely install a new redundant power supply unit.

Remove or Replace a Chassis Adapter

Chassis Adapter Removal and Replacement Steps

Detailed steps for removing and installing the chassis adapter.

Specifications

Additional Resources

Rockwell Automation Support Resources

Technical Support and Documentation

Provides links to knowledgebase, manuals, and product compatibility information.

Documentation Feedback and Contact

Offers a channel for feedback and provides contact details for support.

Related product manuals