24 Rockwell Automation Publication 2711P-IN001J-EN-P - April 2018
PanelView Plus 700 to 1500 and PanelView Plus Compact 1000 Terminals and Display Modules
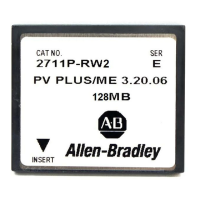
6. Locate the battery on the circuit board.
7. Remove the battery by lifting up the side of the battery.
8. Insert the new battery.
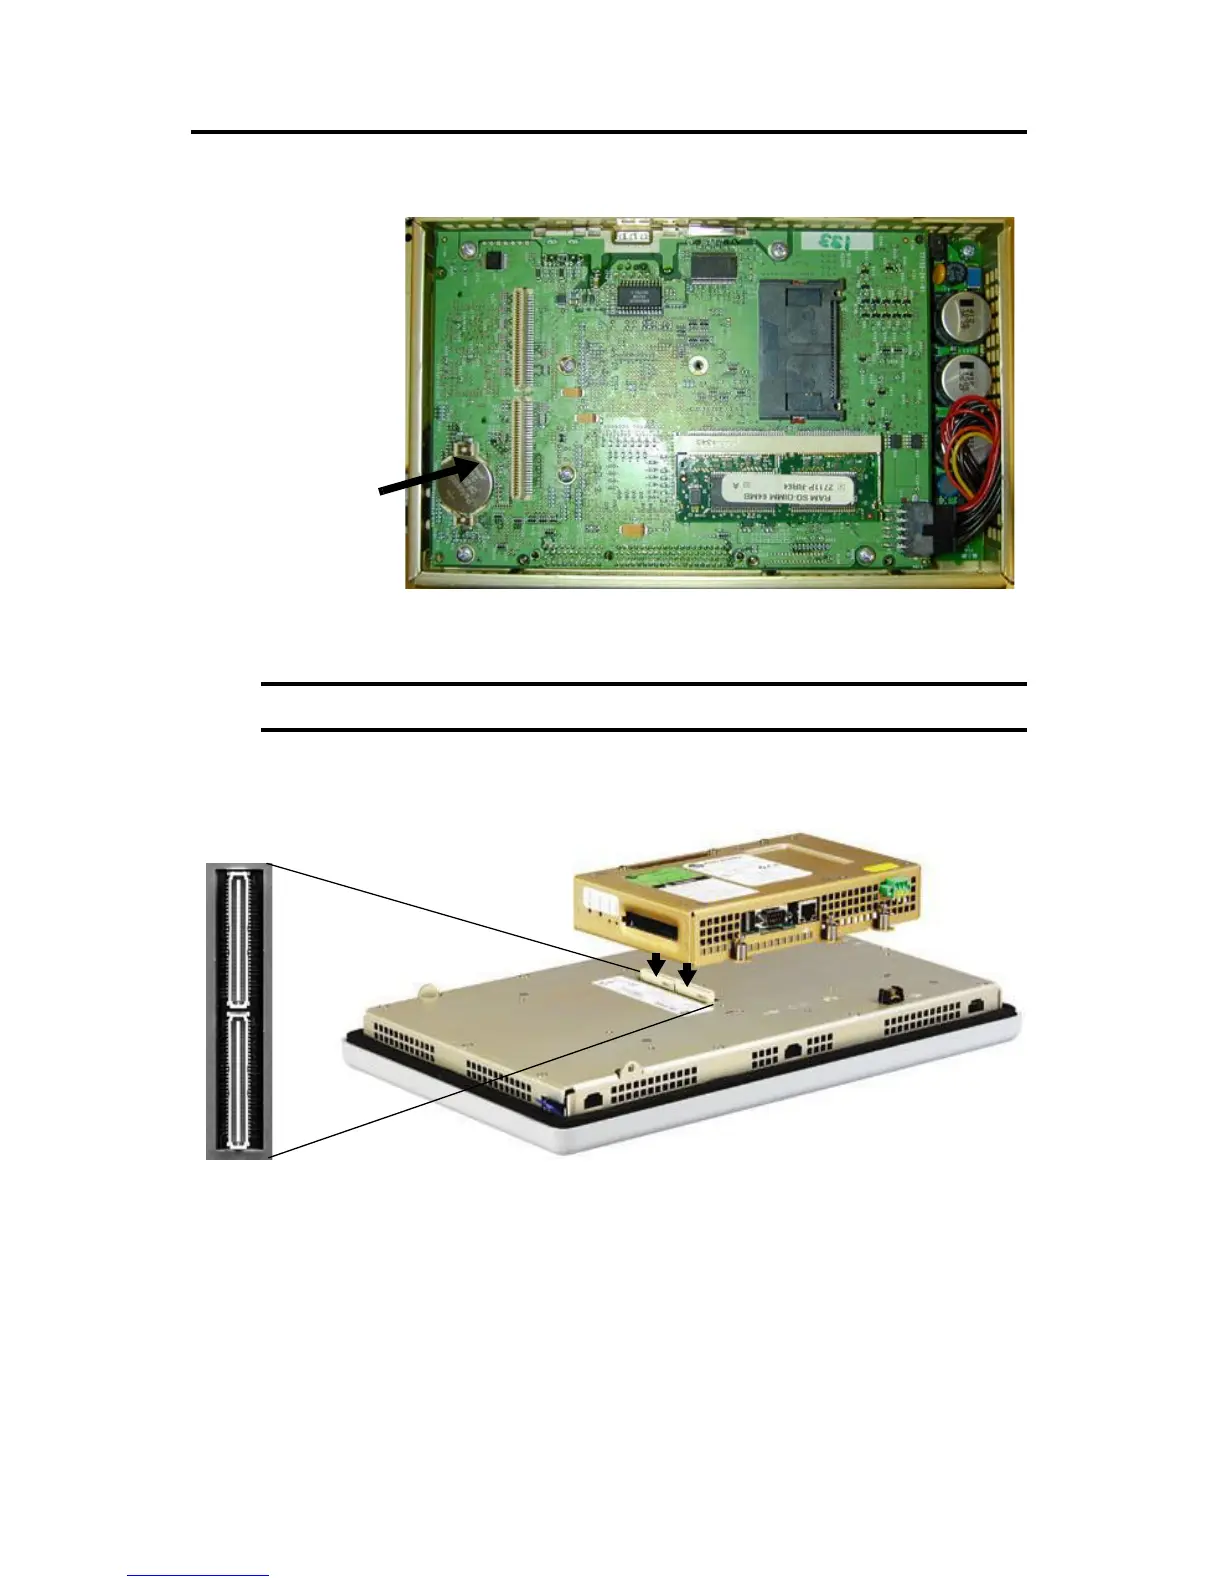
9. Reattach the logic module by aligning the two connectors on the bottom of the module
with the connectors on the terminal.
10. Push down on the logic module until it is firmly seated.
11. Tighten the six captive screws that secure the logic module to a torque of 0.58 N•m
(5…7 lb•in).
IMPORTANT Use only replacement battery catalog number 2711P-RY2032.
Lift up the edge of the
battery indicated by the
arrow.
 Loading...