Enhanced PLC-5 Programmable Controller Firmware Upgrade 3
Publication17855.13 April 1996
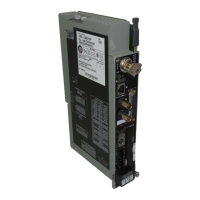
Observe
the orientation of the pin 1 indicators before you remove each PROM. Replace each of the
indicated PROMS, checking to see that the pin 1 indicators are correctly oriented.
9
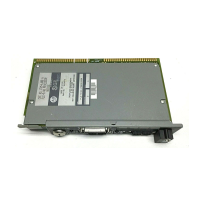
Example (for PLC5/40, 5/60, and 5/80 series A, B, and C processors)
Assemble the processor and check to see that it starts up properly
. Reload your program and make certain that it
runs properly
. If you have any questions, call AllenBradley T
echnical Support at (216) 6466800.
11
For this processor:
Replace these PROMs:
PLC5/1
1 and 5/20 series A and C
PLC5/30 series A and C
PLC5/40, 5/60, and 5/80 series A, B, and C
U70 and U61
U5 and U31
U5, U16 or U13, and U31
U–31
U–5
U–16
10
Skip this step if you do not have plug firmware
. If you have communication plug PROMS, you may
have received catalog number 6690DS2 PROMs with your upgrade kit. T
o update these PROMs, follow
the previous procedure to remove each plug and replace the PROM in socket U7.
U–7
Allen-Bradley Replacements
 Loading...