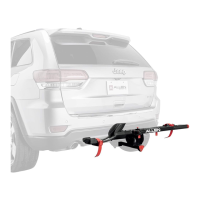
WARNING: Bikes or rack falling in road can cause serious accidents resulting in bodily injury—do not use rack on any
vehicle on which it can not be properly mounted as described in this instruction sheet.
• Rack should only be used on vehicles with Class III or IV 2” receiver hitches.
• NEVER use on trailer or front of vehicles.
• Bikes must be tied to rack using tie-downs, or additional straps if necessary.
• Check periodically during use taht all bolts and pins are tight, and that rack and bicycles are secure.
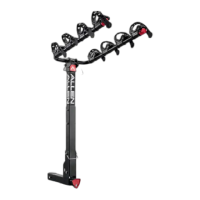
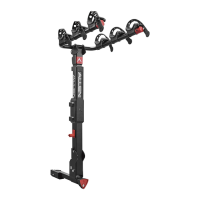
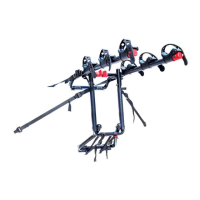
• Never carry more than 4 bicycles (MAX CAPACITY: 140 LB) - no tandems, mopeds, or recumbents. Car tail lights
must remain visible. Bikes must be securely tied to rack. Use bike tie-downs, or additional straps if necessary.
• Drive conservatively, especially over bumps. Never use off-road.
• Do not use if any part of the rack is damaged, worn, or missing. Contact R. A. Allen Co., Inc. for replacement parts..
CAUTION: Use Allen S-645 only in accordance with local motor
vehicle and traffic regulations.
• Install rack and load bicycles only at a safe distance away from
moving traffic.
• Make sure that all of rack and bicycles are kept at a safe distance
from road and hot exhaust.
• Only operate vehicle with rack in an upright, locked position.
• Bicycles should never extend beyond sides of vehicle.
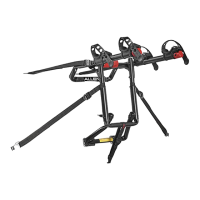
• Remove rack from car, or fold carry arms down when not in use.
• INSERT LOWER PORTION OF RR POST INTO
HITCH INSERT SO THAT THE HOLES AT THE
BOTTOM OF EACH PART LINE UP.
• INSERT THE 3/8” X 3” BOLT THROUGH THE HOLE,
AND THREAD 1—3/8” LOCK NUT ONTO THE END
OF THE BOLT.
• PIVOT THE RR POST INTO THE UPRIGHT
POSITION, SO THAT THE SECURING LATCH
SNAPS INTO PLACE.
• TIGHTEN NUT AND BOLT FIRMLY USING TWO
WRENCHES.
• INSERT CARRY ARM ASSEMBLY
INTO UPPER PORTION OF RR
POST, LINING UP THE HOLES
IN EACH PART.
• INSERT THE 3/8” X 2 1/2”
BOLTS THROUGH EACH HOLE,
AND THREAD 1—3/8” LOCK
NUT ONTO THE END OF THE
BOLTS.
• TIGHTEN EACH NUT AND BOLT
FIRMLY USING TWO
WRENCHES.
NOTE: UPON COMPLETION,
BOTH PARTS SHOULD BE FIRMLY
JOINED TOGETHER.
.
IMPORTANT:
WHEN RACK IS IN AN
UPRIGHT POSITION,
WIRE RETAINER ON QR
CLIP SHOULD ALWAYS
BE IN A CLOSED
POSITION TO KEEP RACK
FROM FALLING OVER
DURING USE.
CARRY ARM ASSEMBLY
TOOLS REQUIRED: 2—9/16” WRENCH & 2—3/4” WRENCH;
or 2 ADJUSTABLE WRENCHES
PARTS
HITCH INSERT
S-645 BOX SHOULD CONTAIN THE
FOLLOWING ITEMS:
1-
CARRY ARM ASSEMBLY
1-
1—HARDWARE KIT,
CONTAINING:
2 - 3/8” X 2 1/2“ BOLT
1 - 3/8” X 3” BOLT
4 - 3/8” LOCK NUT
1 - 1/2” LOCK NUT
1 - 1/2” WOBBLE BOLT
1 - 70” BOTTOM STRAP
RR POST
1- 1- SPINE SHIELD
A.
ASSEMBLING RACK:
B.
STEP 1 STEP 2
3/8” x 2 1/2”
BOLT
3/8”
LOCK NUT
RR POST
HITCH INSERT
3/8” X 3”
BOLT
QR
CLIP
3/8”
LOCK NUT
MODEL S645
INSTRUCTIONS
ENGLISH - PAGE 1
PRODUCT REGISTRATION:
MAKE SURE TO REGISTER YOUR PURCHASE AT
http://allensportsusa.com/about/product-registration
TO QUALIFY FOR PRODUCT WARRANTY AND TO
RECEIVE IMPORTANT PRODUCT NOTIFICATIONS