Do you have a question about the Allen Sports 103DB and is the answer not in the manual?
Procedure to extend the top foot and carry arm assembly.
Instructions for safely inserting setup pins into the rack.
Ensure contact surfaces between car and rubber feet are clean and spaced.
Verify correct threading of top buckles as shown in diagram.
Check all straps for wear or damage before installation.
Properly attach top hooks to metal edges of trunk or rear door.
Adjust top strap length to angle rack and keep bikes clear.
Ensure bottom foot assembly is open and properly positioned.
Confirm bottom straps are correctly threaded through plastic buckles.
Attach bottom hooks to a metal edge below the bumper.
Fully tighten bottom straps by pulling until elastic portion is stretched.
Attach hooks to lower edge of trunk/rear hatch when no metal edge is present.
Place hooks inside trunk/hatch and close to secure bottom straps.
Remove items, tighten quick releases, and check rack security.
Load first bike with gears facing away, ensuring no vehicle contact.
Load bikes alternating directions, heaviest first, with padding if needed.
Guidance for mounting women's frames and recommended adaptor bar.
Position the bicycle correctly within the rack's cradle.
Thread securing straps and pull them tight for stability.
Use excess strap to secure front wheel, preventing vehicle contact.
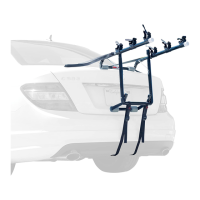
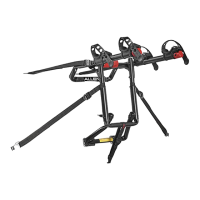
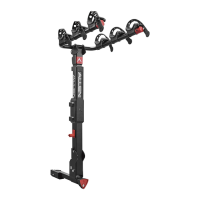
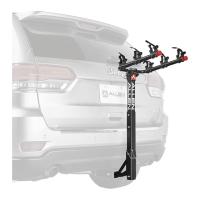
The Allen 103DB is a robust and versatile bicycle rack designed for secure transport of up to three bicycles, with a maximum capacity of 100 lbs. This rack is engineered for attachment to the rear of various vehicles, including trunks, rear doors, or hatchbacks, ensuring your bikes travel safely to your destination.
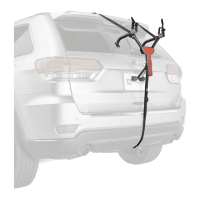
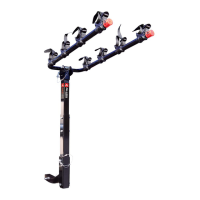
The primary function of the Allen 103DB is to provide a stable and secure platform for transporting bicycles on the exterior of a motor vehicle. It achieves this through a multi-point attachment system that utilizes top hooks, bottom hooks, and rubber feet to firmly grip the vehicle's body. The rack features adjustable carry arms equipped with tie-down cradles and straps to hold bicycles in place, preventing movement and potential damage during transit. Its design prioritizes ease of installation and removal, as well as the safety of both the bicycles and the vehicle.
Before installation, the rack requires a simple setup process. First, the top foot/carry arm assembly needs to be folded out. Pins at the ends of the wire struts are then inserted into corresponding holes in the top foot assembly. Finally, the bottom foot assembly is completely folded out. For safe pin insertion, the rack should be unfolded and laid on its side with the carry arms perpendicular to the middle section. The setup pin is then pulled up and installed into the hole on the carry arm, taking care to avoid pinching fingers. This process is repeated for the other side.
Prior to mounting the rack on the vehicle, several important checks must be performed. Ensure that all contact surfaces between the car and the rack's rubber feet are thoroughly clean and free of dirt, and that the rubber feet are properly spaced. It's crucial to verify that the top buckles are correctly threaded as illustrated in the manual. Additionally, all straps should be inspected for any signs of wear or damage.
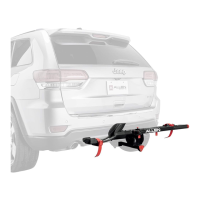
The installation process begins by hooking the top hooks completely over the solid metal edges at the top of the trunk, rear door, or hatchback. It is critical to never hook to rain gutters, roof racks, vertical glass, or plastic moldings. Slightly opening the trunk or hatch can facilitate easier attachment of the hooks, but care must be taken to ensure the hooks do not bind when the trunk/hatch is opened, as this can damage the vehicle.
For vehicles without adequate clearance at the top edge of the rear trunk/hatch, an alternate method involves unthreading the top straps from the metal buckles, opening the rear trunk/hatch, and placing the top hooks inside the vehicle (just inside the top edge). The trunk/hatch is then carefully closed over the top straps, ensuring the hooks do not bind between the frame and rear door. Once the rear door is closed, the top straps are pulled to bring the hooks tight against the inside of the vehicle, and the top straps are re-threaded as shown in the manual.
Next, the length of the top straps is adjusted to position the rack with its carry arms slightly inclined upwards and high enough to keep bikes away from the road and exhaust. The bottom foot assembly should rest against the vehicle in its completely open position, with the bottom gray rubber pads installed on a location that provides proper support, never on glass. The bottom straps must be properly threaded through their plastic buckles.
The bottom hooks are then completely hooked to a metal edge below the bumper or at the bottom of the trunk/rear door. If no metal edge is available below the bumper, alternate attachment methods are provided. Finally, the bottom straps are completely tightened by pulling on their free ends until the elastic portion of the straps is fully stretched.
If there is no metal edge below the bumper for hook attachment, two alternate methods are available. Method 1: Remove the bottom straps from the bottom horizontal cross-bar and loop them around the carry-arms near the top metal buckles. The hooks are then attached to the lower edge of the trunk/rear hatch, and the bottom straps are tightened. Method 2: Before installing the rack, remove the bottom straps, open the trunk slightly, and place the bottom hooks just inside the trunk/hatch. The trunk is then carefully closed over the bottom strap, and the straps are pulled to bring the hooks against the inside of the trunk. The rack is then mounted onto the car as described in the main installation section, and the bottom straps are re-threaded and tightened.
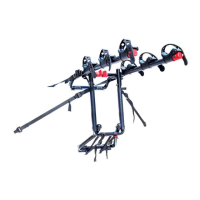
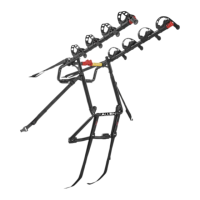
Before loading, remove all loose items from bicycles (pumps, bags, etc.) and check that all quick-release hubs are tight. The first bicycle should be loaded into the tie-down position closest to the vehicle, with its chain and gears facing away from the rack, ensuring no contact with the vehicle. Subsequent bicycles are loaded in alternating directions. For optimal weight distribution, heavier bicycles should be loaded first, with lighter ones on the outside. Padding can be added between bicycle contact points if necessary. After loading, verify that the entire rack is secure and firmly in place. Be aware that vision out of the rear window may be restricted, and side mirrors should be used accordingly when backing up.
All bikes must be securely tied to the rack using individual tie-down straps or additional straps. The process involves placing the bicycle in the cradle, threading the straps, and then pulling the straps tight. An important note for women's style frames: place one carry arm under the front top tube, and with the other carry arm, rotate the tie-down cradle and place the carry in the space behind the seat tube and below the rear down-stay. The Allen 900B Adaptor Bar is also recommended for this application. The front wheel of the inside bicycle should be secured with excess bottom strap or additional straps to prevent it from coming into contact with the vehicle.
The manual emphasizes the importance of inspecting all straps to ensure they are not worn or damaged in any way, which is a key maintenance feature. Regular checks of the contact surfaces between the car and rubber feet for cleanliness and proper spacing also contribute to the longevity and safe operation of the rack. The Allen 103DB comes with a lifetime warranty, covering defects in workmanship or material for the original purchaser. Allen will repair or replace the rack free of charge, though the warranty does not cover damage or wear resulting from day-to-day use or general wear and tear. This warranty underscores the manufacturer's commitment to quality and provides a long-term maintenance assurance for the product.
| Model | 103DB |
|---|---|
| Bike Capacity | 3 Bikes |
| Mounting | Trunk Mounted |
| Material | Steel |
| Max Load per Bike | 35 lbs |
| Wheel Holders | No |
| Anti-Sway Cradles | Yes |
| Type | Trunk Mount |
| Folding Feature | Yes |
| Fit Guide | Fits most sedans, SUVs, minivans and hatchbacks |