MAINTENANCE
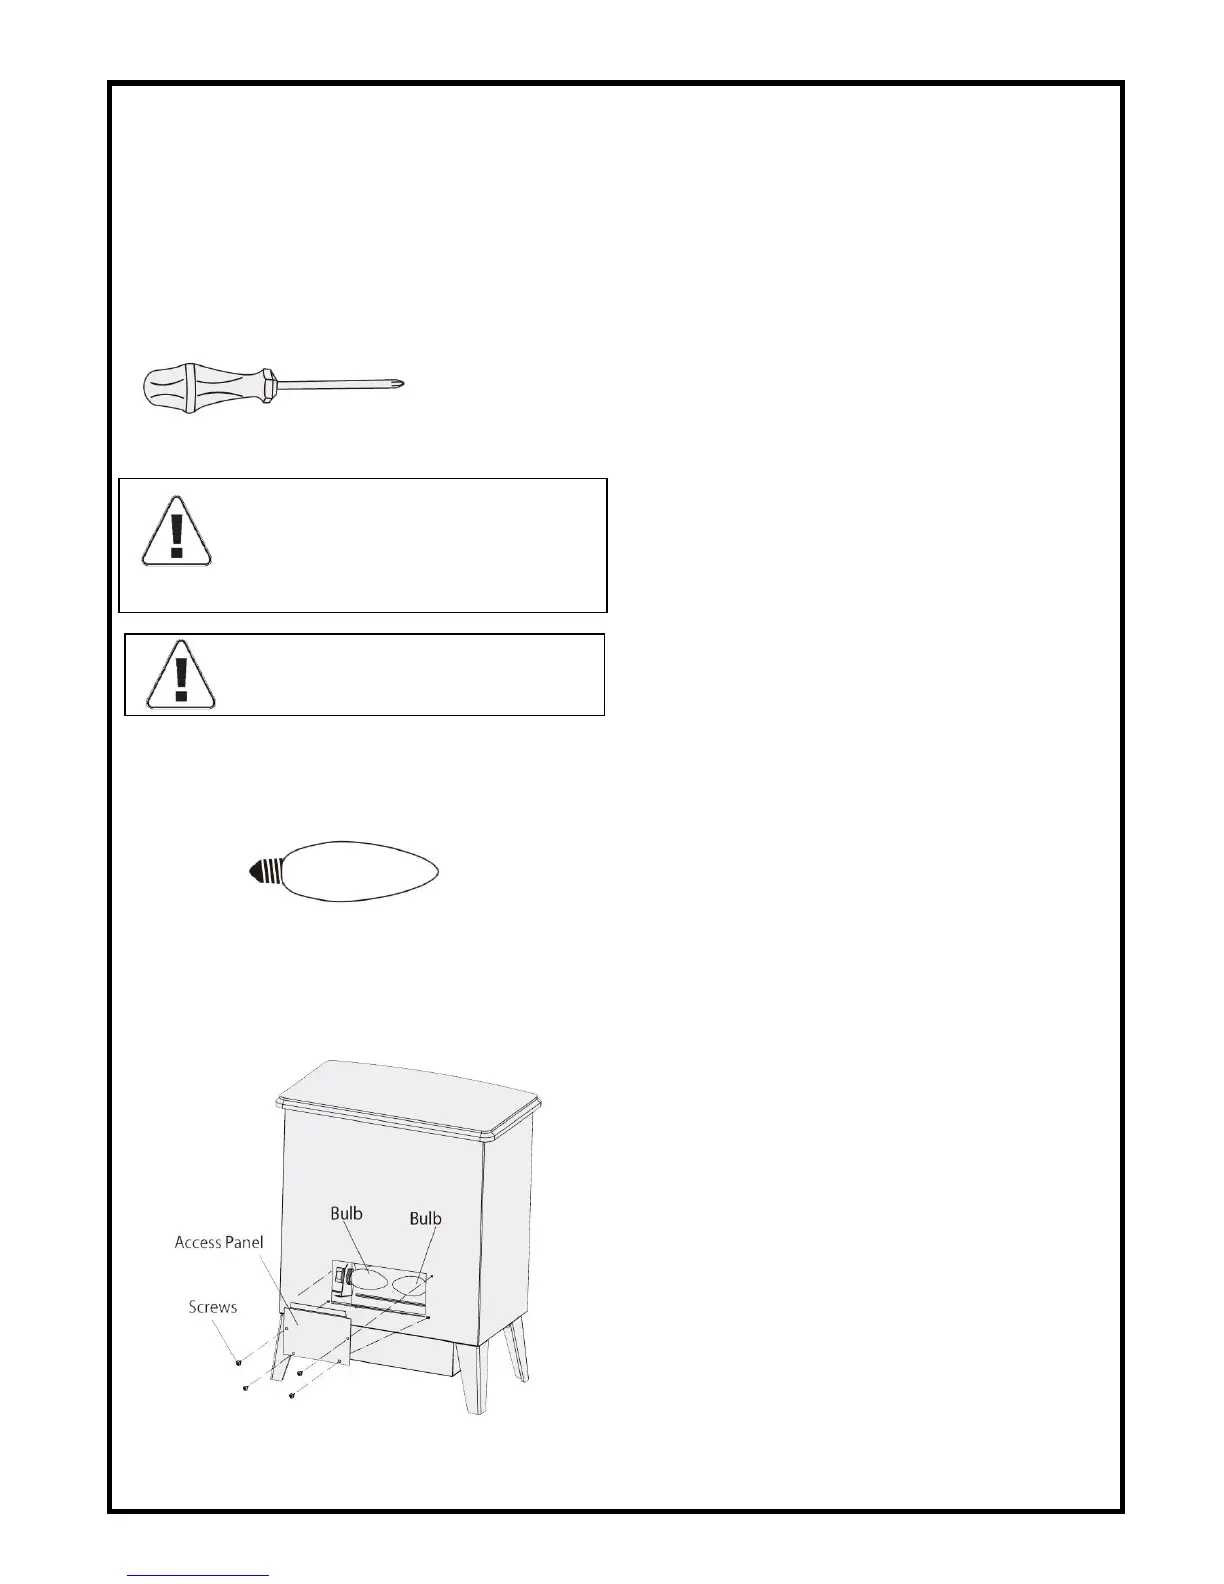
Tools Required: Philips Screwdriver (#1)
REPLACING THE LIGHT BULB
This comes with the following light bulb:
2× 40W E12 Chandelier Light Bulb, Candelabra Base
(See Fig. 3)
Fig. 3
Replace this bulb only with identical size and wattage.
Figure 4 - Unit with back panel removed
Fig. 4
LIGHT BULB MAY BECOME LOOSE DURING SHIPPING.
If the simulated flame effect is dim or does not operate
properly at first, please ensure that the light bulb is
properly secured in the socket (bulb should be finger
tight – do not over tighten).
TO REPLACE FLAME EFFECT LIGHT BULB
1.Turn all controls to “OFF”
2.Unplug the unit from the power supply.
3.Remove back panel by removing 4 screws as shown. (See Fig. 4)
4.Unscrew the light bulb (turning counter-clockwise) and remove.
5.Replace with new light bulb, turning clockwise.
6.Replace back panel and secure with screws.
7.Plug the unit into the power supply.
8.Turn the power switch to the “ON” position.
WARNING: THE UNIT MUST BE UNPLUGGED
FROM THE POWER SUPPLY PRIOR TO ANY
MAINTENANCE OR CLEANING IN ORDER TO
REDUCE THE RISK OF ELECTRIC SHOCK OR FIRE
.