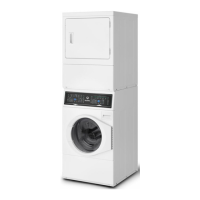
This document serves as a User's Guide for Alliance Laundry Systems dryers, providing essential information for safe operation, maintenance, and troubleshooting. It emphasizes the importance of reading all instructions before use to minimize risks and ensure proper functioning.
Function Description
The dryer is designed to efficiently dry clothes and textiles that have been washed in water. It features various drying cycles and settings to accommodate different fabric types and load sizes. The core function involves tumbling clothes in a heated cylinder to remove moisture. The dryer incorporates an Auto-Sensing system that helps prevent over-drying by detecting moisture levels and adjusting drying time accordingly. This system contributes to energy savings and helps maintain fabric quality. For items that require specific drying times or no heat, manual cycles are available. The dryer also includes a cool-down period at the end of each cycle to ensure items are left at a safe temperature and to prevent damage.
Usage Features
The dryer's operation is managed through a control panel with a digital display that shows the remaining cycle time and diagnostic codes.
- Power/Cancel Keypad: Used to turn the dryer on or off and to exit Idle Mode.
- Start/Pause Button: Initiates or pauses a drying cycle. The dryer will not start if the door is open, and the motor must be running before the cycle can be paused.
- Dry Cycles:
- Auto-Sensing Cycles: These are energy-saving cycles that use moisture sensors to determine the optimal drying time.
- Heavy Duty: For heavy items like blankets.
- Regular: For sturdy items such as play or work clothes.
- Perm Press: For permanent press items and synthetics.
- Delicates: For delicate items.
- Manual Cycles: These cycles run for a set duration, which can be adjusted.
- Favorites: Allows users to save up to nine customized cycle, selection, and option settings for quick access.
- Time Dry: Dries for a user-selected time.
- Quick Dry: A shorter manual drying cycle.
- Fluff Up: A no-heat tumbling cycle.
- Selections: These modify the chosen cycle.
- Temp: Adjusts the temperature for Manual cycles (No Heat, Low, Medium, High).
- Dryness: Changes the dryness level for Auto-Sensing cycles (Damp, Less Dry, Near Dry, Dry). Setting Auto-Sensing loads to Near Dry or Less Dry can increase energy savings and prevent over-drying.
- Options: These provide additional functionalities.
- Anti-Wrinkle: Tumbles clothes without heat for up to 60 minutes after the cycle ends to prevent wrinkling. This option stops if the door is opened.
- EcoDry: Reduces total energy consumption by decreasing the cycle temperature by 10% after the initial temperature is reached.
- Signal: Adjusts the end-of-cycle signal volume (Off, Low, Medium, High). If Anti-Wrinkle is active, the signal sounds with each tumble.
- Control Lock (Secure Keypad): Locks the control panel to prevent accidental changes. It is activated by pressing and holding the Signal keypad for three seconds.
- Status Lights: Indicate the current stage of the drying cycle (Door Open, Heating, Cooling, Extended). The Heating or Cooling light flashes during the warm-up period until the motor starts.
- Keypress Audio: The audible feedback for keypad presses can be toggled on or off by simultaneously pressing and holding the Perm Press and Quick Dry keypads.
- Optional Drying Rack: Available for purchase, this rack allows for no-tumble drying of delicate items like tennis shoes, sweaters, or stuffed toys in manual cycles.
Maintenance Features
Regular maintenance is crucial for the dryer's efficiency, longevity, and safety.
- Lint Filter: Must be cleaned after every load. The lint filter is located in the lower part of the door opening. A clogged filter reduces drying efficiency and prolongs drying time. Annually, the lint filter should be removed, and the duct underneath vacuumed.
- Dryer Interior: Should be wiped with a soft cloth and a household cleaner or a non-abrasive paste of powdered laundry detergent and hot water, followed by a short heat cycle with a load of rags. Chlorine bleach should be avoided as it can damage the finish. For crayon or ballpoint ink, high heat with old rags can help absorb it; chemicals should not be used.
- Cabinet: Wipe as needed. Spilled detergent, bleach, or other washing products should be wiped immediately to prevent permanent damage to the finish.
- Control Panel: Clean with a damp or sudsy cloth only. Avoid spray pretreat products or those containing alcohol, as they may harm the finish.
- Exhaust System: The exhaust duct should be inspected and cleaned by a qualified service person after one year of use, and every one to two years thereafter, to remove lint build-up. The weather hood should be checked frequently to ensure dampers move freely and are not obstructed.
- Motor Overload Protector: This safety feature automatically stops the motor in case of an overload. The digital display will show "Er" or "ro" alternately. After cooling, the protector resets itself. The control can be cleared by pressing START, and the dryer can be restarted. If the issue recurs, a service person should be called.
- Cylinder Light: If replacement is needed, a 10 Watt bulb (part number 60954) should be ordered.
- General Safety: Always disconnect electrical power before attempting any service. Any disassembly requiring tools must be performed by a suitably qualified service person. The area around the dryer should be kept clear of combustible materials and flammable vapors.
The manual strongly advises against operating the dryer without the lint filter in place to reduce the risk of fire and lint accumulation in the exhaust duct. It also emphasizes that the dryer should not be used to dry items soiled with flammable substances like cooking oils, as these can cause fabric to catch fire.