508031-02 Issue 2135 Page 15 of 29
Replacing the Motor Module
1. Disconnect electrical power to unit.
2. Remove unit access panel.
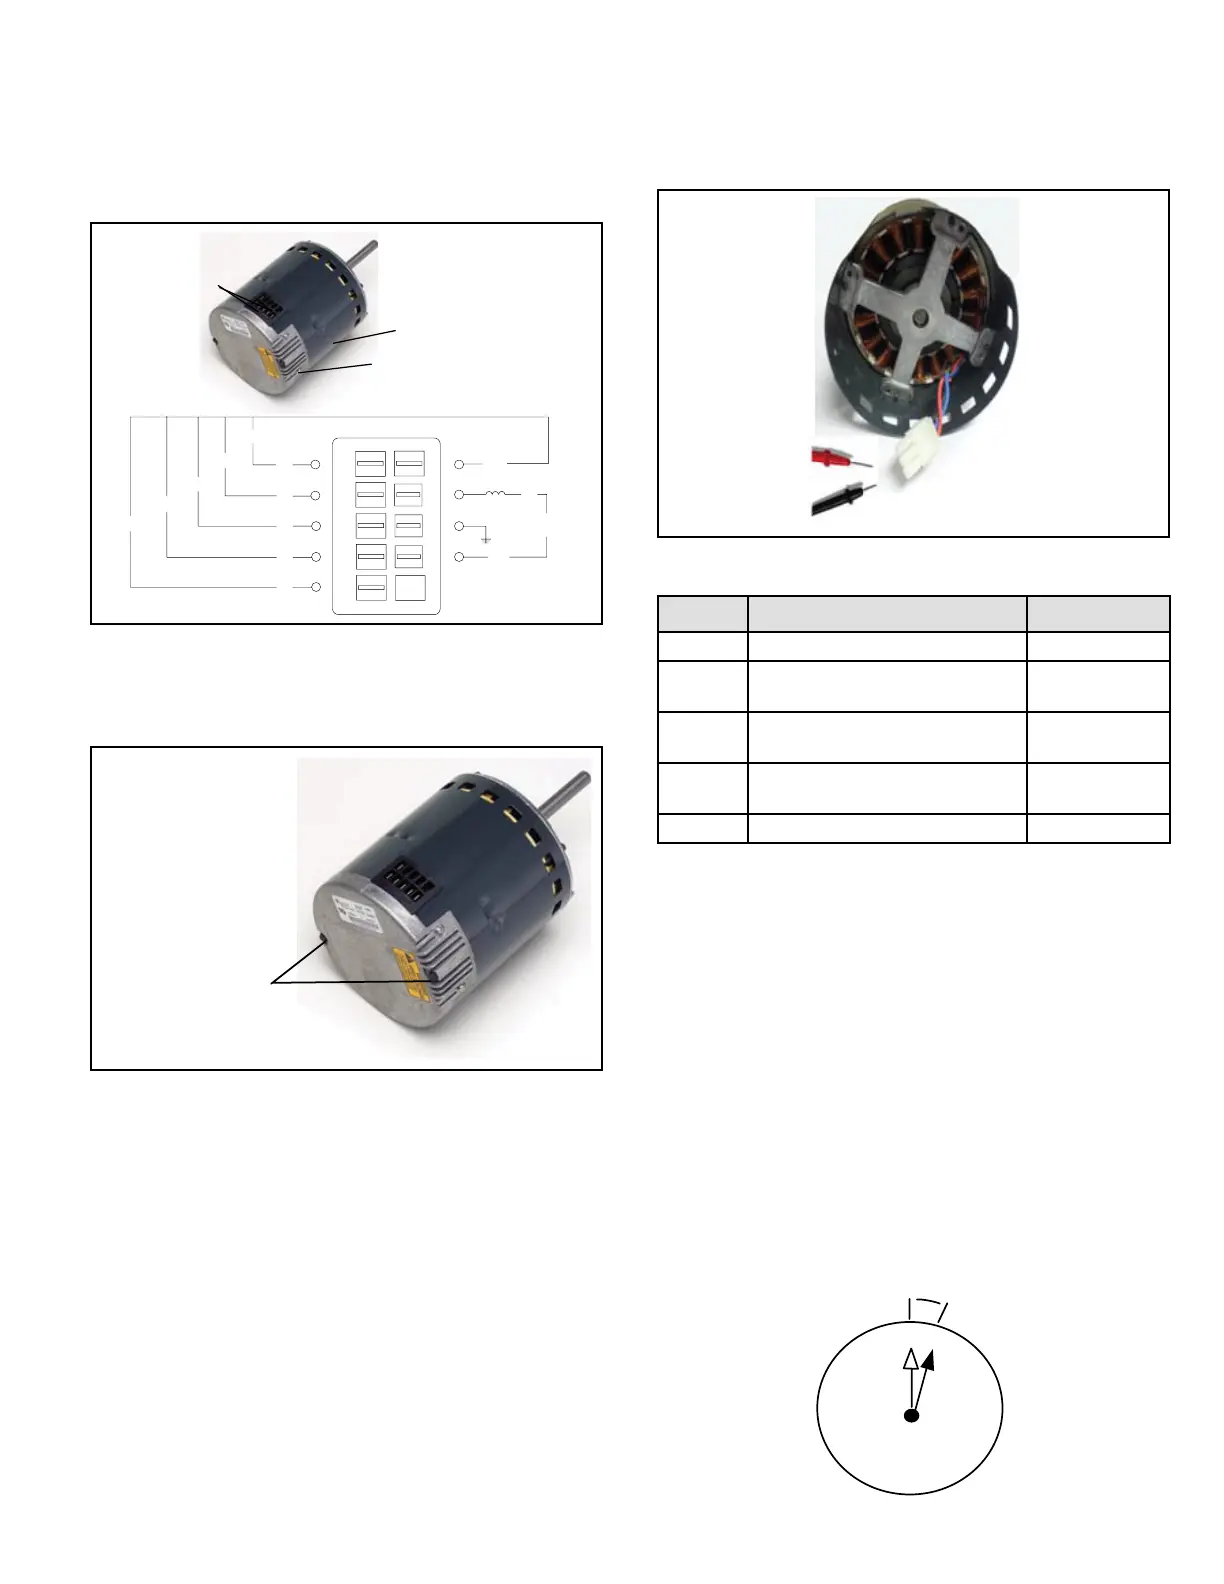
3. Unplug the two harnesses from the motor control
module. See Figure 12.
TWO HARNESS
CONNECTIONS
MOTOR CONTROL MODULE
MOTOR
24VAC
24VAC
24VAC
24VAC
24VAC
T1
T2
T3
T4
T5
12345
CLGN
COM
INDUCTION
L1
MODEL SPECIFIC
LINE VOLTAGE
GND
L2/N
Figure 12. Unplug the Two Harness Connection
4. Remove the two hex head bolts securing the motor
control module to the motor (see Figure 13).
REMOVE BOTH HEX
HEAD BOLTS
Figure 13. Remove the Hex Head Bolts
5. Slide the motor control module away from the motor
to access and disconnect the internal three wire
connector. It is not necessary to remove blower motor
itself. Set both hex head bolts aside.
Testing the Motor (Figure 14)
If any motor fails the below tests, do not install the new
control module. The motor is defective and it also must be
replaced. The new control can fail if placed on a defective
motor.
1. Using an ohmmeter check the resistance from any
one of the motor connector pins to the aluminum end
plate of the motor. This resistance should be greater
than 100k ohms.
2. Check the resistances between each of the three motor
connector pins. These should all read approximately
the same resistance within an ohm.
3. Check to see if the blower wheel spins freely.
Figure 14. Motor Test
Scale Measurement Range in Words ohms
2 M two megohm-two million ohms 0 - 2,000,000
200 K two hundred kilo-ohm-two
hundred thousand ohms
0 - 200,000
20 K twenty kilo-ohm-twenty thousand
ohms
0 - 20,000
2 K two kilo-ohm two-thousand ohms 0 - 2,000
200 two hundred ohms 0 - 200
Table 8.
Motor Module Installation
All replacement motor control modules look similar;
however, each module is designed for a specic motor
size. It is very important to make sure that you are using the
correct replacement motor control module. USE OF THE
WRONG MOTOR CONTROL MODULE MAY RESULT IN
UNEXPECTED UNIT OPERATION.
1. Verify electrical power to unit is disconnected.
2. Connect three-wire harness from motor to control
module.
3. Mount new motor control module to motor using two
hex head bolts removed in Figure 13. Torque bolts to
22 inch pounds or 1/16th clock turn as exampled to
the right.
1
2
3
4
5
7
8
9
10
11
12


 To Next Page