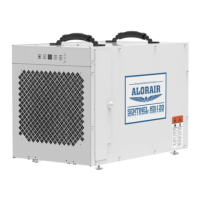
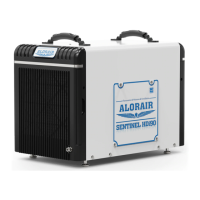
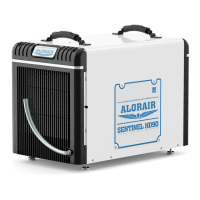
The AlorAir Sentinel HDi120 is a dehumidifier designed for restoration, moisture control, and ventilation applications. It is built for efficient removal of moisture from various environments, including crawl spaces, basements, and other conditioned spaces.
Function Description:
The Sentinel HDi120 operates by drawing air across an evaporator coil, which is cooler than the dew point of the air. This process causes moisture to condense out of the air. The now drier air is then reheated through a condenser coil and distributed back into the room. An integrated humidistat monitors the relative humidity of the space, activating the dehumidifier when the humidity rises above a user-selected setpoint. It features a continuous mode for constant operation regardless of humidity levels and an auto defrost function to prevent ice buildup on the evaporator coils. The unit also includes an integrated condensate pump for automatic water drainage, with a manual drain button for storage or relocation.
Important Technical Specifications:
- Capacity:
- 120 Pints Per Day at 80°F/60%RH
- 93 PPD at 73°F/60%RH
- Airflow: 290 CFM
- Operating Temperature Range: 33.8-104°F
- Operating Relative Humidity Range: 36%-90%
- COP (Coefficient of Performance): 2.7 L/kWh
- Refrigerant: R410A
- Amperage Usage: 7.8 Amps
- Power Supply: 115V/60Hz/Single Phase
- Outlet Requirement: 15 Amp, 3 prong, GFCI
- Sound Level: 60 dBa
- Dimensions (LxWxH): 23.8" x 14.7" x 17.9"
- Certifications: ETL Listed
Usage Features:
- Installation: The unit should be placed on a level surface, ideally with blocks or pavers if on a vapor barrier. A minimum of 2 hours should be allowed for the compressor to settle if the unit has been turned or flipped. Proper ventilation requires a minimum of 6 feet clearance for the inlet and 36 inches for the discharge, with a side panel facing a wall for optimal air diffusion. The dehumidifier is designed for upright and level operation.
- Drain Line Setup: A compression nut is slid over the hose end, which is then attached to the compression fitting on the unit and tightened.
- Power Key: Used to turn the dehumidifier on and off. Pressing once turns it on (two beeps, green power light), and pressing a second time turns it off (one beep, with a 1-minute fan delay).
- Arrow Buttons: Used to set the desired humidity level between 36% and 90%. The unit operates when indoor humidity exceeds the setpoint. Displayed humidity levels are approximate (+/-5%).
- Continuous Mode: Activated by setting the humidity below 36% using the down arrow key. The continuous light illuminates green, and the display shows "CO". To return to normal humidistat operation, the setpoint must be moved above 36%.
- Manual Drain Button: Used to remove water from the integral pump's reservoir, particularly before storing or moving the unit. Each press activates the drain for 15 seconds.
- Indicator Lights:
- Humidity Display Screen: Shows current space humidity or the setpoint during adjustment.
- Power Indicator Light (Green): Solid green indicates proper power and readiness; flashing green indicates standby mode (humidity below setpoint).
- Continuous Mode/Auto Defrost Light: Green for continuous operation, red for auto defrost (clearing ice from coils).
- Compressor Light: Red indicates compressor warming up, green indicates active operation.
- Remote Control (Optional Accessory): Connects via a 25-foot CAT 5 cable, allowing remote monitoring and control.
- On/Off Button: Starts/stops the machine.
- Up/Down Buttons: Adjust humidity level.
- Mode Button: Switches between dehumidifier and ducted application modes. A specific symbol indicates whether the remote or dehumidifier sensor is being used.
- Temperature Button: Displays current temperature.
- Continuous Button: Activates continuous mode, displaying "CONT."
- Drain Pump Button: Removes water from the pump reservoir for extended storage.
- Ducted Applications: The unit can be ducted to condition adjacent rooms. Both inlet/return and supply grilles are designed for 10-inch flex ducting. Ducting should be secured with tie wraps, with a maximum total length of 10 feet. Inlet and outlet duct adapters are optional.
Maintenance Features:
- Cleaning the Machine Body: Use a soft, damp cloth to wipe the exterior. Avoid soap or solvents.
- Coil Maintenance: Clean coils annually with an approved self-rinsing, foaming coil cleaner (e.g., WEB® Coil Cleaner).
- Cleaning the Filter:
- MERV-1 Filter: Remove prefilter, vacuum or wash with warm water (no soap).
- MERV-10 Filters: Replace as necessary, recommended at least once per year.
- Electrical Access: Requires unscrewing 13 screws on the side panel and 2 screws on the control board cover.
- Pump Maintenance: The integral condensate pump requires routine maintenance to prevent issues from dirt and slime. This includes cleaning the drain pan, hose to the condensate pump, pump reservoir, pump head assembly, and discharge tubing.
- Basic Pump Cleaning (Annual): Remove filters, press drain button, disconnect power, pour a 16-ounce bleach (1 oz bleach + 15 oz water) or vinegar (4 oz white vinegar + 12 oz water) solution into the drain tray, let soak for 15 minutes, reconnect power, fill reservoir with 16-32 ounces of water, and flush/cycle the pump at least twice. Repeat if debris persists.
- Advanced Pump Cleaning (As Needed): Press drain button, unplug unit, remove cover to access pump, unscrew and remove pump head from reservoir, wipe reservoir clean, reassemble pump, then follow the basic pump cleaning steps for solution application and flushing.
- Dehumidifier Storage: Turn off and allow to dry. Perform advanced pump cleaning steps 1-3. Wrap and secure the power cord. Cover the filter mesh. Store in a clean, dry space.
Troubleshooting:
The manual provides a troubleshooting guide for common issues and error codes:
- Display Blank: Check power cord connection, reset power.
- No Airflow: Clean filter, clear blockages in air inlet/outlet.
- E1 (Humidity Sensor or Communication Error): Check sensor wire connections; if no visible issues, sensor may be faulty.
- E4 (Problem with Pump): Verify pump installation and function. Unplug for two minutes, then restart. If the issue persists, check discharge line for obstructions and clean as per maintenance. If maintenance is insufficient, replace the hose and/or pump.
- LO (Room Temperature below 33.8°F): Increase room temperature to operating range. If error persists, check sensor.
- HI (Room Temperature above 104°F): Decrease room temperature to operating range. If error persists, check sensor.
- E5 (Refrigerant Leak): Contact installer for assistance.
Warranty:
The AlorAir Sentinel HDi120 comes with a limited warranty:
- Six (6) Month: Parts and labor (includes shipment charges for replacement parts or unit).
- One (1) Year: Parts and labor (excludes shipment charge to send defective product back).
- Three (3) Years: Parts and labor on Refrigeration System ONLY (Compressor, Condenser, and Evaporator) (excludes transportation cost).
- Five (5) Years: Parts on Refrigeration System ONLY (Compressor, Condenser, and Evaporator) (excludes transportation cost).
The warranty is valid only for products purchased from the manufacturer or authorized dealers, operated, installed, and maintained according to the user guide. Warranty service requires proof of purchase or order number. Exclusions include damage from unintended use, unauthorized modification, cosmetic damage, abuse, misuse, pest infestation, accidents, natural disasters, incorrect electrical supply, failure to perform proper maintenance, or use in a SPA or room with an OUTDOOR POOL.