6-EN
3
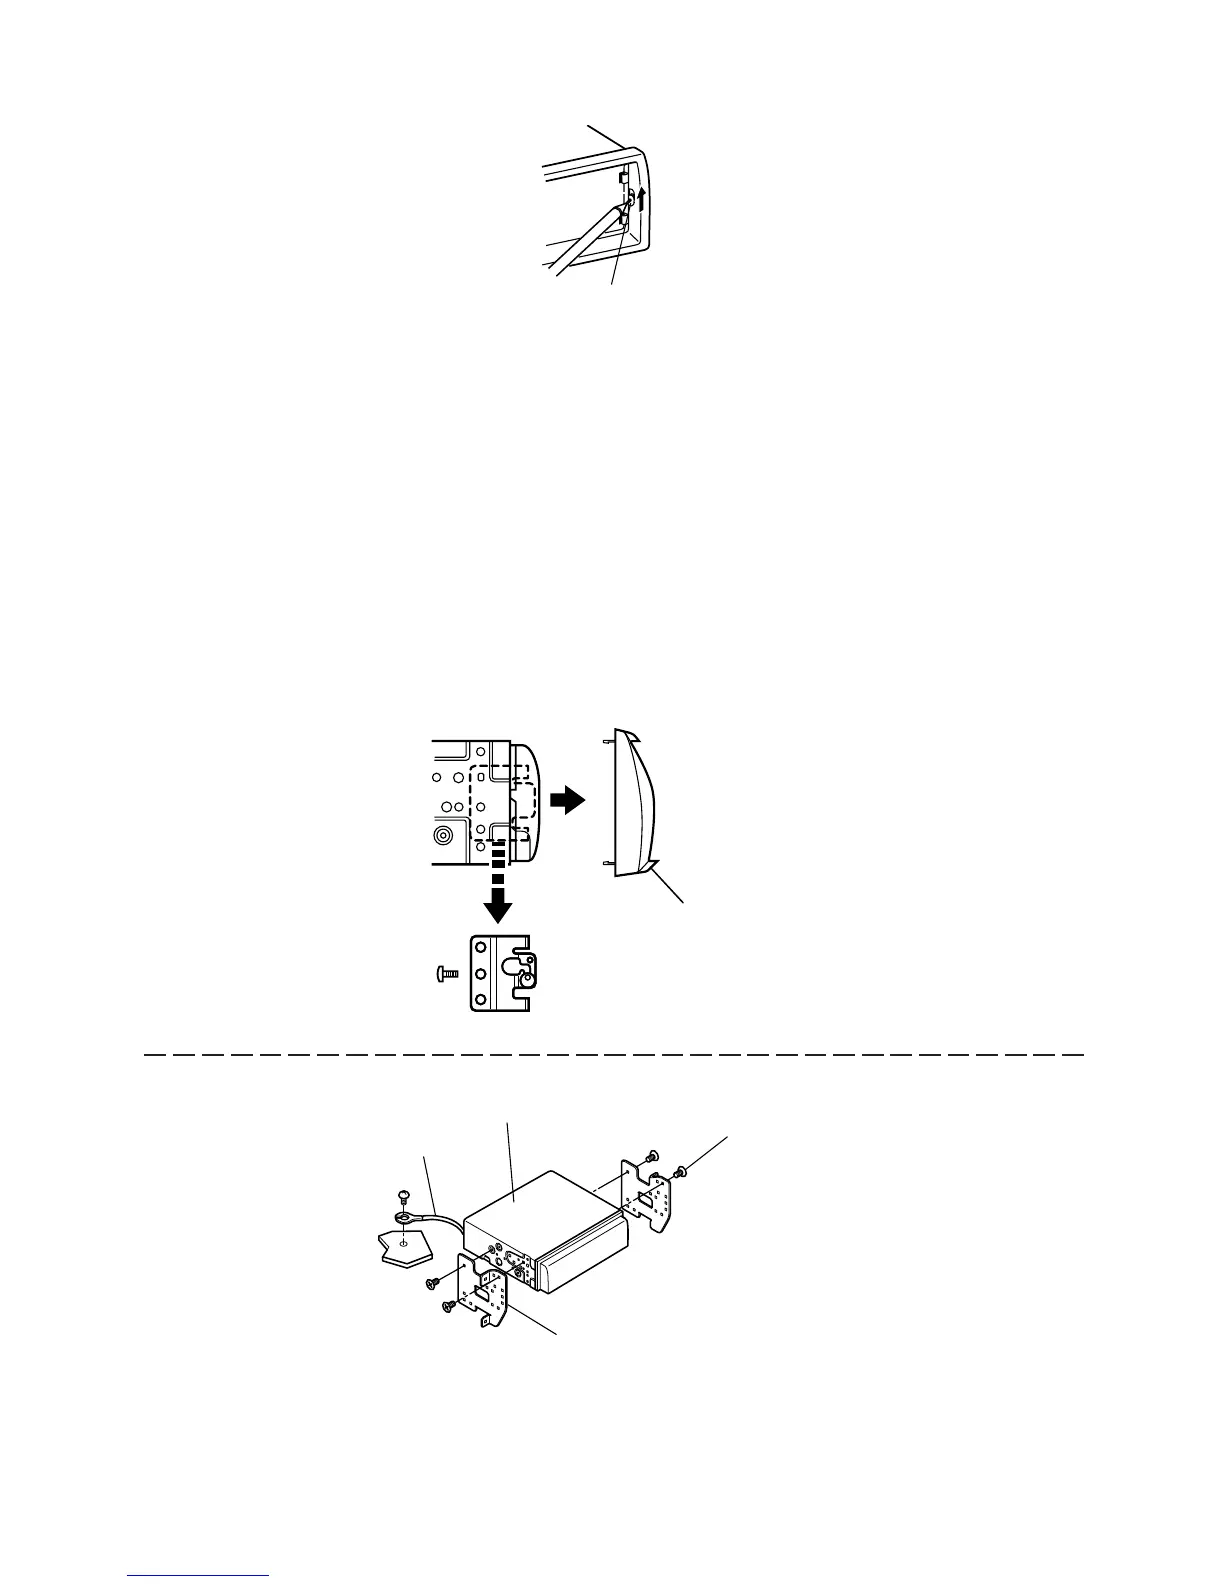
Slide the CDA-7990 into the dashboard. When the unit is in place, make sure the locking pins
are fully seated in the down position. This can be done by pressing firmly in on the unit while
pushing the locking pin down with a small screwdriver. This ensures that the unit is properly
locked and will not accidentally come out from the dashboard. Install the Detachable Front
Panel.
Removal
1 Remove the DETACHABLE FRONT PANEL.
2 Use a small screwdriver (or similar tool) to push the locking pins to the “up” position (see
above drawing). As each pin is unlocked, gently pull out on the unit to make sure it does not
re-lock before unlocking the second pin.
3 Pull the unit out, keeping it unlocked as you do so.
< JAPANESE CAR >
NOTE
Secure the ground lead of the unit to a clean metal spot using a screw (★) already attached to the vehicle chassis.
Lock Pin
Front Frame
CDA-7990
Screws (M5 x 6)
(Included)
Mounting Bracket
Ground Lead
★



 To Next Page