Do you have a question about the Alpine i509-WRA-JL and is the answer not in the manual?
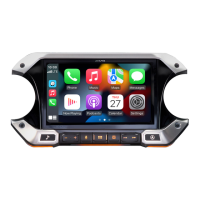
The Alpine i509-WRA-JL is a 9-inch Restyle In-Dash System designed for installation in 2018-Up Jeep Wrangler JL and 2020-Up Jeep Gladiator JT vehicles. This comprehensive system integrates with the vehicle's existing features and provides enhanced audio, navigation, and connectivity options.
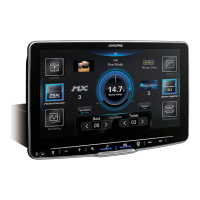
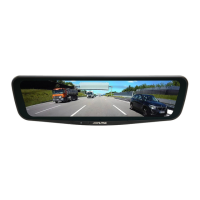
The i509-WRA-JL serves as a central control unit for various in-vehicle functions, offering a large touchscreen display for intuitive interaction. It supports standard and expanded radio functions, navigation outputs (accessory power, parking brake, reverse light, vehicle speed pulse, foot brake), and factory amplifier controls (turn-on, speed-compensated volume, digital fader, DSP settings, gain adjustment). For vehicles equipped with a secondary display, it retains audio, hands-free, and navigation information. It also allows access to and modification of vehicle settings, climate control display and functions, and various gauges (selectable performance, "Track Pack," read/reset check engine codes). Parking assist features, including chimes and distance display, are retained, as are vehicle information displays such as tire pressure, battery voltage, read/reset check engine codes, and door open status/warning. The system also supports OEM accessory control integration. Advanced camera features include front camera auto control (smart parking, low speed trigger), side camera auto control (right lane watch, left lane watch), and 4x4 front camera control (offroad 4x4 trigger).
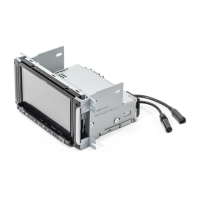
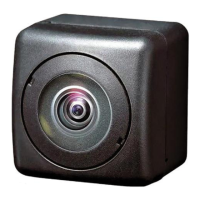
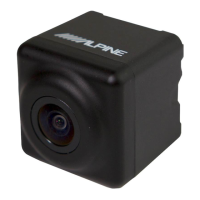
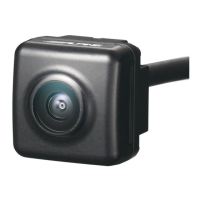
The system is designed for a 12 VDC negative ground car. It requires specific fuse ratings for replacement. OEM amplified vehicles necessitate the separate purchase of the KCX-F200INT module. The installation involves various components, including the i509 Display Unit, i509 Source Unit, External Bluetooth Mic, AUX/Pre Out Harness, GPS Antenna, Direct Camera Adapter, Display Cable, Anti-Vibration Foam, and M5X8LMM screws. The installation kit includes the i509-WRA-JL Display Bezel, M5X10LMM screws, lock washers, Power Inverter Bracket, Display Bracket, Tuner Bracket, and Display Power/Key Harness. The iDatalink Maestro box parts include the iDatalink Maestro Module, USB, HDMI, Aux Interface, Maestro Flashing Cable, Main Harness, Mini USB To USB for Center Console Power, Chime Speaker, and USB Power Adapter. The rear camera retention kit (SGS-BSV1-WJL V2.0) includes a Camera Module, Camera Power Harness, and Camera Male To Male RCA Coupler.
The i509-WRA-JL integrates with the vehicle's steering wheel controls, allowing for two functions per button and standard/expanded radio functions. The steering wheel configuration includes controls for Off Hook, Voice, On Hook, Seek Up/Preset Up, Seek Down, Volume Up, Source, and Volume Down, with options for single press and press-and-hold actions. The system supports HDMI input for iPhone and Android devices, though copyright protections may limit output from certain phone applications. For iPhone, a Lightning To HDMI adapter (purchased from Apple) is required, and the black USB (2.4A) must be used for power. For Android, some phones may require a separate HDMI adapter from the phone manufacturer, or a Miracast adapter can be used if the phone supports video casting. The system features two factory micro USB plugs in the dash: a black one for charging and data transfer (used for rear USBs) and a grey one for charging only. The supplied adapter must be plugged into the black micro USB for proper functionality.
The iDatalink Maestro module is crucial for integrating the system with the vehicle's electronics. It requires programming via the Weblink plug-in, where users register an account, enter vehicle information, and flash the module. The system also allows for setting up OEM Aux Switches, with options for LATCHING or MOMENTARY switch types, and a RECALL LAST STATE feature. The power source for these switches can be set to BATTERY (always on) or IGNITION (on with vehicle). Advanced camera features can be configured, allowing users to set Camera 2 as a FRONT or SIDE camera, and assign Camera 1 to FRONT CAMERA, RIGHT LANE WATCH CAMERA, or LEFT LANE WATCH CAMERA.
The manual provides a detailed troubleshooting guide for common issues. For instance, if an iPhone is not working with HDMI, the remedy suggests purchasing an Apple HDMI to Lightning adapter and ensuring the 2A USB power source is used. For Android HDMI issues, using the correct HDMI adapter from the phone manufacturer or a Miracast adapter with reduced resolution settings is recommended. If the iDatalink website reports an invalid serial number, users should confirm the serial number in the i509-WRA-JL settings and contact ADS for verification. Headunit power issues often point to disconnected Maestro data cables, unplugged OBD2 cables, or unconnected monitor/key-harness/main harness. No output from RCAs indicates the Maestro module might be flashed for an amplified system, requiring re-flashing for a non-amplified system. Inability to enter SETTINGS MENU is resolved by engaging and releasing the parking brake twice. Sound muting in reverse can be turned off in the SOUND menu. Incorrect GPS positioning requires checking the antenna route, performing a factory reset, and ensuring the reverse wire is connected. USB connection issues suggest checking the cable connection, using compatible cables, and cleaning the phone's charging port. Volume control problems may be due to the "External Processor" setting being turned on. OEM USBs not charging is typically resolved by ensuring the supplied adapter is plugged into the black micro USB.
The installation process is described as challenging and time-consuming, requiring specialized skills and experience. It is recommended that the product be installed by an Alpine authorized dealer. As a precautionary measure, masking the dashboard and panels is advised to prevent scratches during disassembly. Design and specifications are subject to change without notice for improvement.
| Brand | Alpine |
|---|---|
| Model | i509-WRA-JL |
| Category | Automobile Accessories |
| Language | English |