74-EN
Adjust the up-down position of the
Display unit (iLX-F509A/iLX-F511A)
Adjust the up-down position of the display according to the
mounting position on the vehicle before mounting the
display unit.
Default setting: 0 mm
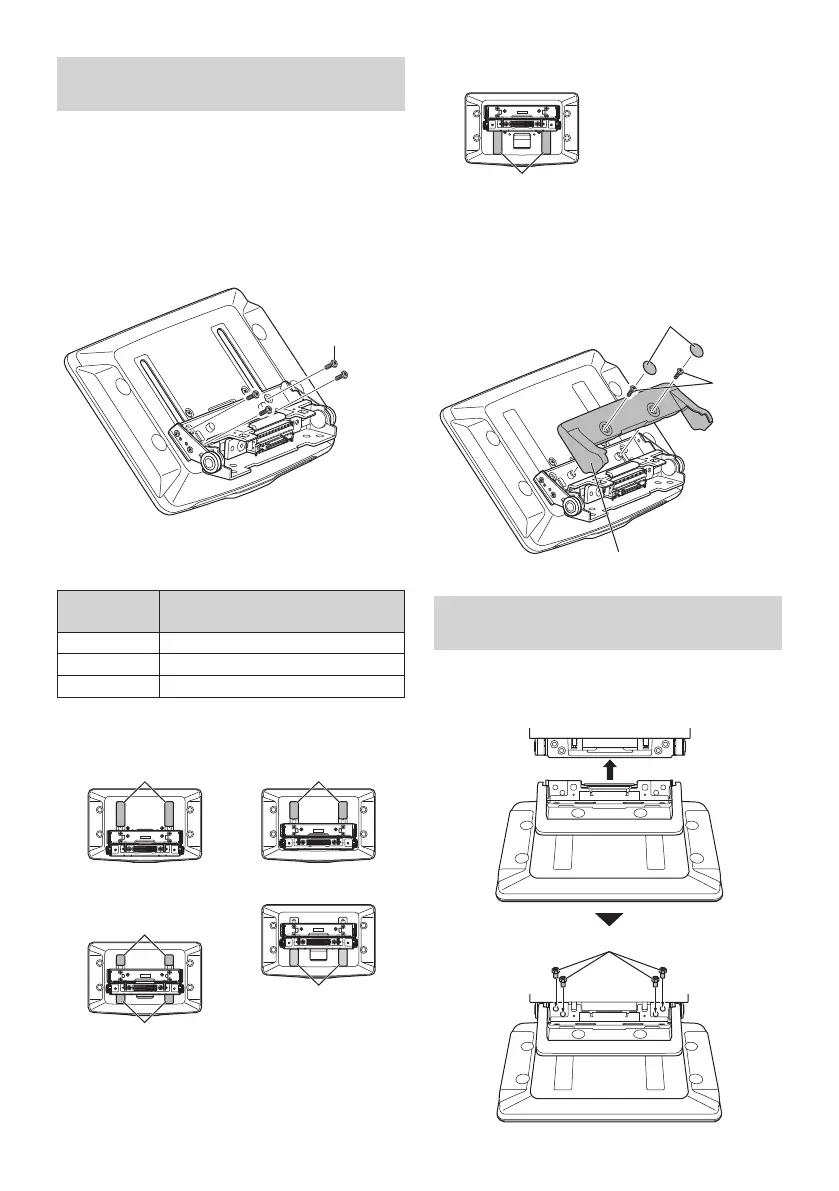
1 Remove the 4 screws on the rear of the
display unit, then adjust the up-down
position.
Screws (M2.6× 8)
2 Attach the Sheet Rear in a position that aligns
with the up-down position of the display unit.
Sheet Rear
(Included)
up-down position
2×50 mm: for up-down position 0 mm or -60 mm
2×35 mm:
for up-down position -15 mm or -45 mm
2×20 mm: for up-down position -30 mm
0 mm
Sheet Rear
(2×50 mm)
-15 mm
Sheet Rear
(2×35 mm)
-30 mm
Sheet Rear
(2×20 mm)
Sheet Rear
(2×20 mm)
-45 mm
Sheet Rear
(2×35 mm)
-60 mm
Sheet Rear
(2×50 mm)
3 Attach the Cover Rear to the rear of the
display unit using 2 screws (M2.6×6).
Secure the screws, then attach the Sheet caps.
Screws
(M2.6× 6)
(Included)
Cover Rear (Included)
Sheet caps
(Included)
Install the display unit (iLX-F509A/
iLX-F511A)
1 Fix the Display unit to the slider of the main
unit using 4 screws (M5×8).
Screws (M5×8) (Included)