pag. 20
MDE/C133 2561 001
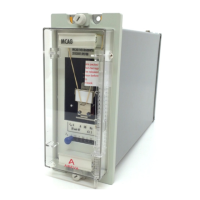
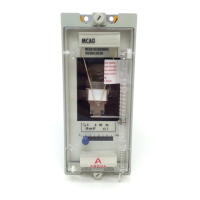
MX3IPG2A
d) By pressing the key ï the new selection is confirmed, and
the system goes back to the main settings change menu. The
following message is displayed:
[SETTINGS IN USE:]
[ SPARE]
6.2.2 Change main settings
a) Press the key
ò or ñ until the following message is
displayed:
[SETTINGS CHANGE]
[MAIN ]
b) By pressing the key ð , you enter the main settings change
sub-menu, which contains all the parameters already listed in
§ 6.1.3.
c) By pressing the keys
ò or ñ, you can vertically scroll the sub-
menu, and by pressing the key ð you can start changing the
displayed parameter. The change can be made by pressing
the keys
ò or ñ .
d) By repeatedly pressing the key ï anywhere in the sub-
menu, you go back to the main changing menu:
[SETTINGS CHANGE]
[MAIN ]
Example of setting
Let us suppose we need to enable and set the rotor ground
threshold R< to 1015 Ohm starting from an initial setting of
990, OFF.
Go through steps a) and b)
Press
ò or ñ until the threshold to be changed is selected on
display:
[
R< OFF]
[R< 0990 Ω ]
Press ð to start changing the selected setting I>>>,the display
unit will show:
[R<
OFF]
[R< 0990 Ω ]
Press
ò or ñ to set it ON and the display will show:
[R<
ON ]
[R< 0990 Ω ]
Press ï to move back to the beginning of the line. Thus, by
pressing
ò, you may move to the second line.
Press ð to select the digit to be changed.
In our case, by pressing 4 times the key ð, the display unit will
show:
[R< ON ]
[R< 099
0 Ω ]
Press ñ to increase the selected numberuntil the value re-
quired by our example is reached:
[R< ON ]
[R< 099
5 Ω ]
Now, by pressing ï you select the third digit making up the
setting, the display unit will show:
[R< ON ]
[R< 09
95 Ω ]
By pressing ñ the digit is changed (on reaching number 9 the
units will increase by 1) until the display unit shows:
[R< ON ]
[R< 10
15 Ω ]
Press ï to move back to the beginning of the line and go back
to the main editing menu:
[SETTINGS CHANGE]
[MAIN ]
Warning:
In the event of the direct rated voltage setting range being
changed, please remember to move the internal jumper
(S20....S23) as follows:
jumper closed setting range
S20 30.00 - 300.00 V
S21 3.00 - 30.00 V
S22 0.30 - 3.00 V
S23 0.03 - 0.30 V
The movement of the jumper causes the setting to be changed,
as the latter is multiplied times 10
d
where d is the distance
between the old and the new jumper, for instance:
old setting
jumper S20
setting range 30-300 V
set Un 165 V
new setting
jumper S23
setting range 0.03-0.30 V
set Un 165 x 10
(20-23)
= 0.16 V
6.2.3 Change spare settings
a) Press the key ò or ñ until the following message is
displayed:
[SETTINGS CHANGE]
[SPARE ]
b) By pressing the key ð , you enter the spare settings change
sub-menu, which contains all the parameters already listed in
§ 6.1.5.
c) By pressing the keys
ò or ñ ,you can vertically scroll the sub-
menu, and by pressing the key ð you can start changing the
displayed parameter. The change can be made by pressing
the keys
ò or ñ .
The settings change procedure mirrors that described in the
example applying to the main settings.
d) By pressing the key ï anywhere in the sub-menu, you go
back to the main settings change menu:
[SETTINGS CHANGE]
[SPARE ]
6.2.4 Set output relays
a) Press the key
ò or ñ until the display shows:
[OUTPUT RELAYS]
[ ]