1
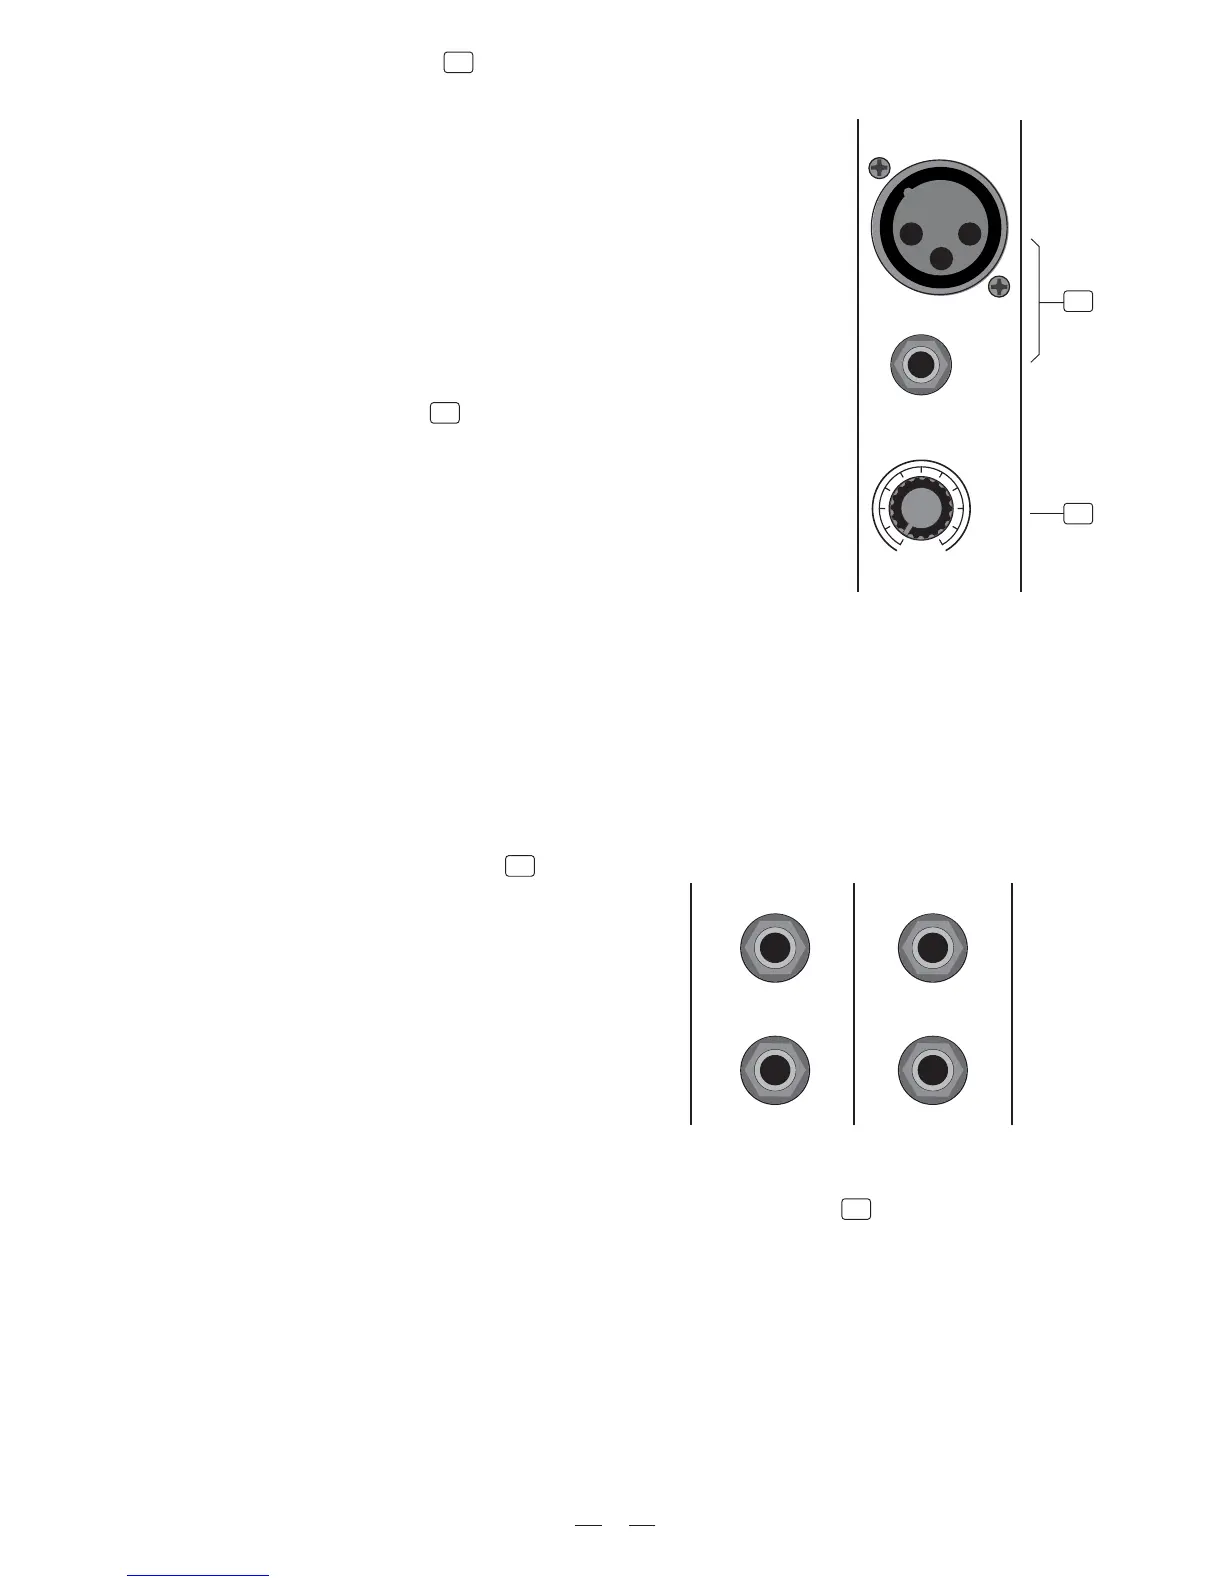
4.1 The MIC/LINE channels
2
4.2 INPUT LEVEL setting
This Control is provided with 2 different indication rings: One is for the Mic-
rophone and the other for the Line levels. When you use a microphone you
shall read the OUTSIDE ring (0-60 dB); When you use a Line level instrument
you shall read the inside ring (+15~-45 dB). For optimum operation you shall
set this control in a way that the peak LED will blink also occasionally in order
to avoid distortion on the input channel.
1
2
These are Channel 1 and Channel 2. You can connect balanced, low impedance
microphones to the XLR socket. ON the 1/4" phone jack you can connect either
a microphone or a line level instrument. You shall never connect an unbalanced
microphone to the XLR socket if you do not want to damage both the Microphone
and the Mixer.
12
3
MIC 1
LINE IN 1
TRIM
BAL OR
UNBAL
BAL OR
UNBAL
+15dB+15dB -45dB-45dB LINE
0dB
0dB 60dB MIC
6
4.1.1 PHANTOM POWER +48 Volts
It is available only on the XLR input sockets.
RIGHT RIGHT
LEFT(MONO)
LEFT(MONO)
LEFT (MONO)
LINE IN 3/4
LINE IN 5/6
3
4.3 STEREO INPUT (CH3~CH6)
Each stereo channel comes with two balanced line
level inputs on 1/4" TRS jacks, for left and right signals.
When only the left input is connected, the channel
operates in mono.
3
 Loading...