Do you have a question about the Amana AGR5330BAS and is the answer not in the manual?
Explains the safety alert symbol, DANGER/WARNING words, and how safety messages are presented.
Provides immediate actions to take when gas odor is detected, emphasizing external communication.
Warns against downward ventilation systems that can cause ignition problems.
Lists required tools and parts for installation, including tools needed and parts supplied/needed.
Specific installation rules for Massachusetts regarding qualified personnel and valve types.
Warns about the risk of the range tipping and the necessity of installing the anti-tip bracket.
Specifies placement for convenient use, enclosure of recessed installations, and avoiding cabinet storage above units.
Outlines specific standards and securing methods required for mobile home installations.
Provides physical dimensions of the range, labeled A, B, C, D.
Warns against improper grounding, adapters, and extension cords, detailing risks of shock, fire, or death.
Specifies grounding requirements, circuit voltage, amperage, and recommended separate circuits.
Discusses the importance of outlet polarization for electronic ignition and GFCI outlet performance.
Emphasizes using approved supply lines, shut-off valves, secure connections, and qualified personnel for LP gas.
Mandates adherence to local codes and national standards like NFGC and CAN/CGA for installation.
Details requirements for rigid pipe, flexible connectors, and manual shut-off valves for gas supply.
States the necessity of using the supplied regulator and specifies inlet pressure requirements for natural and LP gas.
Explains how input ratings are affected by elevation and need for adjustment.
Provides step-by-step instructions for safely unpacking the range, including handling weight and removing packaging.
Details the process of installing the anti-tip bracket to prevent tipping hazards, including floor or wall mounting.
Reiterates safety warnings for gas connections, including approved lines, shut-off valves, and qualified personnel.
Illustrates and describes the steps for connecting the flexible gas connector to the regulator and shut-off valve.
Provides instructions for mounting the anti-tip bracket to the floor or wall, including drilling and securing.
Instructs to locate and check the gas pressure regulator and shut-off valve, ensuring they are in the ON position.
Guides on opening the shut-off valve and testing all connections with leak detection solution for safety.
Repeats warnings about grounding, adapters, and extension cords for electrical connection safety.
Explains how to check if the anti-tip bracket is properly installed and engaged by tilting the range.
Describes how electronic igniters work for cooktop and oven burners and initial flame behavior.
Details how to test cooktop burner ignition, flame size, and color for proper operation.
Provides instructions on how to check and adjust the range to ensure it is level for proper baking performance.
Guides on how to adjust the low flame setting on cooktop burners for optimal performance.
Details how to adjust the oven burner flame by modifying the air shutter for proper combustion.
Explains how to test the oven and broil burner for proper ignition, flame characteristics, and preheating.
Lists final steps including checking parts, tools, packaging disposal, leveling, and cleaning the range.
Provides checks for common issues like fuses, power supply, and gas valve if the range does not operate.
Directs users on how to obtain assistance or service for the range, referencing warranty and dealer contact.
Highlights explosion and tip-over hazards specific to LP gas conversion and required safety precautions.
Adjusts the gas pressure regulator for LP gas by changing the adjustment screw.
Swaps natural gas orifice spuds for LP gas orifice spuds on the surface burners.
Replaces the natural gas oven burner orifice spud with the correct LP gas orifice spud.
Outlines final steps for LP gas conversion, including connecting supply and checking flames.
Highlights explosion and tip-over hazards specific to Natural gas conversion and required safety precautions.
Adjusts the gas pressure regulator for Natural gas by changing the adjustment screw.
Swaps LP gas orifice spuds for Natural gas orifice spuds on the surface burners.
Replaces the LP gas oven burner orifice spud with the correct Natural gas orifice spud.
Outlines final steps for Natural gas conversion, including connecting supply and checking flames.
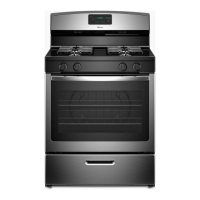
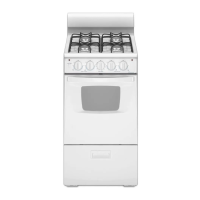
This manual describes the installation, operation, and maintenance of a 30" (76.2 cm) freestanding gas range. It provides comprehensive instructions for ensuring safe and efficient use, covering everything from initial setup to gas conversions and troubleshooting. The range is designed for residential cooking, offering both cooktop and oven functionalities powered by natural gas or LP gas, depending on the configuration.
The freestanding gas range serves as a primary cooking appliance for residential kitchens. It features a cooktop with multiple burners for surface cooking and an oven for baking, roasting, and broiling. The cooktop burners utilize an electronic ignition system, eliminating the need for standing pilots. When a cooktop control knob is turned to the IGNITE position, the system generates a spark to light the burner. This sparking continues until the knob is set to the desired flame intensity. For oven operation, a hot surface igniter heats to a bright orange and then ignites the gas, with no sparking occurring during this process. The glow bar remains active while the oven burner operates to maintain the set temperature. The range is equipped with a gas pressure regulator to ensure proper gas flow and pressure for optimal burner performance. It also includes an anti-tip bracket, a crucial safety feature designed to prevent the range from tipping over, which could lead to serious injury or death.
The range is designed for ease of use and safety. For cooktop operation, users simply push in and turn the control knob to the IGNITE position to light a burner. Once lit, the knob can be adjusted to achieve the desired flame height, from HI to LO. The manual provides guidance on checking for proper flame characteristics, noting that a correct flame should have a distinct blue inner cone and a less distinct outer cone. For oven use, the electronic control panel allows users to select functions like Bake or Broil and set the desired temperature. The oven preheats, and the burner cycles on and off to maintain the set temperature. The manual emphasizes the importance of proper burner cap and grate placement on the cooktop to ensure correct ignition and flame distribution.
A key usage feature is the ability to convert the range between natural gas and LP gas. This conversion process involves replacing specific orifice spuds for both the cooktop and oven burners and adjusting the gas pressure regulator. The manual provides detailed, step-by-step instructions for these conversions, highlighting the need for a qualified service technician to perform these tasks to ensure safety and proper operation.
The range also incorporates several safety features. The anti-tip bracket is a critical component that must be securely installed to the floor or wall. Users are instructed to verify that the rear range foot is engaged in the bracket's slot by gently attempting to tilt the range forward. If resistance is met, the bracket is engaged. If the range lifts more than 1/2" (1.3 cm) without resistance, the bracket is not properly engaged, and the range should not be operated until the issue is resolved. The manual also stresses the importance of using a new CSA International approved gas supply line and installing a manual shut-off valve that is easily accessible. All gas connections must be securely tightened and tested for leaks using a noncorrosive leak-detection solution.
Electrical safety is also addressed, requiring the range to be plugged into a grounded 3-prong outlet. Users are warned against removing the ground prong, using adapters, or extension cords, as these actions could lead to electrical shock. The electronic ignition system requires proper grounding and polarity for correct operation, and the manual advises checking that the outlet provides 120-volt power and is correctly grounded.
The manual provides instructions for basic maintenance and checks to ensure the range continues to operate safely and efficiently. After installation and gas connection, users are instructed to test all gas connections for leaks using a leak-detection solution. Bubbles indicate a leak, which must be corrected immediately.
For cooktop burners, the manual guides users on how to adjust the low flame setting if needed. This involves removing the control knob and using a flat-blade screwdriver to turn a valve adjusting screw until the smallest stable flame is achieved. Proper flame characteristics for both high and low settings are described to help users identify if adjustments are necessary.
For the oven burner, the manual explains how to check for proper flame and adjust the air shutter if the flame is not ideal. The correct oven flame should be about 1/2" (1.3 cm) long with a bluish-green inner cone and a clean, soft outer mantle, free from yellow tips or signs of blowing. After any adjustments, the shutter screw must be tightened.
General maintenance includes cleaning the range. The manual suggests using a mild solution of liquid household cleaner and warm water to remove any waxy residue from shipping materials, followed by drying with a soft cloth. It also advises users to regularly check that the range is level for satisfactory baking performance.
The manual emphasizes the importance of professional service for gas conversions and any complex repairs. It directs users to consult a qualified installer, service agency, or the gas supplier for such tasks. It also recommends saving the installation instructions for future reference, along with the Use and Care Guide, which contains additional information on range operation and troubleshooting. The range's model/serial rating plate, located on the left side of the bottom of the broiler, provides crucial information about the types of gas the appliance can use and should be consulted before any gas conversion attempts.
| Type | Freestanding Range |
|---|---|
| Fuel Type | Gas |
| Number of Burners | 5 |
| Oven Capacity | 5.0 cu. ft. |
| Self-Cleaning | No |
| Cooktop Surface | Porcelain |
| Oven Type | Conventional |
| Color | Black |
| Ignition Type | Electronic |
| Warranty | 1 Year Limited |
| Width | 30 inches |