EasyManua.ls Logo

Amana AER5630BAS - User Manual

Amana AER5630BAS
16 pages
Print Icon
To Next Page IconTo Next Page
Loading...
INSTALLATION INSTRUCTIONS
30" (76 CM) FREESTANDING ELECTRIC RANGES
Table of Contents
RANGE SAFETY ..................................................................................2
INSTALLATION REQUIREMENTS.....................................................3
Tools and Parts.................................................................................3
Location Requirements.....................................................................3
Electrical Requirements - U.S.A. Only..............................................5
INSTALLATION INSTRUCTIONS.......................................................6
Unpack Range ..................................................................................6
Install Anti-Tip Bracket......................................................................6
Electrical Connection - U.S.A. Only..................................................8
Verify Anti-Tip Bracket Is Installed and Engaged...........................12
Level Range ....................................................................................13
Warming Drawer or Premium Storage Drawer...............................13
Storage Drawer...............................................................................14
Oven Door.......................................................................................14
Complete Installation ......................................................................14
Moving the Range...........................................................................15
IMPORTANT:
Save for local electrical inspector's use.
W10403811C
Question and Answer IconNeed help?

Do you have a question about the Amana AER5630BAS and is the answer not in the manual?

Summary

RANGE SAFETY

Tip Over Hazard

A child or adult can tip the range and be killed. Install anti-tip bracket.

Verify Anti-Tip Bracket Installation

Steps to visually check if the anti-tip bracket is securely attached and engaged.

Electrical Requirements - U.S.A. Only

Grounding and Wiring Compliance

Discusses grounding conductor, wire gauge, and NEC compliance.

Range Power Rating and Cord Specification

Details power requirements, cord ratings, and circuit protection.

INSTALLATION INSTRUCTIONS

Install Anti-Tip Bracket

Instructions for mounting the anti-tip bracket to the floor or wall.

Electrical Connection - U.S.A. Only

Power Supply Cord Connection

Steps for connecting a power supply cord, including strain relief.

Direct Wire Connection

Steps for direct wiring the range, including strain relief.

Electrical Connection Options

3-Wire Power Supply Cord Connection

Direct Wire Installation - Copper or Aluminum Wire

3-Wire Direct Wire Installation

Verify Anti-Tip Bracket Installation and Engagement

For Storage Drawer Models

Steps to verify anti-tip bracket installation for ranges with a storage drawer.

For Warming Drawer Models

Steps to verify anti-tip bracket installation for ranges with a warming drawer.

Complete Installation Checklist

Overview

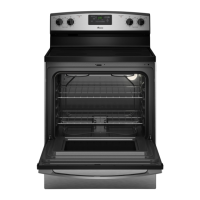
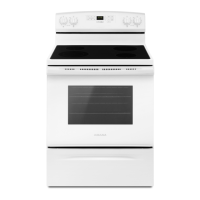
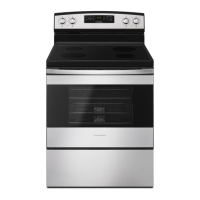
This document provides installation instructions for 30" (76 cm) freestanding electric ranges. It covers safety information, installation requirements, detailed installation steps, and maintenance features.

Function Description:

This manual guides users through the proper installation of a freestanding electric range, ensuring safe and efficient operation. It details the process from unpacking the appliance to making electrical connections, installing the anti-tip bracket, leveling the range, and verifying the installation. The instructions are designed to prevent hazards such as electric shock and tip-over, and to ensure the range functions correctly within specified clearances and electrical parameters.

Important Technical Specifications:

  • Dimensions:
    • Max. depth with handle: 27¾" (70.5 cm)
    • Max. overall height with leveling legs screwed all the way in: 46⅞" (119.1 cm)
    • Max. cooktop height with leveling legs screwed all the way in: 36" (91.4 cm)
    • Width: 29⅞" (75.9 cm)
    • Depth (back of range to front of cooktop): 25⁵⁄₁₆" (64.3 cm)
  • Cabinet Opening Dimensions:
    • Countertop depth: 25" (64.0 cm)
    • Base cabinet depth: 24" (61.0 cm)
    • Countertop height: 36" (91.4 cm)
    • Min. opening width: 30" (76.2 cm)
    • Min. opening width (at top of cooktop): 30⅛" (76.5 cm)
    • Max. upper cabinet depth: 13" (33.0 cm)
    • Outlet location: 8" (20.3 cm) to 22" (55.9 cm) from either cabinet, 5½" (14.0 cm) max. from floor.
  • Electrical Requirements (U.S.A. Only):
    • Voltage and Frequency: Range must be connected to the proper electrical voltage and frequency as specified on the model/serial rating plate.
    • Power Supply Cord:
      • 3-wire system: UL listed, 3-wire, 250-volt, 40- or 50-amp range power supply cord (pigtail) with 3 copper conductors, ring or open-end spade terminals, terminating in a NEMA Type 10-50P plug. Uses a 3-wire receptacle of NEMA Type 10-50R.
      • 4-wire system: UL listed, 4-wire, 250-volt, 40- or 50-amp range power supply cord (pigtail) with 4 copper conductors, ring or open-end spade terminals, terminating in a NEMA Type 14-50P plug. Uses a 4-wire receptacle (NEMA Type 14-50R). The fourth (grounding) conductor must be green or green/yellow, and the neutral conductor white. Cord should be Type SRD or SRDT, at least 4 ft (1.22 m) long.
    • Direct Wire Connection:
      • 8 gauge copper or 6 gauge aluminum wire.
      • Wire sizes and connections must conform to the range rating.
      • A UL listed conduit connector must be provided at each end of the power supply cable.
      • Allow 2 to 3 ft (61.0 cm to 91.4 cm) of slack in the line.
    • Circuit Protection: A circuit breaker is recommended.
    • Range Rating Chart:
      • 120/240 Volts: 8.8-16.5 KW (40 or 50 Amps), 16.6-22.5 KW (50 Amps)
      • 120/208 Volts: 7.8-12.5 KW (40 or 50 Amps), 12.6-18.5 KW (50 Amps)
  • Anti-Tip Bracket: Must be securely mounted to floor or wall with #12 x 1⅝" screws. V-notch of bracket should be 12⁹⁄₁₆" (31.9 cm) from centerline.
  • Wood Cabinet Temperatures: Oven designed to comply with maximum allowable wood cabinet temperatures of 194°F (90°C).
  • Mobile Home Installation: Must conform to the Manufactured Home Construction and Safety Standard, Title 24 CFR, Part 3280. Requires securing the range to the floor and using a four-wire power supply cord or cable.

Usage Features:

  • Anti-Tip Bracket: Essential safety feature to prevent the range from tipping over. It must be installed to the floor or wall and the rear range foot must be engaged in its slot. Re-engagement is required if the range is moved.
  • Leveling Legs: Allow for adjustment of the range height by approximately 1" (2.5 cm) to ensure it is level. Leveling is crucial for satisfactory baking performance and optimal cleaning results, especially for AquaLift® Technology and Steam Clean functions.
  • Storage Drawer/Warming Drawer/Premium Storage Drawer: Instructions are provided for removing and replacing these drawers for installation and maintenance purposes.
  • Oven Door Removal: Detailed steps for removing and reinstalling the oven door, useful for cleaning or service. The door is heavy and requires careful handling.

Maintenance Features:

  • Cleaning: After installation, a mild solution of liquid household cleaner and warm water is recommended to remove waxy residue from shipping materials.
  • Troubleshooting: The manual advises checking for common issues if the range does not operate, such as tripped circuit breakers, proper grounding, and electrical connections. It also mentions specific error codes (e.g., "F9" or "F9, E0") that indicate potential electrical wiring problems.
  • Moving the Range: Instructions for safely moving the range for cleaning or maintenance, emphasizing the need to disengage and re-engage the anti-tip bracket and disconnect/reconnect power. When moving, it's recommended to slide the range onto cardboard or hardboard to protect floor coverings.
  • Access to Components: Instructions for removing the terminal block cover to access electrical connections for wiring.
  • Strain Relief: Details on installing strain relief for both power supply cords and direct wire connections to protect electrical wiring.

Amana AER5630BAS Specifications

General IconGeneral
BrandAmana
ModelAER5630BAS
CategoryRanges
LanguageEnglish

Related product manuals