Do you have a question about the Amana AER6303MFW and is the answer not in the manual?
Explains the anti-tip bracket mechanism and safety precautions.
Instructions for setting the clock on the appliance.
Instructions for setting and canceling the oven timer.
How to initiate oven functions and timing.
How to stop oven functions and timers.
Adjusting temperature and time settings for oven functions.
Instructions for the self-cleaning cycle.
Overview of the electronic oven control panel features.
How to adjust oven temperature for personalized cooking.
Instructions and precautions for the self-cleaning cycle.
General cleaning methods for various range surfaces.
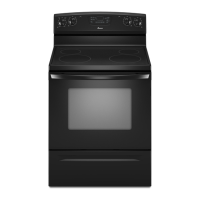
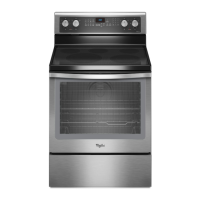
This document provides user instructions for an Amana electric range, covering its functions, usage, and maintenance.
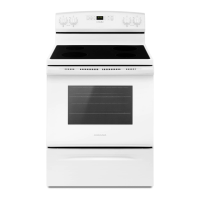
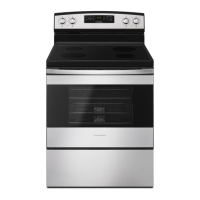
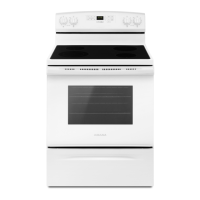
The Amana electric range is designed for cooking, baking, roasting, and broiling. It features a cooktop with multiple heating elements and an oven cavity. The range offers various cooking modes, including Bake, Broil, and Warm, and includes a Self-Cleaning cycle for oven maintenance. Some models may feature a Sabbath Mode, which allows the oven to remain on in a Bake setting until turned off, with specific control limitations to comply with religious observances. The range also includes a timer function for setting cooking durations and a clock display.
The cooktop elements are controlled by knobs that can be set anywhere between HI and LO. For optimal performance and safety, it is recommended to use flat-bottomed cookware that is about the same size as the surface cooking area, not extending more than 1/2" (1.3 cm) beyond the element. Cookware material affects heat transfer; aluminum heats quickly and evenly, cast iron heats slowly and evenly, ceramic or ceramic glass heats slowly but unevenly, copper heats very quickly and evenly, and porcelain enamel-on-steel or cast iron performs similarly to stainless steel or cast iron. The cooktop includes an On indicator light that glows when any element is active. Ceramic glass models also feature a Hot Surface indicator light, which remains on as long as any cooking area is too hot to touch. Dual Zone and Melt cooking elements, available on some models, offer flexibility for different cookware sizes and cooking needs, from boiling liquids to maintaining low temperatures for sauces.
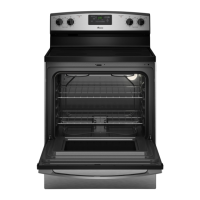
The oven features electronic controls for various functions. The display shows the time of day when not in use and flashes after power-up or a power loss. Keypress tones provide audible feedback, with one tone for valid presses and preheating completion, and three tones for invalid presses. The oven temperature can be set in Fahrenheit or Celsius and adjusted to personalize cooking needs, with a range of 30°F (18°C) above or below the default setting. The Temperature Management System electronically regulates oven heat levels during preheat and bake cycles to maintain consistent temperatures. The oven light can be turned on or off manually and automatically illuminates when the oven door is opened. For baking and roasting, racks should be positioned before preheating, allowing 2" (5 cm) of space around bakeware for even air circulation. Broiling requires preheating the oven for 5 minutes and positioning food on a broiler pan and grid in the center of the oven rack, with the oven door closed for proper temperature. The oven vent, located on the cooktop, releases hot air and moisture and should not be blocked.
Regular cleaning is essential for maintaining the range. Before cleaning, ensure all controls are OFF and the oven and cooktop are cool. Soap, water, and a soft cloth or sponge are generally recommended.
Food spills containing acids should be cleaned as soon as the range cools to prevent finish damage. Mild liquid cleaner or nonabrasive scrubbing pads are suitable.
To avoid damage, do not use abrasive cleaners, steel-wool pads, or gritty cloths. Cleaning should be done in the direction of the grain.
Abrasive cleaners, bleach, rust removers, ammonia, or sodium hydroxide should not be used as they may stain the paint.
The cooktop should be cleaned after each use to prevent permanent damage and make soil removal easier. A cooktop scraper is recommended for stubborn soils, especially for sugary spills that can adhere to the surface. Abrasive cleaners, cleaning pads, or harsh chemicals should be avoided.
To clean the control knobs, pull them straight off the control panel and wash with soap and water. Do not use abrasive cleaners or soak the knobs.
Glass cleaner and a soft cloth or sponge are suitable for cleaning the control panel and oven door exterior. Abrasive cleaners, steel-wool pads, or gritty cloths should not be used.
Coil elements should be cool and the control knobs OFF before cleaning. They should not be immersed in water; soil will burn off when hot.
Burner bowls should be removed and washed frequently in warm, soapy water. Mild abrasive cleaners and plastic scrubbers can be used for stubborn stains.
The coil cooktop can be lifted to provide access for cleaning underneath. Glass cleaner, mild liquid cleaner, or nonabrasive scrubbing pads are recommended.
Oven racks can be cleaned with a steel-wool pad. A light coating of vegetable oil on the rack guides can help them slide more easily if they become discolored or harder to move.
The storage drawer should be cool and empty before cleaning with mild detergent.
For models without a Self-Cleaning cycle, food spills should be cleaned when the oven cools. For models with a Self-Cleaning cycle, the oven cavity should not be cleaned with commercial oven cleaners.
This cycle heats the oven to a high temperature to burn off food soils. Before starting, all oven racks, bakeware, and plastic items from the cooktop should be removed. The oven door gasket should not be cleaned or damaged. The cycle duration can be adjusted, and the oven door will lock automatically during the process. After the cycle, once the oven has cooled, ash can be removed with a damp cloth.
The oven light is a standard 40-watt appliance bulb. To replace it, unplug the range, turn the glass bulb cover counterclockwise to remove, then turn the bulb counterclockwise to remove it from the socket. Replace with a new bulb and reattach the cover.
| Type | Freestanding |
|---|---|
| Oven Capacity | 5.0 cu. ft. |
| Number of Burners | 4 |
| Self-Cleaning | Yes |
| Color | White |
| Fuel Type | Electric |
| Width | 30 in |
| Control Type | Electronic |