Do you have a question about the Amana AER5830VAB and is the answer not in the manual?
Information on preventing the range from tipping over.
General safety precautions to reduce risks of fire, shock, injury, or damage.
Overview of oven display, tones, and basic functions.
Instructions for bake, roast, broil, and rack positioning.
Detailed instructions and safety precautions for the self-cleaning cycle.
Solutions for power, control, and general non-operation.
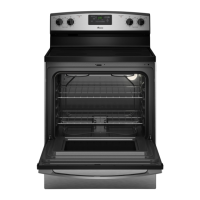
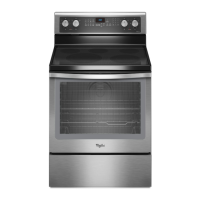
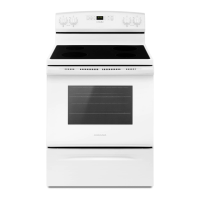
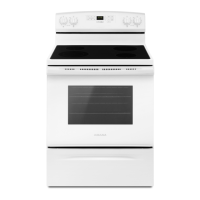
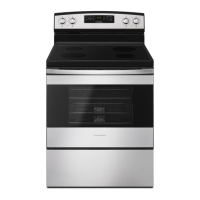
This document provides user instructions for an Amana electric range, covering its functions, usage, and maintenance.
The Amana electric range is designed for cooking food using both a cooktop and an oven. The cooktop features various heating elements, including ceramic glass surfaces (on some models) and coil elements with burner bowls (on others), offering flexibility for different cooking needs. Some ceramic glass models include a Dual Cooking Zone, allowing for single or dual element use depending on cookware size. The oven offers multiple cooking modes such as Bake, Broil, Warm, and Timed Cooking. Certain models are equipped with a Self-Cleaning cycle for convenient oven maintenance and a Sabbath Mode, which allows the oven to remain on in a Bake setting for an extended period, compliant with Sabbath observance. The range also includes an electronic oven control system with a clock, timer, and oven control lockout feature for safety.
Cooktop Use: The cooktop controls are knobs that can be set anywhere between High (HI) and Low (LO). For ceramic glass models, the surface cooking area glows red when an element is on and cycles on and off to maintain the selected heat level. It's recommended to use cookware about the same size as the surface cooking area, not extending more than 1/2" (1.3 cm) outside the area. A Cooktop On indicator light (on some models) glows when any control knob is turned on. For coil element models, elements should be level for optimal cooking, and clean burner bowls reflect heat back to cookware. The Dual Cooking Zone allows users to select between a single element for smaller cookware or a dual element for larger cookware.
Oven Use: The electronic oven controls feature a display that flashes after power-up or loss, showing the time of day when not in use. Tones provide audible signals for basic functions (valid pad press, preheated oven, function entered, end-of-cycle reminders), invalid pad presses, and end-of-cycle. The oven temperature can be adjusted in 10°F (5° or 6°C) increments between 30°F (17°C) and -30°F (-17°C) to personalize cooking needs. The temperature scale can be switched between Fahrenheit and Celsius.
Baking and Roasting: To bake, press BAKE, set the desired temperature using the TEMP/HOUR "More" or "Less" arrow pads (between 170°F and 525°F in 5° increments), and press START. The oven preheats, and a tone sounds when the set temperature is reached. For roasting, it's not necessary to wait for the preheat cycle to end unless specified by the recipe.
Broiling: To broil, position cookware in the oven and close the door to the broil stop position (approximately 5" open). Press BROIL, set the temperature using the TEMP/HOUR "More" or "Less" arrow pads (between 300°F and 525°F in 5° increments), and press START. For best results, a broiler pan and grid are recommended to drain juices and reduce spatter and smoke.
Timed Cooking (on some models): This feature allows the oven to turn on at a specific time, cook for a set duration, and/or shut off automatically. It can be used for a Timed Cook (oven turns on and off after a set time) or a Delayed Timed Cook (oven starts at a set time and cooks for a set duration). Delay start should not be used for foods that may not bake properly.
Sabbath Mode (on some models): This mode keeps the oven on in a Bake setting until manually turned off. The Oven Control Lockout Feature is disabled, no tones sound, the display doesn't show temperature, and the Kitchen Timer Mode is canceled. Only the "+", "-", "More", "Less", and CANCEL pads function. The oven light's state (on/off) is determined upon entering Sabbath Mode and remains that way throughout the period. The oven temperature can be adjusted by 25°F (14°C) increments while in Sabbath Mode, without display changes or sounds.
Oven Racks and Bakeware: Racks should be positioned before turning on the oven and not moved with bakeware on them. For even cooking, allow 2" (5 cm) of space around bakeware and oven walls, ensuring no bakeware piece is directly over another. Multiple rack cooking is supported, with specific recommendations for baking layer cakes on two racks.
Oven Vent: The oven vent releases hot air and moisture and should not be blocked or covered to ensure proper air circulation, cooking, and cleaning results.
General Cleaning: Before cleaning, ensure all controls are off and the oven and cooktop are cool. Always follow label instructions on cleaning products. Soap, water, and a soft cloth or sponge are generally suggested.
Exterior Porcelain Enamel Surfaces (on some models): Food spills containing acids (e.g., vinegar, tomato) should be cleaned as soon as the range is cool to prevent finish damage. Use glass cleaner, mild liquid cleaner, or a nonabrasive scrubbing pad.
Stainless Steel (on some models): To avoid damage, do not use soap-filled scouring pads, abrasive cleaners, steel-wool pads, or gritty washcloths. Rub in the direction of the grain. Liquid detergent or an all-purpose cleaner, followed by rinsing and drying with a lint-free cloth, is recommended.
Metallic Paint (on some models): Avoid abrasive cleaners, cleaners with bleach, rust removers, ammonia, or sodium hydroxide (lye) as they may stain the paint surface.
Ceramic Glass (on some models): Clean the cooktop after each use to prevent scratches, pitting, and abrasions, and to condition the glass surface. Use ceramic glass cooktop cleaner and a cooktop scraper for stubborn soils. Do not use abrasive cleaners, cleaning pads, or harsh chemicals. For sugary spills, scrape them off while the cooktop is still warm, wearing oven mitts. Metal marks from aluminum and copper should be cleaned as soon as the cooktop cools.
Cooktop Controls: To prevent damage, do not use steel wool, abrasive cleansers, or oven cleaner. Knobs should not be soaked and must be in the OFF position when replaced.
Control Panel and Oven Door Exterior: Avoid abrasive cleaners, steel-wool pads, gritty washcloths, or abrasive paper towels. Use glass cleaner applied to a soft cloth or sponge (not directly on the panel).
Coil Elements (on some models): Clean with a damp cloth, ensuring control knobs are off and elements are cool. Do not clean or immerse in water.
Burner Bowls (on some models): Before removing or replacing coil elements and burner bowls, ensure they are cool and control knobs are in the OFF position. Wash chrome burner bowls frequently in warm, soapy water. For heavily soiled bowls, place an ammonia-soaked paper towel on stains for a short time, then gently scrub with a plastic scrubber.
Surface Under Cooktop (on some models): The coil cooktop lifts up for easy access for cleaning underneath. Use glass cleaner, mild liquid cleaner, or a nonabrasive scrubbing pad.
Oven Cavity: Food spills should be cleaned when the oven cools to prevent staining, etching, pitting, or faint white spots. A nonabrasive plastic scrubbing pad and mildly abrasive cleanser can be used on a cool cavity. Follow package directions if using commercial oven cleaners.
Oven Racks: Clean with a steel-wool pad. For discolored or hard-to-slide racks, apply a light coating of vegetable oil to the rack guides.
Storage Drawer: Ensure the storage drawer is cool and empty before cleaning. Clean with mild detergent.
Oven Light: The oven light is a standard 40-watt appliance bulb. Before replacing, ensure the oven and cooktop are cool and control knobs are in the off position. To replace, unplug the range, turn the glass bulb cover counterclockwise, remove the bulb counterclockwise, replace with a new bulb, turn the bulb cover clockwise, and then plug in the range or reconnect power.
Self-Cleaning Cycle (on some models): This cycle uses high temperatures to burn off soil. Before starting, remove the broiler pan, grid, cookware, bakeware, cooking utensils, oven racks, and aluminum foil. Clean the inside door edge and the 11/2" (3.8 cm) area around the inside oven cavity frame with a damp cloth, being careful not to move or bend the gasket. Remove plastic items from the cooktop and all items from the storage drawer. Ensure the oven door is completely closed for the cycle to begin. After the cycle, once the oven has completely cooled, remove ash with a damp cloth. Do not apply a cool damp cloth to the inner door glass before it has completely cooled to avoid breaking the glass. The cycle can be stopped at any time by pressing CANCEL. The oven light will not function during the self-cleaning cycle. Some models offer adjustable clean times (2 hours 30 minutes to 4 hours 30 minutes) or HI/LO settings (4 hours 30 minutes for HI, 3 hours 30 minutes for LO).
| Type | Freestanding |
|---|---|
| Fuel Type | Electric |
| Width | 30 in |
| Number of Burners | 4 |
| Oven Capacity | 5.3 cu. ft. |
| Oven Type | Single |
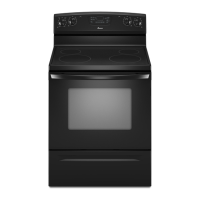
| Color | Black |
| Self-Cleaning | Yes |
| Convection Oven | No |
| Warming Drawer | No |
| Range Type | Electric |
| Control Type | Electronic |