Installation & Operation Guide Page 11 of 48
4. Mark the location of the bottom holes.
5. Install the screws or anchors for the bottom-mounting holes and secure the back plate to the wall.
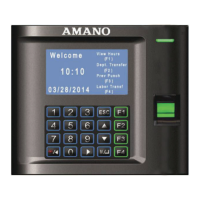
6. Slide the terminal onto the two latches located at the top of the mounting plate. Secure the reader to the mounting plate
by inserting and tightening the screw located at the bottom of the unit.
7. Your terminal is now mounted to the wall and ready to connect the data and power lines.
Communication Connections
A connection between your Host PC with Time Guardian and the MTX-30 terminal(s) is/are based upon your setup.
USB Connection (Direct Connect)
You should use the Amano CommStik™ [part number AUS-10035x] (50 foot 4-pin Molex to USB) Communications Cable
(included) to interface with the host PC and Time Guardian.
Figure 0-2 Serial Direct
Connection with CommStik
Ethernet Connection (Network)
Networked terminals can be connected to a standard 10Base-T or 100BaseTX computer network. In addition, each
networked terminal can have a group of up to 29 serial terminals connected via RS-485.
Figure 0-3 Networked Terminal(s)
Time & Attendance
Software
PC Host
 Loading...