8
Assembly
Step 4:
The product features a timer, which lets the
user to set an automatic switch off time. You
can choose from 0.5 to 7.5 hours.
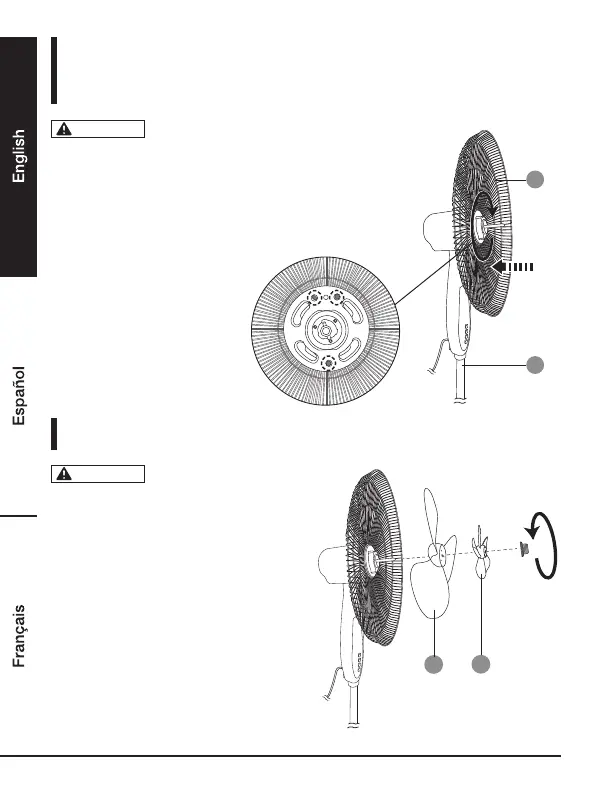
• Connect the rear guard (B) with the main unit (E). Align the rear
guard’s small round holes with the 3 pins on the main unit’s
front.
• Secure the rear guard (B) with the fixing ring.
Step 5:
Remove the plastic tube
from the shaft before
installing the blades (C)
and (D).
• Place the large blade (C) on the shaft. Align
the cross pin on the shaft with the groove
on the rear side of the large blade (C).
• Place the small blade (D) on the shaft.
Align the pin on the rear side of the small
blade with one of the three holes on the
large blade (C).
• Hold the large blade (C) with one
hand and screw on the cap nut in the
counter-clockwise direction to secure the
blades.
C
D
B
E
NOTICE
NOTICE