EN
9
8.4 Switching on/o
NOTICE Avoid blocking the air intake or exhaust vents
of the appliance. Ensure that these areas are free from any
obstructions, such as dust, debris, or fabric.
NOTICE The appliance is equipped with overheat
protection for the battery pack. It automatically shuts down
when the appliance internally becomes hot. Wait for the
appliance to cool down before using again.
1. Press the
button (C) to switch the appliance on.
2. Press the Mode button (B) to select the desired suction
power (Low/ Medium/ High).
3. After use, press the
button (C) to switch the appliance o.
9. Cleaning and Maintenance
NOTICE
» Switch the appliance o before cleaning.
» During cleaning do not immerse the appliance in water or
other liquids. Never hold the appliance under running water.
9.1 Cleaning
» To clean the appliance, wipe with a soft, slightly damp cloth.
» Wipe the appliance dry after cleaning.
» Never use corrosive detergents, wire brushes, abrasive
scourers, metal or sharp utensils to clean the appliance.
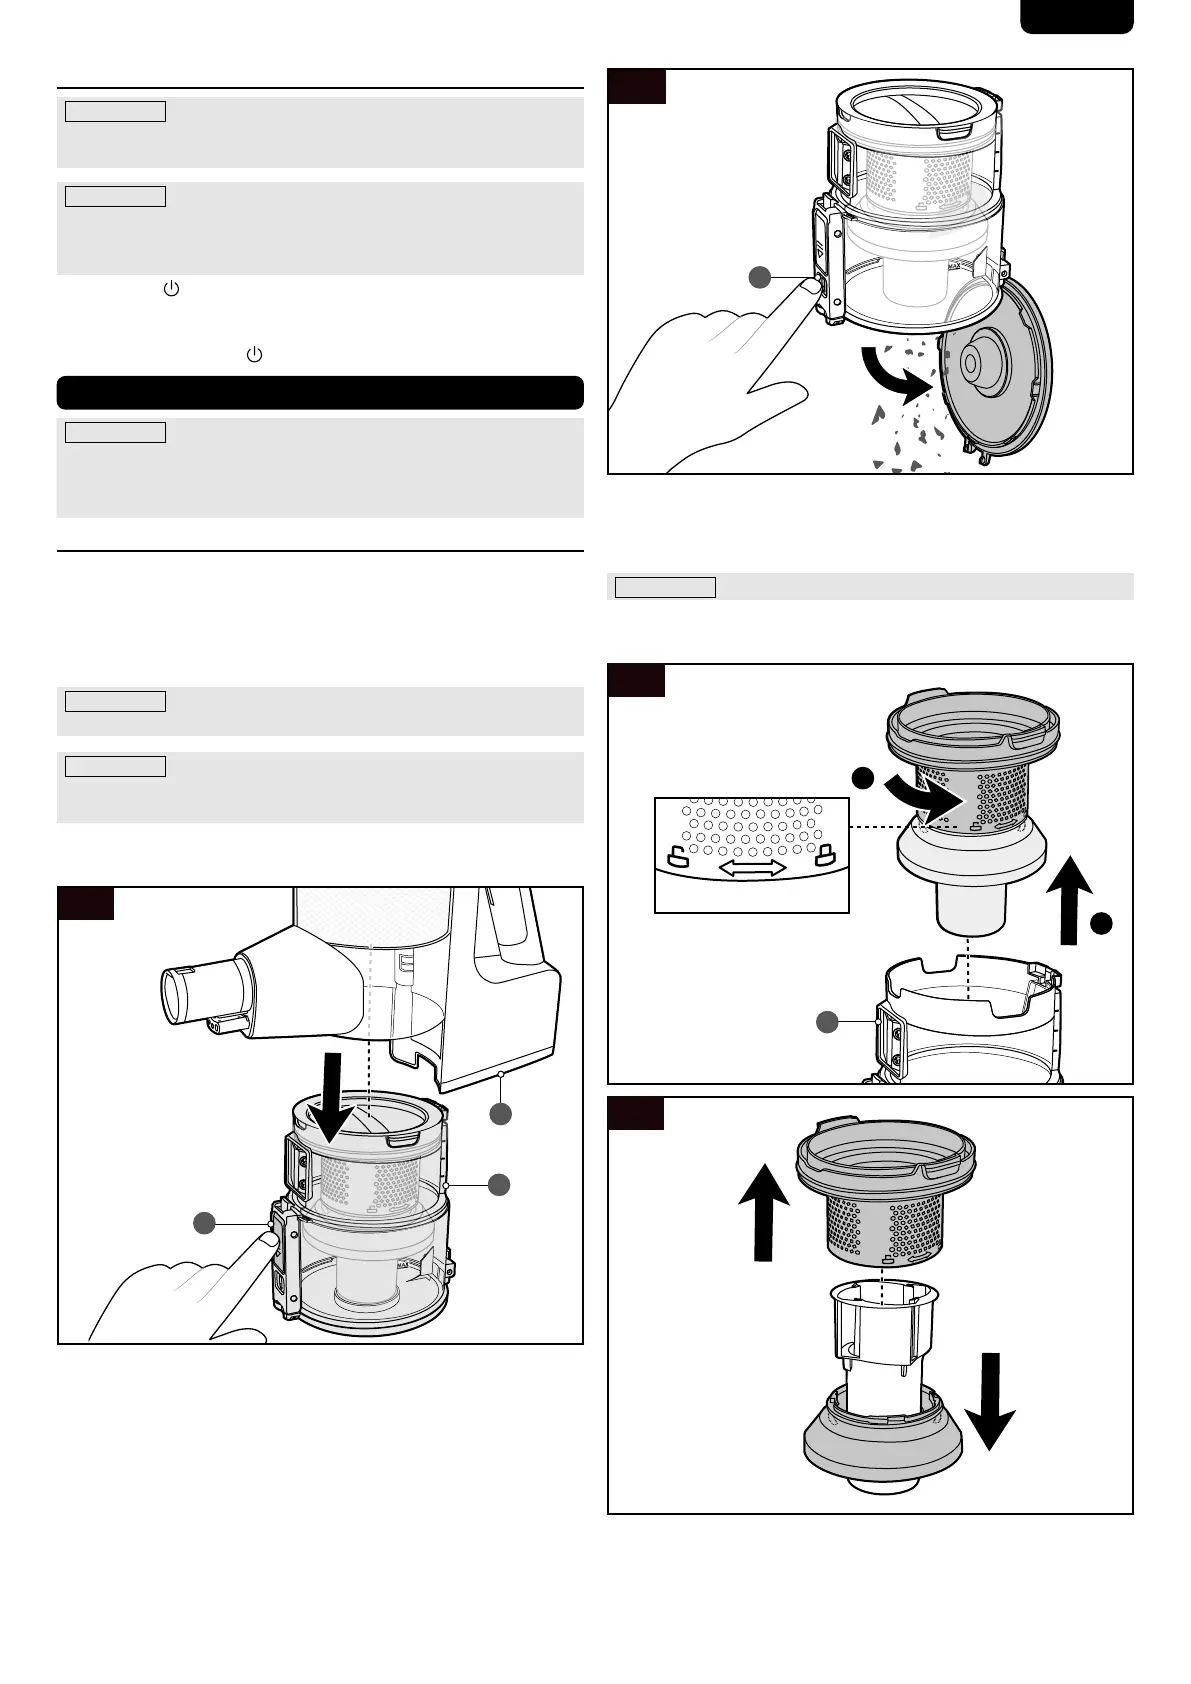
9.1.1 Emptying the dust container
NOTICE Empty the dust container (E) when the amount of
dust has reached the MAX marking.
NOTICE For a quick way to clear trash, hover the
appliance on top of a trash bin and press the lid release
button (F) to dispose of the contents in the dust container (E).
1. Press the dust container release button (G) to detach the
dust container (E) from the main unit (D) (Fig. 9).
9
E
D
G
2. Hover the dust container (E) on top of a trash bin. Press the
lid release button (F) to dispose of the contents in the dust
container (E) (Fig. 10).
10
F
3. Close the cover of the dust container (E). Ret the dust
container (E) to the main unit (D).
9.1.2 Cleaning the dust container
NOTICE Empty the dust container (E) before cleaning it.
1. Disassemble the lter parts from the dust container (E)
(Fig. 11 and 12).
11
1
2
E
12
2. Clean the lter parts and the dust container (E) using water
and mild detergent.
3. Dry the parts thoroughly before reassembling and retting
to the main unit (D).