4
MEASUREMENT WITH OUTER
CASE REMOVED
• When you replace the magnetron, measure
for microwave energy leakage before the
outer case is installed and after all necessary
Special care should be taken in measuring the
following parts :
- Around the magnetron
- The waveguide
WARNING: AVOID
CONTACTING ANY HIGH
VOLTAGE PARTS
MEASUREMENT WITH A FULLY
ASSEMBLED OVEN
• After all components, including the outer
case, are fully assembled, measure for
microwave energy leakage around the door
viewing window, the exhaust opening, and
• Microwave energy leakage must not exceed
NOTE: Leakage with the outer case removed - less
than 5 mW/cm
2
oven (before the latch switch (primary) is
interrupted) with the door in a slightly opened
position - less than 2 mW/cm
2
NOTES WHEN MEASURING
• Do not exceed the meter’s full-
• The test probe must be moved no faster than
1 in/secondsecond) along the shaded
• The test probe must be held with the grip
A false reading may result if the operator’s
• When testing near a corner of the door, keep
the probe perpendicular to the surface to avoid
RECORD KEEPING AND
NOTIFICATION AFTER
MEASUREMENT
• After adjustment and repair of any microwave
energy interruption or microwave energy
blocking device, record the measured values
for future reference and enter the information
• The microwave energy leakage should not be
more than 4 mW/cm
2
after determining that
all parts are in good condition and functioning
properly, and that proper replacements parts
• Have the electromagnetic energy leakage
monitor checked for calibration by its
manufacturer
DISASSEMBLY AND ADJUSTMENT
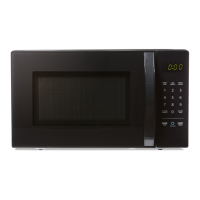
1. OUTER CASE REMOVAL
• Disconnect the power supply cord from
• Remove the screws from the rear and along
• The outer case must be moved backward to be
2. POWER SUPPLY CORD
•
• Disconnect two terminals, and remove one
•
CAUTION: DISCHARGE THE HIGH-VOLTAGE
CAPACITOR BEFORE SERVICING (refer to
Page 2).
3. CONTROL PANEL ASSEMBLY
• Disconnect the leadwire from the PCB
• Remove the screws for the earth terminal and
• Lift control panel assembly from
the oven by the unhooked tab
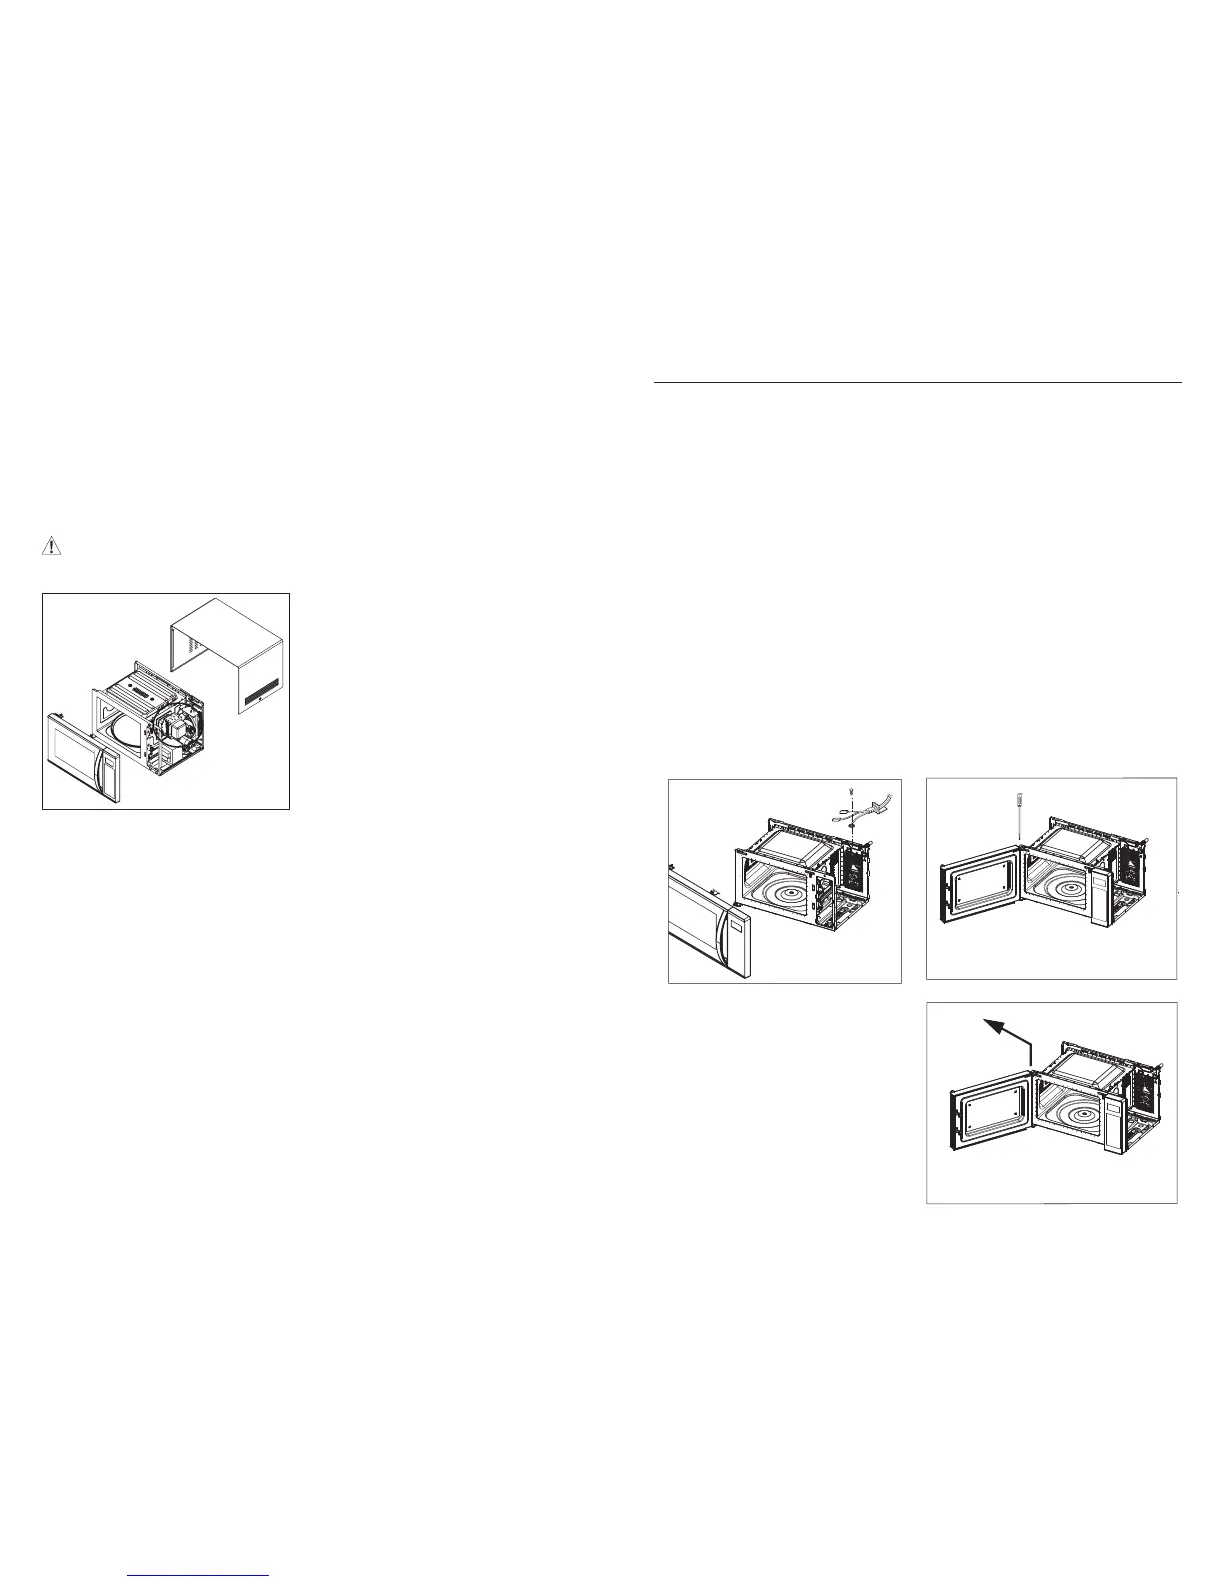
4. DOOR ASSEMBLY REMOVAL
•
• Remove the two screws holding the hinge to
CAUTION: Be careful not to damage the door
with the screwdriver.
•
NOTE:
• After replacing the door, be sure to check
that the primary switch, monitor switch, and
• After replacing the door, check for microwave
energy must be below the limit of 5 mW/cm
2
• When mounting the door assembly to the oven
assembly, be sure to adjust the door assembly
parallel to the chassis and in such a way that
the door has no play between the inner door
assembly is not mounted properly, microwaves
may leak from the clearance between the door
Remove door assembly:
 Loading...