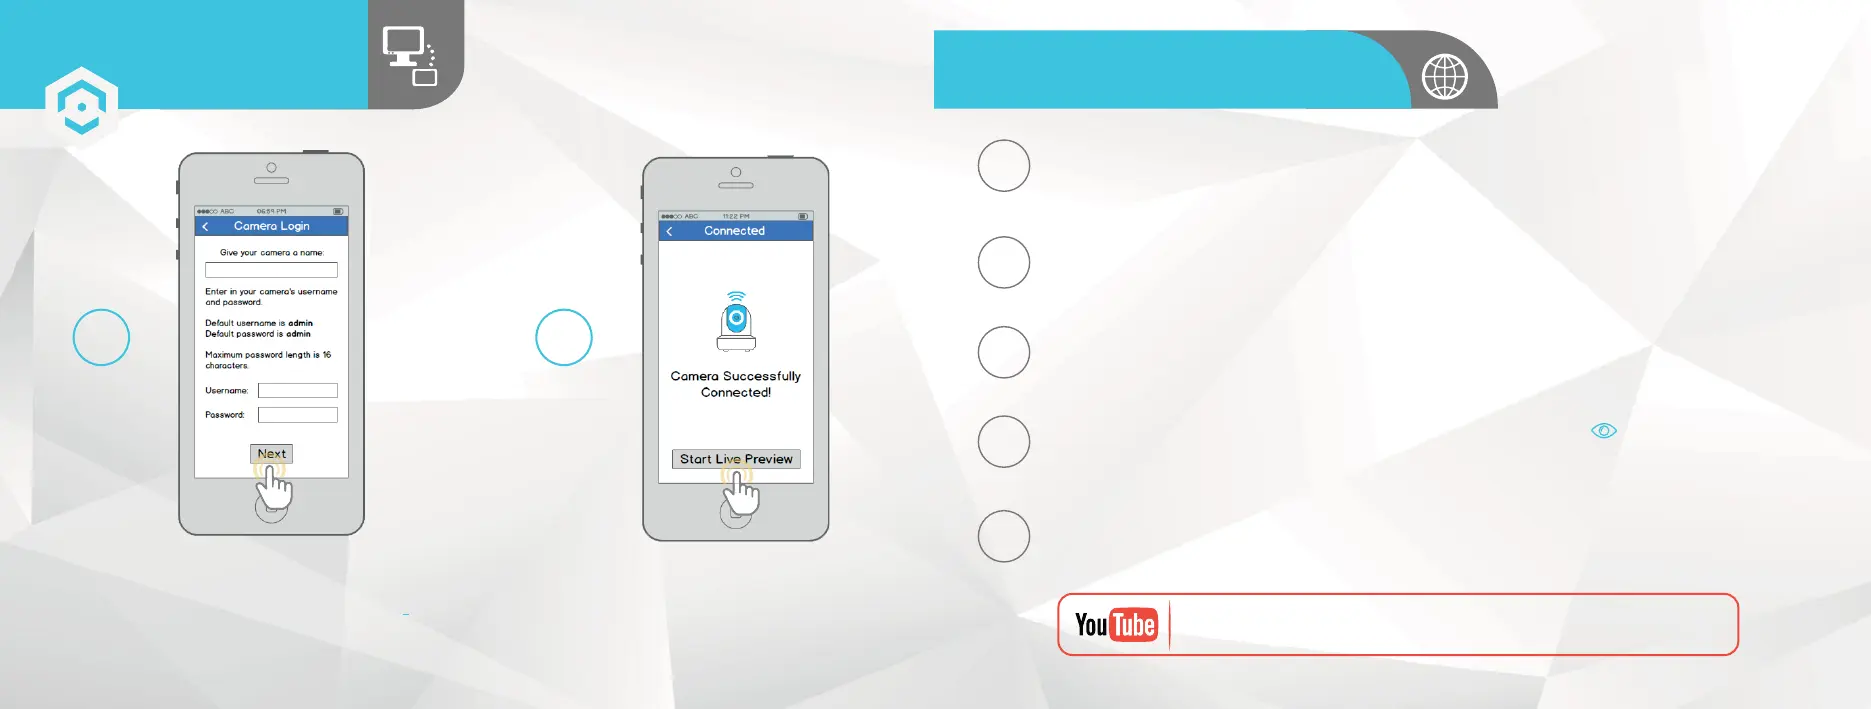
Give your camera a name, then enter in the camera’s
username and password. The default username
is admin and the default password is admin .
Once you’ve filled out all of the fields, tap “Next”.
Your camera is now ready to
go! Tap the “Start Live Preview”
button to get started!
8 9
REMOTE WEB ACCESS SETUP
ADDITIONAL ACCESS METHODS
Once activated, download and install the plugin for your web browser. The installation of the
plugin will require all web browsers to close.
Log in to your account. To add a camera, click the "Add Device" button. Give the camera a
name, enter the S/N (found on your camera’s sticker), then enter the login details for the
camera. The default username and password for the camera is admin.
Using Internet Explorer, Firefox, or Safari, go to www.AmcrestView.com and register for an
account. You will be required to activate your account by e-mail (double-check your spam
folder).
1
2
3
Once added, the camera should appear in the device list. Click the icon next to the camera's
S/N to open the live view and playback interface.
4
Click the camera name in the list on the left to enable it. The camera should now be successfully
set up for live viewing and playback!
5
To watch a video on setting up your camera for remote web access,
please visit www.amcrest.com/remotewebsetup
P2P SETUP
SETTING UP YOUR CAMERA
2019