EasyManua.ls Logo

Amerex 321M - User Manual

Amerex 321M
6 pages
Print Icon
To Next Page IconTo Next Page
Loading...
PN 05603 04/2020
COVER SHEET
DO NOT PRINT THIS PAGE FOR ACTUAL MANUAL. INTERNAL USE ONLY.
PART
NUMBER
TITLE DATE CREATED CREATED BY REV. CKD
05603 MANUAL OWNERS SERVICE CO2 HP
12/15/92 HB F
REV DRAWING CHANGE BY ECN# DATE
E UPDATE MANUAL & ADD MODEL 320/321 JA 7/2013
F REFRESHED LAYOUT DESIGN CT B002026 4/22/20
THIS DRAWING IS THE EXCLUSIVE AND CONFIDENTIAL PROPERTY OF AMEREX
CORPORATION. IT SHALL NOT BE DUPLICATED, USED OR DISCLOSED TO OTHERS
WITHOUT THE EXPRESS WRITTEN CONSENT OF AMEREX CORPORATION.
# NOTES
1 THIS COVERSHEET FOR INFORMATIONAL PURPOSES ONLY - DO NOT PRINT THIS PAGE IN MANUAL.
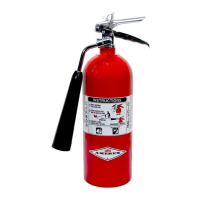
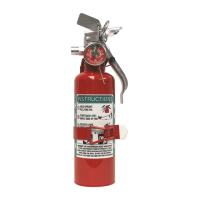
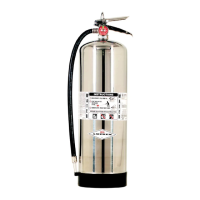
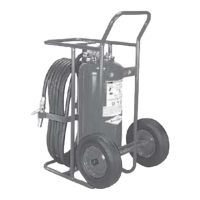
2 DESCRIPTION: MANUAL OWNERS SERVICE FOR CARBON DIOXIDE PORTABLE EXTINGUISHERS
3 ACTUAL PRINTED MATERIAL TO CONSIST OF ATTACHED
4 OVERALL SIZE OF PRINTED DOCUMENT PAGES: 8-1/2” X 11” ON 20 LB PAPER
5 PRINTED MATERIAL TO MATCH ATTACHED IN SADDLE STITCHED BOOKLET FORM
6 PRINT MATERIAL IS TO BE HOLE PUNCHED 3 EACH 1/4HOLES DOWN LEFT SIDE FOR STD 3-RING BINDER
7 CURENT REVISION DATE: 4/20

Questions and Answers

  • J
    Jeffrey HernandezAug 17, 2025
    What to do if Amerex Firefighting Equipment leaks during discharge under the discharge lever?
    • C
      Cassidy PayneAug 17, 2025
      If your Amerex Firefighting Equipment leaks during discharge under the discharge lever, remove the valve assembly, downtube, spring, and valve stem assembly. Install a new valve stem assembly and check the valve seat for any scratches or foreign matter.
  • S
    Sherry WallAug 19, 2025
    What to do if there is a leak in the Amerex 321M cylinder?
    • J
      Julie WeeksAug 20, 2025
      If your Amerex Fire Extinguisher cylinder is leaking, contact Amerex if it's under warranty. Otherwise, mark it as "Rejected" and remove it from service or return it to the owner.
  • D
    David JonesAug 22, 2025
    What to do if my Amerex 321M leaks during discharge under discharge lever?
    • J
      john12Aug 22, 2025
      If your Amerex Fire Extinguisher leaks during discharge under the discharge lever, remove the valve assembly, downtube, spring, and valve stem assembly. Install a new valve stem assembly and check the valve seat for scratches or any foreign matter.
  • S
    Summer RobinsonAug 26, 2025
    How to fix a leak at the safety relief nut on an Amerex 321M Fire Extinguisher?
    • M
      Maria WatkinsAug 26, 2025
      To fix a leak at the safety relief nut of your Amerex Fire Extinguisher, remove the safety nut, disc, and gasket assembly. Replace it with a new Amerex P/N 04000 safety nut, disc, and gasket assembly. Tighten the assembly to 250 in-lbs of torque.
  • W
    weaverjeanAug 28, 2025
    What to do if my Amerex 321M has a leak through the valve?
    • A
      Anthony MolinaAug 28, 2025
      If your Amerex Fire Extinguisher is leaking through the valve, check the valve stem seating area for scratches or foreign matter. Clean the seating area with a toothbrush and soft cloth. Then, install a new valve stem assembly.
  • R
    ryanmorrisAug 31, 2025
    How to fix a leak at collar o-ring on Amerex 321M?
    • A
      Amanda WiseAug 31, 2025
      To fix a leak at the collar o-ring of your Amerex Fire Extinguisher, remove the valve assembly, clean the collar thoroughly, and install a new collar o-ring. Lubricate it with Visilox V-711 and reinstall the valve to a maximum of 100 ft-lbs torque.
  • M
    Michael OrtizSep 2, 2025
    What to do if Amerex Firefighting Equipment has a leak through the valve?
    • S
      Susan GonzalezSep 3, 2025
      If there's a leak through the valve of your Amerex Firefighting Equipment, inspect the valve stem seating area for scratches or foreign material. Clean the seating area using a toothbrush and a soft cloth. Then, install a new valve stem assembly.
  • A
    angela08Sep 5, 2025
    What to do if Amerex Firefighting Equipment leaks during discharge at the hose connection elbow?
    • T
      timothyturnerSep 5, 2025
      If your Amerex Firefighting Equipment is leaking during discharge at the hose connection elbow, tighten the hose connection at the elbow on 10, 15 & 20 lb models. For 2½ & 5 lb models, replace the O-ring and/or elbow.
  • L
    Lauren YorkSep 7, 2025
    What to do if my Amerex Firefighting Equipment has a leak at the safety relief nut?
    • A
      angelahillSep 8, 2025
      If your Amerex Firefighting Equipment has a leak at the safety relief nut, remove the safety nut, disc, and gasket assembly. Replace it with a new Amerex safety nut, disc, and gasket assembly. Tighten the assembly to a maximum torque of 250 in.-lbs. [28.25 Nm].
  • E
    Elizabeth Crawford DDSSep 12, 2025
    How to fix a leak at the collar O-ring in Amerex Firefighting Equipment?
    • J
      James PetersSep 12, 2025
      To fix a leak at the collar O-ring in your Amerex Firefighting Equipment, remove the valve assembly and thoroughly clean the collar. Install a new collar O-ring, lubricating it only with V-711 before reinstalling the valve.

Overview

This document outlines the installation, operating, and servicing instructions for Amerex Carbon Dioxide Portable Extinguishers, specifically models 321M, 322, 322NM, 330, 331, and 332.

Function Description:

These devices are portable fire extinguishers designed to combat fires by diluting the surrounding atmosphere with inert carbon dioxide (CO2) gas, thereby reducing oxygen levels below what is required for combustion. This method is effective for certain types of fires, but users are warned about the potential for oxygen deficiency in unventilated spaces, which can lead to loss of consciousness. Skin contact with CO2 is also cautioned against due to its extremely cold temperature, which can cause burns or frostbite. The extinguishers are intended for immediate use and should be recharged immediately after any use.

Important Technical Specifications:

The manual provides approximate discharge times and ranges for different extinguisher sizes:

  • Discharge Time (Approximately):
    • 2½ or 5 lb.: 9 seconds
    • 10 lb.: 11 seconds
    • 15 lb.: 15 seconds
    • 20 lb.: 19 seconds
  • Discharge Range (Approximately):
    • 2½, 5, 10, 15, 20 lb.: 3 to 8 feet [0.3 to 2.4m]
  • Valve Assembly Torque:
    • Safety relief assembly: 250 in-lbs. [28.25 Nm]
    • Valve-to-cylinder seal (maximum): 100 ft. lbs. [135.58 Nm]
  • Cylinder Threads: Amerex CO2 valve bodies and aluminum cylinders use 1⅛"-12 UNF straight threads.
  • Printed Material: The manual itself is designed to be 8-1/2" x 11" on 20 LB paper, printed in saddle-stitched booklet form, and hole-punched with three 1/4" holes on the left side for a standard 3-ring binder.

Usage Features:

The operation of the extinguisher involves a simple, multi-step process:

  1. Removal: Remove the extinguisher from its wall hanger or vehicle bracket.
  2. Positioning: Move to within approximately 8 feet [2m] (for 2½ & 5 lb. models) or 10 feet [3m] (for 10, 15, or 20 lb. models) of the fire site.
  3. Activation: Hold the extinguisher upright, twist, and pull the pull pin.
  4. Aiming: Stand back 8 feet [2m] or 10 feet [3m] from the fire and aim the horn at the base of the flames. Users are specifically instructed to hold the horn on the hand grip only to avoid cold burns. The 2½ & 5 lb. models feature a swivel horn that maintains a fixed position once aimed, eliminating the need for continuous holding during discharge.
  5. Discharge Technique: Keep the extinguisher upright and sweep side to side across the base of the fire, progressively following up until the fire is extinguished. Users should work the fire away from themselves, remaining alert for flashbacks, and moving closer as the fire diminishes, but not so close as to scatter or splash burning materials.
  6. Stopping Discharge: Release the valve lever to stop the discharge once the fire is out.
  7. Post-Fire Procedure: Stand by for possible reignition. Immediately evacuate and ventilate the area after extinguishing the fire due to hazardous fumes and smoke.

Maintenance Features:

The manual emphasizes the importance of regular inspection, maintenance, and proper recharging.

Periodic Inspection Procedures (Monthly or more often if circumstances dictate):

  • Verify the extinguisher is in its designated place.
  • Ensure no obstructions to access or visibility.
  • Confirm operating instructions on the nameplate are legible and facing outward.
  • Check that the tamper seal is not broken or missing.
  • Examine for obvious physical damage, corrosion, leakage, or clogged nozzle.
  • Determine fullness by weighing or hefting.

Maintenance - Service Procedure (Annually or more frequently):

  • Cleaning: Clean the extinguisher to remove dirt, grease, or foreign material.
  • Inspection: Inspect the instruction nameplate for legibility and the cylinder for corrosion, abrasion, dents, or weld damage. If integrity is doubted, hydrostatic testing is required per CGA Pamphlets C-1 and NFPA 10.
  • Parts Check: Inspect for damaged, missing, or substitute parts. Only factory-replacement parts are approved.
  • Weight Check: Weigh the extinguisher and compare with the weight printed on the nameplate. Recharge if the weight is outside allowable tolerances.
  • Hydrostatic Test Date: Check the cylinder dome's manufacture date; hydrostatic testing is required every 5 years per DOT requirements.
  • Pull Pin: Remove and inspect the pull pin and tamper seal; replace if bent or difficult to remove. Install a new tamper seal.
  • Lever/Handle: Inspect the discharge lever and carrying handle for dirt, corrosion, or damage; replace with proper Amerex parts if needed.
  • Horn/Hose Assembly: Remove and inspect the horn and discharge tube (2½ & 5 lb.) or hose and horn assembly (10, 15, or 20 lb.) for damage. Replace if brittle, cracked, or deformed. Blow air through the nozzle to ensure it's clear.
  • Hose Continuity Test: Perform a conductivity test on carbon dioxide hose assemblies using a basic conductivity tester to ensure continuous metal braid connection and minimize static shock (NFPA 10).
  • Valve Assembly: Inspect for corrosion or damage to hose thread connection and the safety relief assembly for obstruction or damage. Replace with a complete Amerex factory-assembled safety relief assembly if necessary, tightening to 250 in-lbs. [28.25 Nm]. Valve removal or part replacement should only occur after completely discharging the cylinder.
  • Elbow/Diffuser Tip: Inspect the 10, 15 & 20 lb. elbow and diffuser tip for blockage or damage. The 2½ & 5 lb. CO2 diffuser is built into the discharge tube. Replace damaged parts with genuine factory replacement parts only.
  • Reinstallation: Reinstall the horn and discharge tube or hose and horn assembly. Check horn strap and clip (10, 15 & 20 lb.) for damage and proper positioning.
  • Record Keeping: Install a new tamper seal and record service data on the inspection tag.
  • Mounting: Replace the extinguisher on its wall hanger or vehicle bracket, ensuring it fits properly and the bracket is securely attached.

Recharging Procedure:

  • Depressurization: Ensure the extinguisher is completely empty and depressurized before disassembly.
  • Valve Tightness: Retighten the valve assembly, ensuring minimum tightness for a leak-tight seal, but do not overtighten (maximum 100 ft. lbs. [135.58 Nm]).
  • CO2 Source: Use only an approved source of carbon dioxide and an approved pump, hose, and recharge adapter. Dry ice convertors are not permitted.
  • Adapter Installation: Install the proper Amerex recharge adapter, ensuring it fits over the diffuser tip (2½ & 5 lb.) or elbow (10, 15 & 20 lb.) without blocking diffuser holes.
  • Weighing and Filling: Place the extinguisher on an accurate scale, attach the CO2 supply line, and use a "Pony Spring Clamp" to hold the valve lever open. Pump the correct amount of CO2 as indicated on the nameplate.
  • Leak Check: After filling, remove the supply line and adapter, then check the collar and valve for leaks using leak-detection fluid or soapy water. Wipe the exterior dry.
  • Final Steps: Install the pull pin with the ring facing forward, install a new tamper seal, record the recharge date, and attach a new recharge tag. Reinstall the horn or hose and horn assembly.
  • Final Weight Check: Weigh the assembled extinguisher to confirm the total weight is within allowable tolerances.

Troubleshooting Guide:

The manual includes a troubleshooting guide for common leakage problems, providing corrective actions such as replacing O-rings, valve stem assemblies, safety relief nuts, or contacting Amerex for cylinder issues. It reiterates the warning about depressurizing the extinguisher completely before attempting repairs and the importance of using proper torque for valve assembly.

Important Notes:

  • Amerex Corporation does not service, maintain, or recharge fire extinguishers directly but publishes this manual as a guide for qualified service personnel.
  • The use of substitute parts voids Amerex's warranty and UL listing. Only factory-replacement parts are approved.
  • All warnings, cautions, and notes in the manual must be carefully observed to prevent serious injury.
  • References to NFPA 10, CGA C-1, CGA C-6.1, and the National Fire Code of Canada are provided for further guidance.
  • Replacement parts information is available in the Amerex Portable and Wheeled Parts Book PN 27277, accessible online.

Amerex 321M Specifications

General IconGeneral
BrandAmerex
Model321M
CategoryFire Extinguisher
LanguageEnglish

Related product manuals