EasyManua.ls Logo

American Standard MADERA 3043 User Manual

American Standard MADERA 3043
12 pages
To Next Page IconTo Next Page
Page #1 background imageLoading...
Page #1 background image
SAVE FOR FUTURE USE
1
7301166-100 Rev. B
Product names listed herein are trademarks of AS America, Inc.
© AS Americas Inc. 2014
2
Putty Knife
Adjustable Wrench
Sealant
Tape Measure
Regular Screwdriver
Phillips Screwdriver
Carpenters Level
Flush Valve
RECOMMENDED TOOLS AND MATERIALS
Pictures may not exactly define contour of china
Models: 3043, 3248, 3249, 3461, 3462, 3463, 3464, 3465, 3466
Models 3043, 3248, 3461, 3462, 3465, 3466
Models 3249, 3463, 3464
MADERA 16-1/2" HEIGHT FLUSH VALVE
FLOOR MOUNTED TOILETS
CAUTION: PRODUCT IS FRAGILE. TWO PEOPLE ARE RECOMMENDED FOR
HANDLING TO AVOID BREAKAGE AND POSSIBLE INJURY!
NOTE: For proper operation product requires a minimum of 30 psi working line pressure
Meets the American Disabilities Act Guidelines and ANSI A117.1
Requirements for the Physically Challenged
Thank you for selecting American Standard – the benchmark of fine quality for over 100 years. To ensure this product
is installed properly, please read these instructions carefully before you begin. (Certain installations may require
professional help.) Also be sure your installation conforms to local codes.
!
INSTALL CLOSET BOLTS
Install closet bolts in flange channel, turn 90°, and
slide into place 6" (152 mm) apart and parallel to wall.
CLOSET FLANGE
CLOSET BOLTS
10"
254mm
WAX RING
SEALANT
INSTALL WAX SEAL
Invert toilet on floor (cushion to prevent damage),
and install wax ring evenly around waste flange
(horn), with tapered end of ring facing toilet. Apply
a thin bead of sealant around toilet base.
3
711mm
(28")
1 - 1/2
SPUD
121mm
(4-3/4")
238mm
(9-3/8")
419mm
(16-1/2")
470mm
(18-1/2")
356mm
(14")
338mm
(13-5/16")
150mm
(5-7/8
")
254mm
(10")
13mm
(1/2")
25mm
(1
")
102mm
(4
")
718mm
(28-1/4
")
C/L OF SEAT POST HOLES
140mm (5-1/2) CENTERS
FINISHED WALL
FINISHED
FLOOR
FINISHED
FLOOR
C/L OF OUTLET
1" N.P.T. OR 1" C.W.T.
SUPPLY TO FLUSH VALVE
238mm
(9-3/8
")
419mm
(16-1/2
")
438mm
(17-1/4
")
470mm
(18-1/2
")
356mm
(14
")
338mm
(13-5/16
")
150mm
(5-7/8
")
254mm
(10
")
13mm
(1/2
")
76mm
(3
")
718mm
(28-1/4
")
C/L OF SEAT POST HOLES
140mm (5-1/2) CENTERS
FINISHED WALL
C/L OF OUTLET
INSTALLATION INSTRUCTIONS
Question and Answer IconNeed help?

Do you have a question about the American Standard MADERA 3043 and is the answer not in the manual?

American Standard MADERA 3043 Specifications

General IconGeneral
BrandAmerican Standard
ModelMADERA 3043
CategoryPlumbing Product
LanguageEnglish

Summary

RECOMMENDED TOOLS AND MATERIALS

BASIC INSTALLATION STEPS

INSTALL CLOSET BOLTS

Install closet bolts in flange channel, turn 90°, slide into place 6" apart and parallel to wall.

INSTALL WAX SEAL

Invert toilet on floor, install wax ring around waste flange, apply sealant around toilet base.

TOILET ON FLANGE AND INSTALLATION

POSITION TOILET ON FLANGE

Align toilet on closet flange so bolts project through mounting holes. Loosely install washers and nuts.

INSTALL TOILET

Position toilet squarely to wall, press bowl down fully on wax ring and flange. Tighten nuts until firmly seated.

WARRANTY INFORMATION

AS AMERICA, INC. ONE YEAR LIMITED WARRANTY

One-year limited warranty for defects in materials or workmanship. Excludes labor and consequential damages.

SELECTRONIC FLUSH VALVE FEATURES

Exposed Flushometer Features

Clog resistant self-cleaning piston valve and single sensor design for all Selectronic products.

One Sensor Fits All

Single sensor for faucets, urinals, and flush valves with adjustable range and low battery indicator.

INSTALLER NOTES

Note to Installer

Please give manual to customer after installation. Visit website for more info.

UNPACKING AND CARE

UNPACKING

Remove flush valve items from carton. Note: Some residual water may remain.

CARE INSTRUCTIONS

Clean with clear water and soft cloth. Do not use soaps, acid, or abrasives.

ROUGHING-IN AND PREPARATION

Roughing-in Dimensions

Provides dimensions for right or left hand installation and critical line on vacuum breaker.

General Description

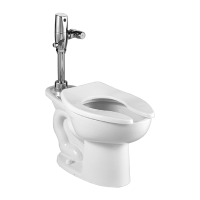
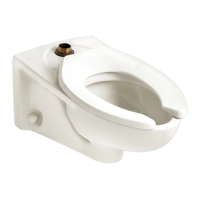
Describes the Selectronic proximity toilet flush valve, its operation, and pressure requirements.

Prior to Installation

Lists items that must be installed before the flush valve, including toilet, drain line, and water supply line.

FLUSH VALVE INSTALLATION - PART 1

INSTALL SWEAT ADAPTER

Measure, cut, clean, and sweat adapter to copper supply pipe for flush valve connection.

INSTALL COVER TUBE, WALL ESCUTCHEON AND STOP VALVE

Measure, cut cover tube, assemble escutcheon and stop valve onto supply pipe.

INSTALL VACUUM BREAKER TUBE

Place spud flange, friction washer, seal washer and coupling nut over spud. Insert vacuum breaker tube.

FLUSH VALVE INSTALLATION - PART 2

FLUSH OUT SUPPLY LINES

Remove stop valve cover, open stop valve to flush debris, then close and replace cover.

LEFT OR RIGHT HAND INSTALLATION

Instructions for reorienting the flush valve unit if needed for left or right-hand installation.

INSTALL FLUSH VALVE

Insert adjustable tailpiece, align flush valve body, vacuum breaker tube, and hand-tighten couplings.

MAINTENANCE - ADJUSTMENTS

ADJUST STOP VALVE

Adjust stop valve after each flush to achieve proper volume, prevent splashing, and cleanse fixture.

RETROFITING WITH SELECTRONIC VALVE

Steps for replacing older manual or electronic valves with the Selectronic model.

MAINTENANCE - POWER OPTIONS

REPLACE BATTERY

Procedure for replacing the standard battery in the flush valve cover.

REPLACE LONG LIFE POWER PACK

Procedure for replacing the long-life power pack in the flush valve cover.

MAINTENANCE - SENSOR SETTINGS

SET DETECTION RANGE

Guide to adjusting the sensor detection distance if required, from 30-50mm.

TROUBLESHOOTING FLOW CHARTS

UNIT DOES NOT FUNCTION

Flow chart to diagnose and resolve issues when the unit does not function at all.

UNIT WILL ONLY FLUSH MANUALLY

Flow chart to diagnose and resolve issues when the unit only flushes manually.

UNIT IS CONTINUOUSLY FLUSHING

Flow chart to diagnose and resolve issues when the unit flushes continuously.

PARTS IDENTIFICATION

Standard Battery Parts (6065 Series)

Lists and illustrates replacement parts for the standard battery models.

Long Life Power Pack Parts (6066 Series)

Lists and illustrates replacement parts for the long-life power pack models.

Model Numbers

Lists all available model numbers for the Selectronic DC Powered Proximity Exposed Toilet Flush Valve.

Related product manuals