EasyManua.ls Logo

American Standard Studio-S 4803300 User Manual

American Standard Studio-S 4803300
3 pages
To Next Page IconTo Next Page
Page #1 background imageLoading...
Page #1 background image
- 1 -
Product names listed herein are trademarks of AS America, Inc.
© AS America, Inc. 2019
Thank you for selecting American Standard...
the benchmark of fine quality for over 140 years.
To ensure that your installation proceeds smoothly-please read
these instructions carefully before you begin.
RECOMMENDED TOOLS
1
M985011 (3/19)
INSTALL FAUCET
Studio-S
®
Pull-Down Kitchen Faucet
Plumbers' Putty or CaulkingAdjustable WrenchPhillips ScrewdriverFlat Blade Screwdriver
Certied to comply with ANSI A112.18.1M
INSTALLATION
INSTRUCTIONS
4803300
Certied to comply with ANSI A112.18.1M
SPOUT BASE
1
4
3
2
5
6
8
7
2
Make certain the SEAL (1) is properly seated in recess of
spout base.
Insert all HOSES (2) and SHANK (3) through MOUNTING
RING (4) and mounting surface. Do not use putty.
Insert HOSES (2) through RUBBER WASHER (5), BRASS
WASHER (6), and threaded LOCKNUT (7).
Assemble RUBBER WASHER (5), BRASS WASHER (6), and
threaded LOCKNUT (7) onto SHANK (3) from underside
of sink or mounting surface. Hand tighten LOCKNUT (7).
Use a screwdriver to tighten SCREWS (8) on LOCKNUT (7).
Work your way around LOCKNUT (7), tightening the screws
slightly each time until all are snug to ensure even pressure.
CAUTION
Turn off water at
main supply
Question and Answer IconNeed help?

Do you have a question about the American Standard Studio-S 4803300 and is the answer not in the manual?

American Standard Studio-S 4803300 Specifications

General IconGeneral
BrandAmerican Standard
ModelStudio-S 4803300
CategoryKitchen & Bath Fixtures
LanguageEnglish

Summary

Recommended Tools

Install Faucet

Mounting Faucet Body

Secure faucet shank and mountings with locknut and screws for proper installation.

Make Water Supply Connections

Connect Supply Hoses

Connect flexible supply hoses to wall supplies, ensuring correct hot/cold connections.

Connect Spray Hose and Install Weights

Attach Spray Hose and Weight

Connect spray hose to connector and install weight onto hose for proper function.

Test Installed Faucet

Test Functionality and Flush Lines

Turn on water, operate handle, and flush lines to test functionality and clear debris.

Spray Operation Modes

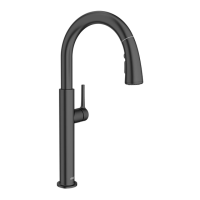
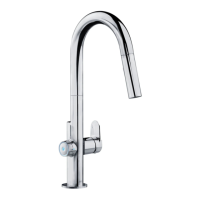
Learn to switch between stream/spray and use pause function on the spray head.

Check Connections for Leaks

Service Faucet

Troubleshooting Drips and Flow

Address faucet drips by checking valve and handle operation, or resolve reduced flow by cleaning.

Cartridge Cleaning and Replacement

Disassemble to clean or replace faucet cartridge, seals, and related components.

Care Instructions

Related product manuals