Page 15;&(%$*4.8"4,7%<'*#$"&8#=%/7*,#*%4,77%>?@@@?@AA?BCDC1Item 64014
EF;6GHIJ6KFGLIMNFLMG6MFMO6 E6GPJ
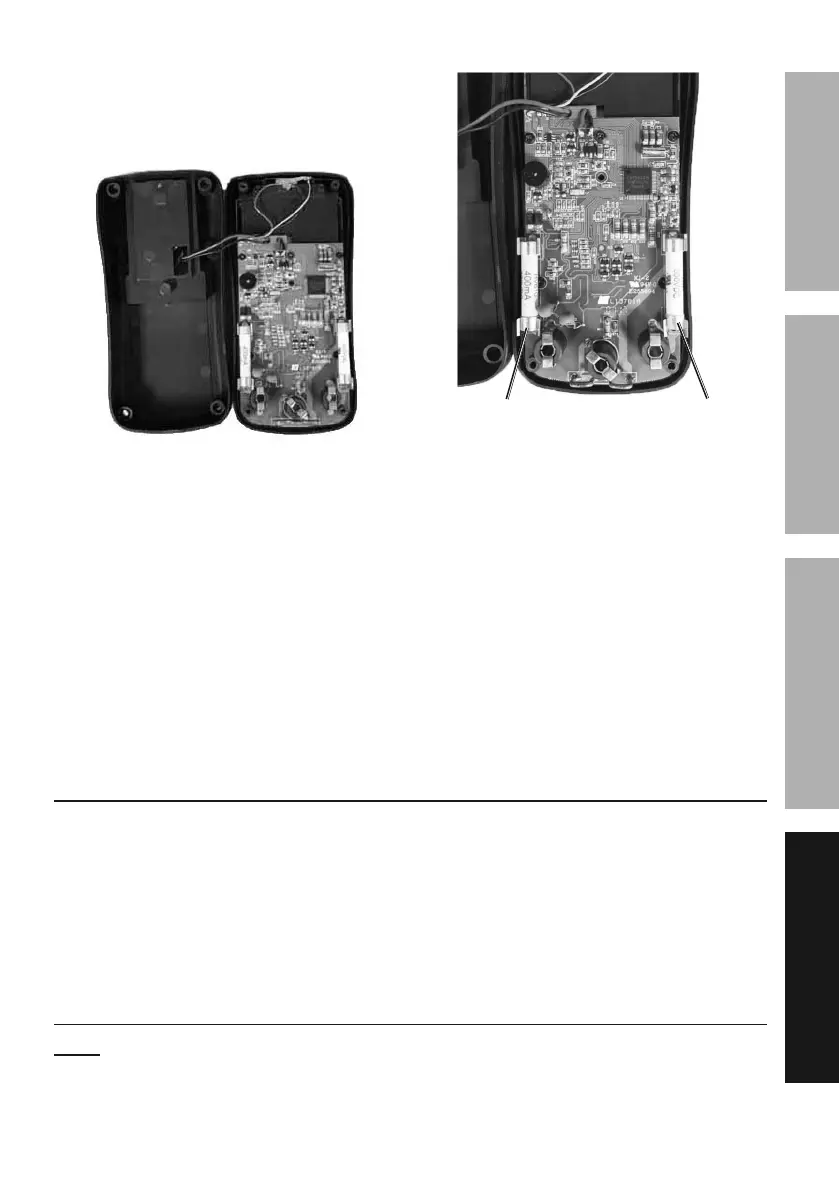
6. Carefully open the case and separate
the case top and bottom. Lie the two
sides of the case next to each other
being careful to 8&$%/'77%$.*%)"(*#.
7. Carefully remove fuses one at a
time. Gently pry one end loose
and remove from its bracket.
Make note of the rating.
;a%b%cdd5F ;>%b%>dF
8. Replace with new fuse of the
same type and rating.
9. Rejoin the covers being careful to
8&$%/"84.%)"(*#. Secure covers
with the four saved screws.
10. Reattach Meter’s outside cover.
11. Reattach battery cover and tilt
stand. Secure with the saved
screw and tighten securely.
O,7"+(,$"&8
Have the Meter calibrated by a qualified technician every year.
K*4&(9%E*(",7%M'5+*(%X*(*-%
%
M&$*- If product has no serial number,
record month and year of purchase instead.