EasyManua.ls Logo

AMP Research BedStep 75309-01A User Manual

AMP Research BedStep 75309-01A
5 pages
To Next Page IconTo Next Page
Page #1 background imageLoading...
Page #1 background image
www.amp-research.com
IM75309 rev 11.11.22
1/3
Torque wrench
15mm
19mm
1
AMP PART # 75309-01A
Toyota Tundra 2014 - 2021
Cover body panels
with protective tape to
prevent damage.
12mm 13mm
Secure linkage in vice and tighten bolts. Do not
Torque. Allow steel bracket to rotate freely.
Remove corner bumper cap and use at blade
screwdriver to pry loose. Use caution when re-
moving tabs.
Remove license plate light by rotating and pulling
out. Squeeze metal tabs holding trailer hitch plug
and remove.
Remove plastic plug holding bumper cap onto
lower portion of bumper. Remove license plate
and plug behind holding bumper cap in place.
15mm
Flat Screwdriver
2 3
4
5
6
7
8
9
APPLICATION
(Non Resin Bumpers only)
T-25
1 2
3 4
TECH SUPPORT 1-888-983-2204
Monday - Friday, 7:00 AM - 5:00 PM PST
Designed and manufactured by AMP Research. Patent 6,830,257 / 6,641,158 / 6,834,875 / 6,938,909 / 6,942,233 / 7,007,961 / 7,055,839 / 7,163,221
Other US and worldwide patents pending. Three-year limited warranty. “BEDSTEP” is a trademark of AMP Research.
Question and Answer IconNeed help?

Do you have a question about the AMP Research BedStep 75309-01A and is the answer not in the manual?

AMP Research BedStep 75309-01A Specifications

General IconGeneral
BrandAMP Research
ModelBedStep 75309-01A
CategoryAutomobile Accessories
LanguageEnglish

Summary

BedStep Installation Guide

Part Number and Application Details

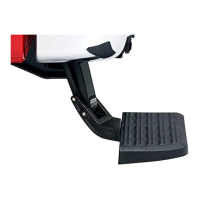
Specifies the AMP Part #75309-01A for Toyota Tundra (2014-2021) non-resin bumpers.

Required Tools and Hardware

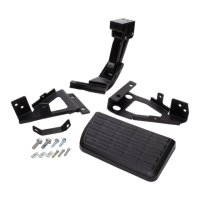
Lists essential tools like torque wrench, flat screwdriver, and specific bolt sizes (12mm, 13mm, 15mm, 19mm, T-25).

Installation Steps 1-4

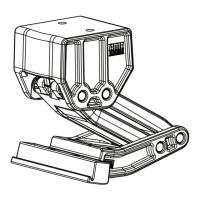
Covers removing license plate light, bumper cap plug, securing linkage, and removing the corner bumper cap.

Installation Steps 5-10

Details removing bumper cap, loosening lower bolts, removing upper bolts, replacing bracket, and mounting.

Installation Steps 11-14

Covers inserting PT screws, securing the step pad, and final assembly and fitment checks.

Product Registration and Benefits

Register Your Product Today

Encourages product registration via website or QR code for faster service and updates.

Product Registration Benefits

Highlights benefits like ensuring purchase info for warranty and easier customer support access.

BedStep Operation and Care

Operating the BedStep

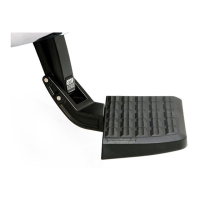
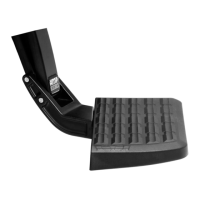
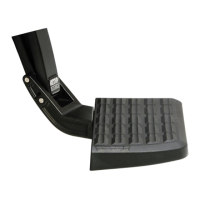
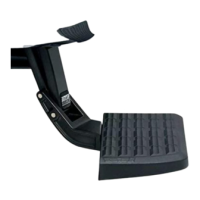
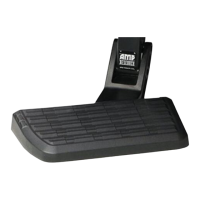
Instructions on how to foot-operate the BedStep to deploy and retract.

Maintenance and Cleaning

Guidance on washing with mild soap and water, avoiding slippery agents.

Driving Safety Reminder

Crucial warning to always stow the BedStep in the retracted position when driving.

Warranty and Safety Information

Limited Warranty Terms

Details the three-year warranty period, coverage, and exclusions for defects.

Warranty Claim Procedure

Instructions for making a warranty claim, including required proof of purchase.

Installation Warning

Emphasizes the critical need to follow instructions precisely for occupant safety.

Related product manuals