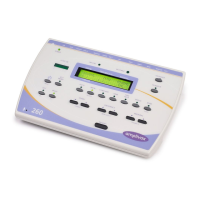
Page 14 OM023-4 Amplivox 260 Operating Manual
Note that the Save process will overwrite any records that exist in the
selected memory location.
3.7 Loading audiograms from internal memory
Press and hold the MENU key, press FREQUENCY repeatedly until
“Load Audiogram no. 1” appears on screen. Use the SIGNAL keys to
select a location numbered 1-12, and then press the YES key. Release
the MENU key once confirmation appears on the display.
3.8 Printing audiograms
Two designated thermal printers (the Able AP1300 or the Martel
MCP8830) are available as options for use with the Amplivox Model 260
audiometer. The correct printer must be selected (use the MENU options
described in Section 3.4.2 to make this selection).
Connect the audiometer to the printer with supplied printer cable (refer
to Section 2.5 of this operating manual for printer set-up). Insert the 6-
pin mini DIN into the DATA socket on the back of the audiometer.
Insert the terminal plug into the socket at the back of the printer. Note
that the printer cables for the Able printer (stock number A105)
and Martel printer (stock number A104) are not compatible.
Ensure the printer is fully charged, switched on, loaded with paper and
ready to print.
Load the desired audiogram as described in Section 3.7; to print the
current audiogram ignore this instruction.
Press and hold the MENU key and press the FREQUENCY key to
display “Print Audiogram”. Continue to hold the MENU key, press the
YES key and release the MENU key. On the prompt “Is printer
ready?” press the YES key again. The audiogram will then print. To
cancel the print operation press NO.
Hearing levels will be printed if available for both ears at every
frequency for air conduction (ACT), uncomfortable loudness (AUL),
bone conduction unmasked (BC) or bone conduction masked (BM)
3.9 Data transfer to a NOAH database
For transfer of test results stored within the audiometer to a NOAH
database the Amplivox link driver disc (see Section 12) is required. This
option includes a USB cable to connect to a PC and the necessary
installation & operating instructions.