PRODUCT
OPERATING
How
to schedule the robot?
Week
&
Time
setting
(On
remote control)
1 .Press
ffi
on the remote
controller, the icon
ffiweem
in the LCD
screen of robot will flicker. Then
press
correct week button, there is
display
in icon
Bwnem,
1 means Monday, 2means Tuesday.'.7means
Sunday1
2. After
setting correct week, then
you
can set time.
(
No need to
press
"ENTER'
after setting the week.)
the lcd
screen of the robot will flicker.
4. Press
A
or
V
to
set the correct hour
6.
Press
A
or
Y
to
set
the
correct minute.
7. After finishing week
& time setting,
press
ENrER
to save it.
Timing
cleaning setting
(on
remote
conlrol)
^.
1. Press timing
cleaning.setting button
"ffi,
then the icon
Q/
in tne
lcd
screen of the
robot
will flicker.
2. Press any week
button / some week buttons
or all week buttons
you
want
to set timing cleaning
on any day or days or everyday of a week.
then the
selected date or dates will flickerin
@_legeCgZ
'
1 means Monday, 2 means
Thursday,
accordingly
7
means Sunday.
4. lf
you
want to cancel any
setting day or days,
press
the week
button again.
(No
need to
press
.ENTER'
after setting the week.)
After
setting cleaning day of each week, it is
possible
to set the starting
time of cleaning.
Cleaning
time
setting:
1 .Press F
to enter cleaning
time setting. the
iconffiffi:--
in the lcd
screen of the cleaner will flicker.
2.Press
A
or
V
to
set the timing cleaning hour.
3.Press
y
again
--ffi
willflicker.
4.Press
A
or
V
to set the timing
cleaning minute.
5.Afterfinishing week&time
setting.
press
ENTER
to
save
it.
Full
Go cleaning setting:
-
Week button
Press
"schedule"
first,
then
press
Full Co,
@:
of the
LCD
screen flicker,
press
ENTER
to save it.the robot will
start cleaning automatically when the
battery is charged(3-4 hours charging).
When the cleaning robot is
connected to the
docking station. at the set
time it will
start cleaning automatically
(when
the battery is
fully
charged);
when the cleaning is finished
or the battery is low. the cleaning robot will
go
back to the
docking station.
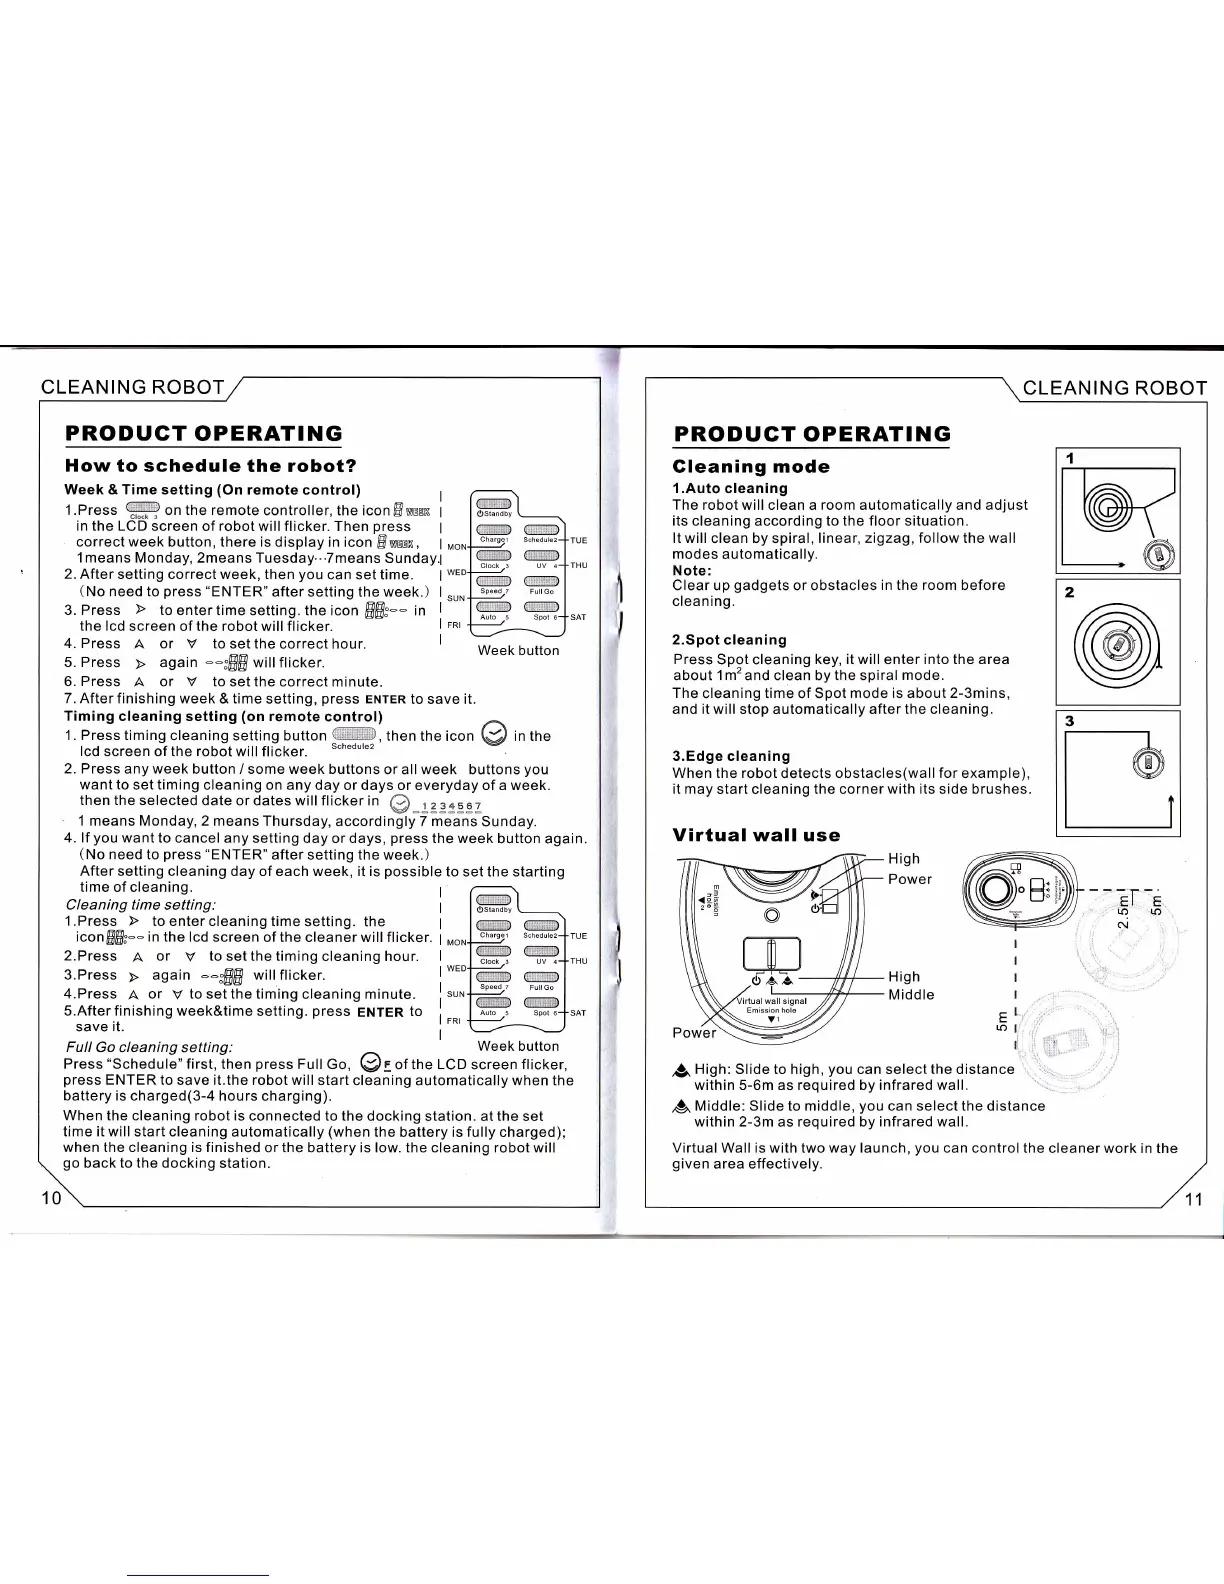
(@
Ostandby
@
(:re
Schsdul62.
(@
Cloch
-l
UV
4
(xx5a@
Speed-7
Full
Go
re@
Auto
5 Spoi 6
Week button
Ostandby
@
Charqe
l
w €3w
Clock
-3
UV 4
@ @x3&
@(lwwe
Auto
.5
Spot 6
{
CLEANING ROBOT
10
CLEANING ROBOT
PRODUGT
OPERATING
Gleaning mode
1.Auto
cleaning
The robot will clean a room automatically and adjust
its cleaning
according
to the floor situation.
It will
clean by spiral,
linear, zigzag, follow the wall
modes
automatically.
Note:
Clear up
gadgets
or obstacles
in
the
room
before
cleaning.
2.Spot cleaning
Press
Spot cleaning
key, it will
enter
into the area
about
1m'and
clean by the spiral
mode.
The
cleaning time of Spot mode
is about 2-3mins,
and it will stop automatically after the cleaning.
3.Edge cleaning
When the robot
detects obstacles(wall
for
example),
it may
start cleaning the corner
with its
side brushes.
Virtual wall
use
I
I
I
I
-l
-
-1,
li
p.
High: Slide to high,
you
can select the distance
within 5-6m as required by infrared wall.
pn
Middle: Slide to middle,
you
can select the distance
within 2-3m
as
required
by
infrared wall.
Virtual Wall is with two way launch,
you
can control the
cleaner work in the
given
area effectively.
o
m
OAA-
11
 Loading...