25
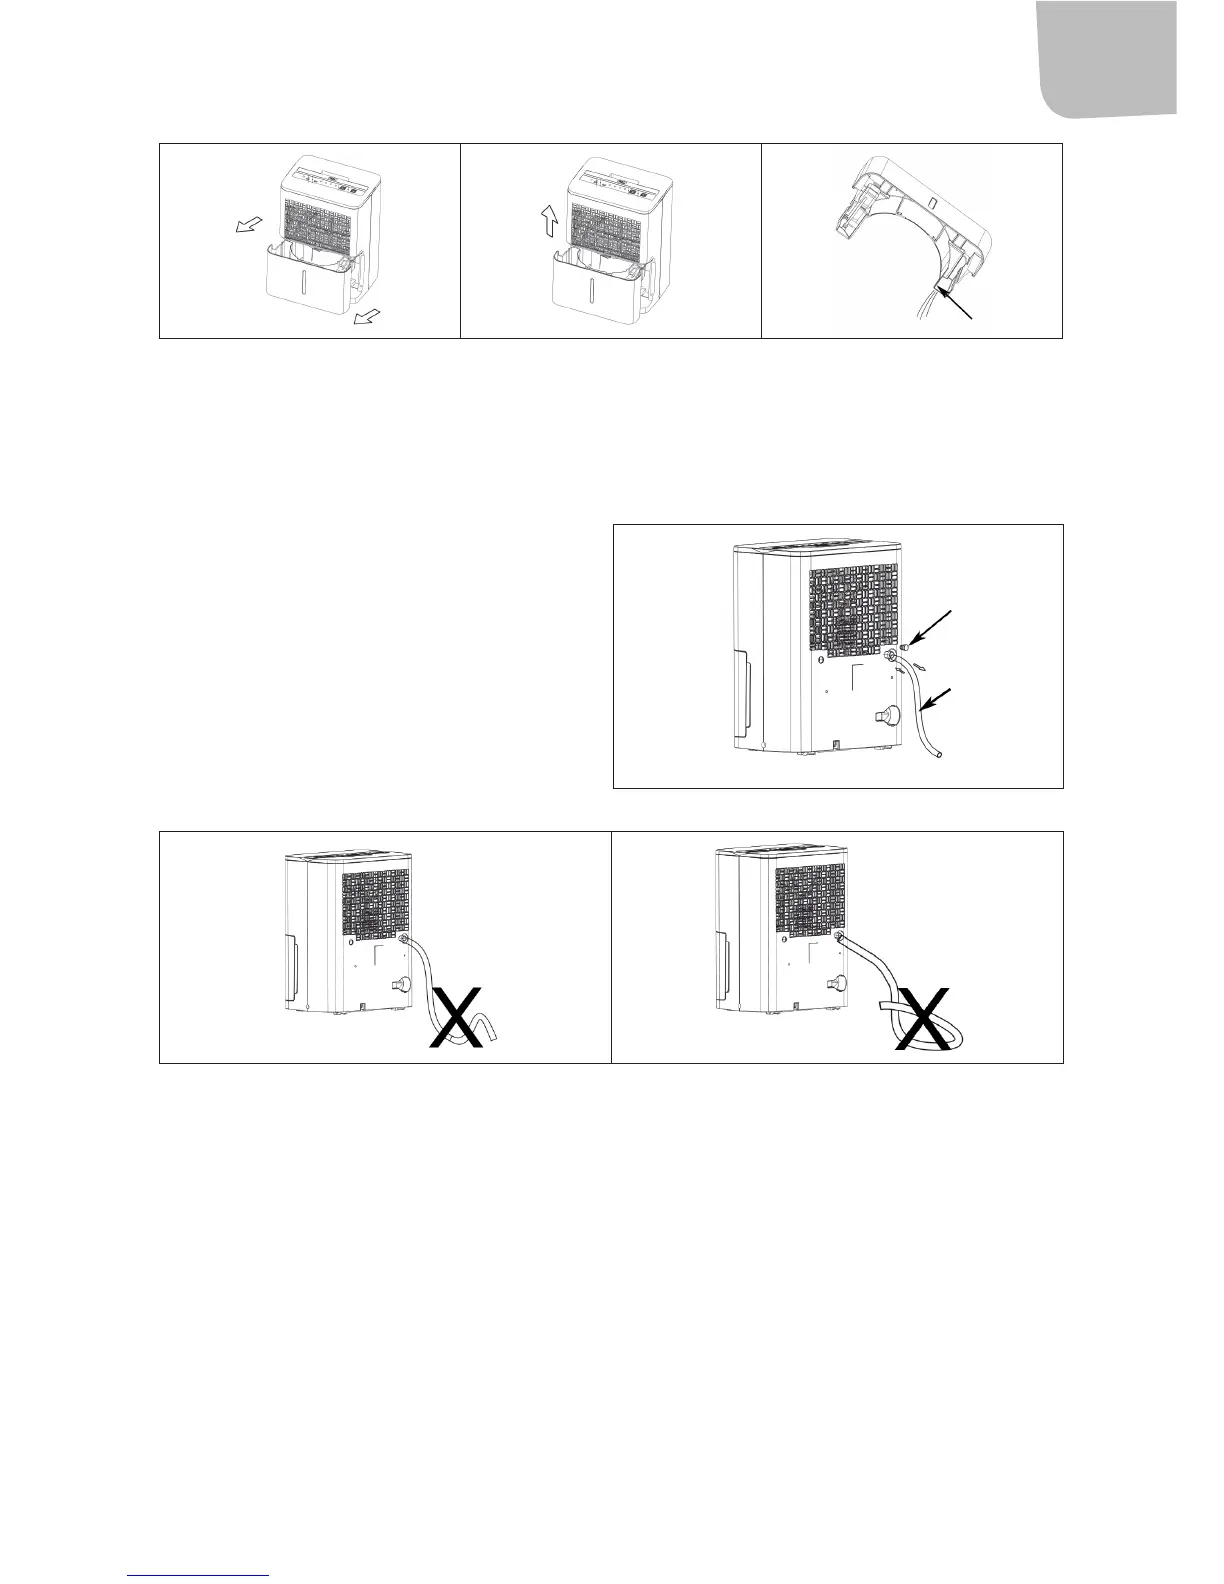
1. Grip both sides rmly and pull the
container straight out.
2. Lift up the water container. 3. Empty out the water.
NOTE:
• Do not touch any parts inside the dehumidier when removing the water container, this could damage the dehumidier.
• Push the water container carefully into the dehumidier, otherwise the dehumidier can be damaged.
Continuous drainage
The water can be drained automatically to a drain via a hose with a
diameter of 16.5/13.5 mm (sold separately).
1. Remove the drain plug on the back of the dehumidier and
put it in a safe place.
2. Connect the hose. Check that the connection is tight.
3. Put the end of the hose in a suitable drain. The drain must be
lower than the outlet on the dehumidier.
4. The hose must go down towards the drain. Avoid bending or
running the hose over obstacles.
NOTE: Remove the hose and insert the rubber plug when the hose is
not in use.
NOTE:
• Do not bend the drain hose. • Do not bend the drain hose.
Automatic switching o
The oat switch switches o the dehumidier when the water container is full, or not properly inserted, and when the water container is taken
out. The dehumidier switches o automatically when the set target humidity is reached.
Start delay 3 minutes
When the dehumidier has been stopped it will not start for 3 minutes. This is a safety function, and is completely normal. The dehumidier
starts automatically after 3 minutes.
Automatic defrosting
If frost forms on the evaporator coils the compressor will switch o, and the fan will run until the frost has melted.
Automatic restart
When the power supply is reset after a power failure the dehumidier restarts with the previously set function.


 To Next Page