EasyManua.ls Logo

Antra AH6000 Series - User Manual

Antra AH6000 Series
8 pages
Print Icon
To Next Page IconTo Next Page
Loading...
2018
Customer Sevice
Technical Info.
Parts & Accessories
Promotions
www.facebook.com /AntraHelmets
Made in china
Auto-Darkening Welding Helmet
User Manual
AH6000 SEREIES
X60-2D
Question and Answer IconNeed help?

Do you have a question about the Antra AH6000 Series and is the answer not in the manual?

Summary

General Safety Warnings

Arc Ray Eye Protection

Warnings about arc ray hazards and protective measures for eyes and skin.

Fumes and Gases Hazards

Hazards from welding fumes and gases, and necessary ventilation and respiratory protection.

Fire and Explosion Prevention

Risks of fire and explosion during welding, and precautions to prevent them.

Additional Safety Precautions

Flying Metal Eye Hazards

Warning about flying metal from welding, grinding, and chipping, and the need for eye protection.

Hot Parts Burn Hazards

Caution against touching hot parts without adequate cooling time to prevent burns.

Noise Induced Hearing Loss

Warning about potential hearing damage from noise and the need for ear protection.

Technical Specifications and General Information

Product Specifications Overview

Detailed specifications including model, viewing area, materials, and protection levels.

Helmet Usage Limitations

Information on what the helmet does not protect against and its recommended welding applications.

Parts and Operation

Component Identification

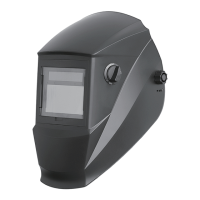
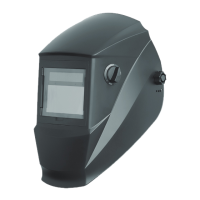
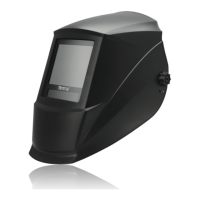
Identification of the helmet's main components and included accessories.

Helmet Fit Adjustment

Instructions on adjusting the headband for circumference, height, and viewing angle.

Headband Preference Adjustment

Guidance on using the ratcheting knob and top strap for a secure headband fit.

Shade and Delay Settings

Welding Shade Control

How to select shade numbers for welding, with ranges 5-9 and 9-14.

Grinding Shade Setting

Setting the shade to 'Grind' for grinding applications and resetting for welding.

Recommended Shade Guide

A guide for recommended shade numbers based on welding process and current amperage.

Delay Time Adjustment

Adjusting the delay time for lens lightening from 0.1 to 1.0 seconds based on welding needs.

Maintenance and Checks

Pre-Welding Functionality Test

Procedures for testing the auto-darkening lens functionality and battery status before welding.

Battery Replacement

Step-by-step guide for replacing the helmet's batteries.

Exterior Cover Lens Replacement

Instructions for removing and installing the outer protective lens.

Interior Cover Lens Replacement

Procedure for removing and installing the inner protective lens.

Filter Replacement and Cleaning

Welding Filter Replacement

Detailed steps for removing and installing the welding filter cartridge.

Filter Cleaning and Inspection

Guidelines for cleaning the helmet and filter, and inspecting for damage.

Troubleshooting and Warnings

Filter Not Darkening or Flickering

Solutions for issues like filter not darkening, flickering, or intermittent operation.

Lens Stays Dark

Troubleshooting steps when the auto-lens remains dark without an arc.

Slow Switching

Explanation for slow switching related to operating temperature.

Poor Vision Issues

Causes and solutions for poor vision, including dirty lenses or incorrect shade.

Irregular Darkening

Addressing irregular darkening possibly caused by uneven headband settings.

Final Warnings and Warranty

Operating Condition Warnings

Precautions regarding operating temperature, overhead welding, and heat exposure.

Product Warranty Information

Details on the one-year warranty, coverage limitations, and recommended product lifespan.

Overview

This document outlines the features, usage, and maintenance of the AH6000 SEREIES X60-2D Auto-Darkening Welding Helmet, designed to provide comprehensive eye and face protection during various welding and cutting operations.

Function Description

The AH6000 SEREIES X60-2D is an auto-darkening welding helmet that automatically adjusts its lens shade in response to the intensity of the welding arc. This core function ensures continuous protection for the welder's eyes from harmful visible, ultraviolet (UV), and infrared (IR) rays, as well as sparks and hot metal. The helmet is equipped with an auto-darkening filter (ADF) that transitions from a light state to a pre-selected dark shade almost instantaneously upon arc ignition. In the event of electronic failure, the helmet provides passive protection against UV and IR radiation up to shade 14, ensuring a baseline level of safety. It is suitable for a wide range of arc welding processes including MIG, MAG, TIG, SMAW, Plasma Arc, and Carbon Arc. However, it is not recommended for "overhead" welding, laser welding, or laser cutting applications. The helmet's design prioritizes user safety by integrating features that mitigate risks associated with arc rays, flying metal, hot parts, fumes, gases, and potential fire or explosion hazards.

Usage Features

The helmet offers several user-adjustable features to optimize comfort and performance for individual welding requirements.

  • Headband Adjustment: The headband can be adjusted for both circumference and height to ensure a secure and comfortable fit. The angle between the face and helmet is also adjustable, with a recommended setting of 10°-12° for optimal viewing. A ratcheting knob allows for precise width adjustment, while a top strap controls headband height, ensuring the helmet is firmly positioned on the head.
  • Shade Number Selection: The helmet provides two ranges of shade numbers for the dark state: "5-9" and "9-14". An adjustment knob allows the user to select the appropriate shade setting based on the welding process and current amperage. A recommended settings chart is provided as a guide for various welding processes and current levels. It is crucial to ensure the adjustment knob is set to the correct shade position before commencing welding.
  • Grinding Control: A dedicated "Grind" position on the adjustment knob allows the helmet to function as a grinding shield, providing eye protection without the auto-darkening feature. Users are reminded to reset the knob back to a "5-9" or "9-14" welding position after grinding to re-enable auto-darkening.
  • Delay Time Control: The helmet features a continuously adjustable delay time control, allowing the user to set how long the lens remains dark after the arc extinguishes. This delay can be adjusted from 0.1 to 1.0 seconds. Turning the DELAY knob clockwise increases the delay, which is beneficial for high amperage welding with significant afterglow. Turning it counter-clockwise reduces the delay, suitable for tack welding or production welding with short welds.
  • Sensitivity Control: An adjustable sensitivity control knob allows the user to fine-tune the helmet's responsiveness to the welding arc. Increasing sensitivity (clockwise) is recommended for low amperage welding or DC TIG welding. Decreasing sensitivity (counter-clockwise) is advisable in environments with high ambient light or where interference exists, to prevent unwanted darkening. The sensitivity should be adjusted to properly condition the helmet according to the specific application and environment.
  • Automatic ON/OFF: The solar unit automatically switches on when exposed to light, eliminating the need for manual power activation.
  • Pre-Welding Check & Battery Testing: Before welding, users should perform a check to ensure the auto-darkening lens is functioning correctly. This involves verifying sufficient ambient light to trigger the lens, confirming the adjustment knob is in the "5-9/9-14" position, and pressing and holding the "Batt" button for 1-2 seconds. If the LED illuminates and the lens darkens as per the shade setting, the helmet is functioning properly. If the LED does not illuminate, battery replacement is required. If the LED illuminates but the LCD does not darken, the auto-darkening lens may be defective. It is emphasized to always test the auto-darkening lens before welding.

Maintenance Features

Proper maintenance is essential to ensure the longevity and continued protective capabilities of the AH6000 SEREIES X60-2D welding helmet.

  • Regular Inspection: Users should regularly inspect the auto-darkening welding filter and other helmet components. Any cracked, pitted, or scratched filter glass or cover lenses that impair vision must be replaced immediately, as they compromise protection. Worn parts should also be replaced to prevent injury.
  • Cleaning and Disinfection: The helmet can be cleaned with mild soap and lukewarm water. The welding filter should be cleaned with a clean, lint-free tissue or cloth. It is crucial not to immerse the helmet or filter in water and not to use solvents, as these can damage the components.
  • Battery Replacement: The helmet uses a CR 2450 replaceable battery. To replace the battery, the back cover is opened counter-clockwise. One end of the battery is gently pressed to lift the other end for removal. A new battery is then inserted, and the back cover is tightened clockwise. Used batteries should be recycled properly and never disposed of with household waste.
  • Exterior Cover Lens Replacement: To replace the exterior cover lens, the old lens is removed, and a new one (with its protective film removed) is placed into the recess at the front of the helmet. It is critical to ensure the front cover lens is mounted and its protective film removed before using the helmet. The 4 sensors at the front of the filter cartridge must be kept clean and free from dirt or spatter.
  • Inner Cover Lens Replacement: The inner cover lens can be lifted from the groove of the inner frame using a hand or hard object until it pops out. After removing the protective film from the new inner cover lens, it is carefully pushed into the recess along the card slots on both sides of the ADF.
  • Welding Filter Replacement: The welding filter is held in place by four lugs on the shield. To remove the filter, the front cover lens retainer must first be removed. This involves pushing the lugs inwards towards the center of the filter using a tool like a ball pen, then pressing them downwards to unlock them from the shield. Once all four lugs are unlocked, the retainer can be removed. To remove the filter itself, the top lugs are lifted with one thumb while pushing the top part of the filter with the other hand, allowing it to be lifted out. For installation, the filter is positioned with the solar panel outside and up, the bottom edge is slid into the bottom lugs, and then the top lugs are lifted from inside while pushing the UP edge of the filter into the top lugs until they lock in position. Finally, the lens retainer is positioned and locked back into the shield.
  • Troubleshooting: The manual provides guidance for common issues such as the filter not darkening or flickering (check for dirt, spatter, sensitivity, batteries, and shade setting), the lens staying dark (fine-tune sensitivity), slow switching (operating temperature too low), poor vision (dirty/damaged lenses, insufficient ambient light, incorrect shade), and irregular darkening (unevenly set headband). If malfunctions persist, users are advised to stop using the helmet and contact the nearest distributor.
  • Storage and Use Conditions: The helmet should be warmed to ambient temperature if stored in extremely cold conditions before welding. It should never be placed on a hot surface, and the filter cartridge should not be opened or tampered with. The filter, being an electronic product, must be kept dry and clean and is not waterproof. Regular inspections for visible signs of damage are crucial before each use. The manufacturer recommends a use period of 3 to 5 years, with the actual duration depending on factors like use, cleaning, storage, and maintenance.

Antra AH6000 Series Specifications

General IconGeneral
ModelAH6000 Series
CategoryWelding Accessories
SensitivityAdjustable
Grinding ModeYes
TypeAuto-Darkening Welding Helmet
Viewing Area3.86" x 1.73"
Power SupplySolar + Lithium Battery
Switching Time1/25, 000 second
Delay TimeAdjustable (0.1 to 1.0 second)
Operating Temperature-5°C~+55°C (23°F~131°F)
StandardsANSI Z87.1
Reaction Time0.1 ms

Related product manuals