Anvil Brewing Foundry™ - V4
©Anvil Brewing Equipment 2019 | www.anvilbrewing.com
2
Assembly
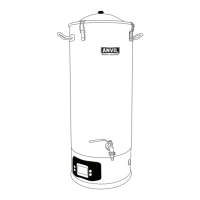
Place the knob washer on the top and
bottom of the lid in the center. Put the
screw through the bottom of the lid
into the knob. Do not over tighten.
Attach the valve through the hole in the Foundry™. Place all parts
in order as shown. When assembled correctly, the valve and dip
tube can be rotated to leave behind trub in the bottom of the
kettle. Tighten the valve rmly but not so tight that the valve
doesn’t rotate by hand.
Use the rotating valve at the end of your boil to transfer clearer
wort.
Tip: Install the dip tube facing the same direction as the
closed valve handle so you know the position
Place the basket support ring into the top of the Foundry™. The basket support ring will t
rmly into the top. If the ring does not t rmly, stretch out the ring until it ts snugly. This
will prevent the ring from popping out accidentally.
Warning: Be careful not to dislodge the support ring while lifting the basket.
Foundry™ Kettle Wall
Outside Foundry™ Inside Foundry™
Teon
Washer
Barb
Nut
Valve
Barb Dip TubeValve Nut
Lid Assembly
Valve and Rotating Dip Tube Assembly
Basket Support Ring Assembly
Knob
Knob Washer
Screw
Lid
O-ring
Assemble the valve handle to the valve with the valve nut and lock washer as shown below. Do not overtighten the nut.
Barb O-ring
O-ring (inside dip tube)
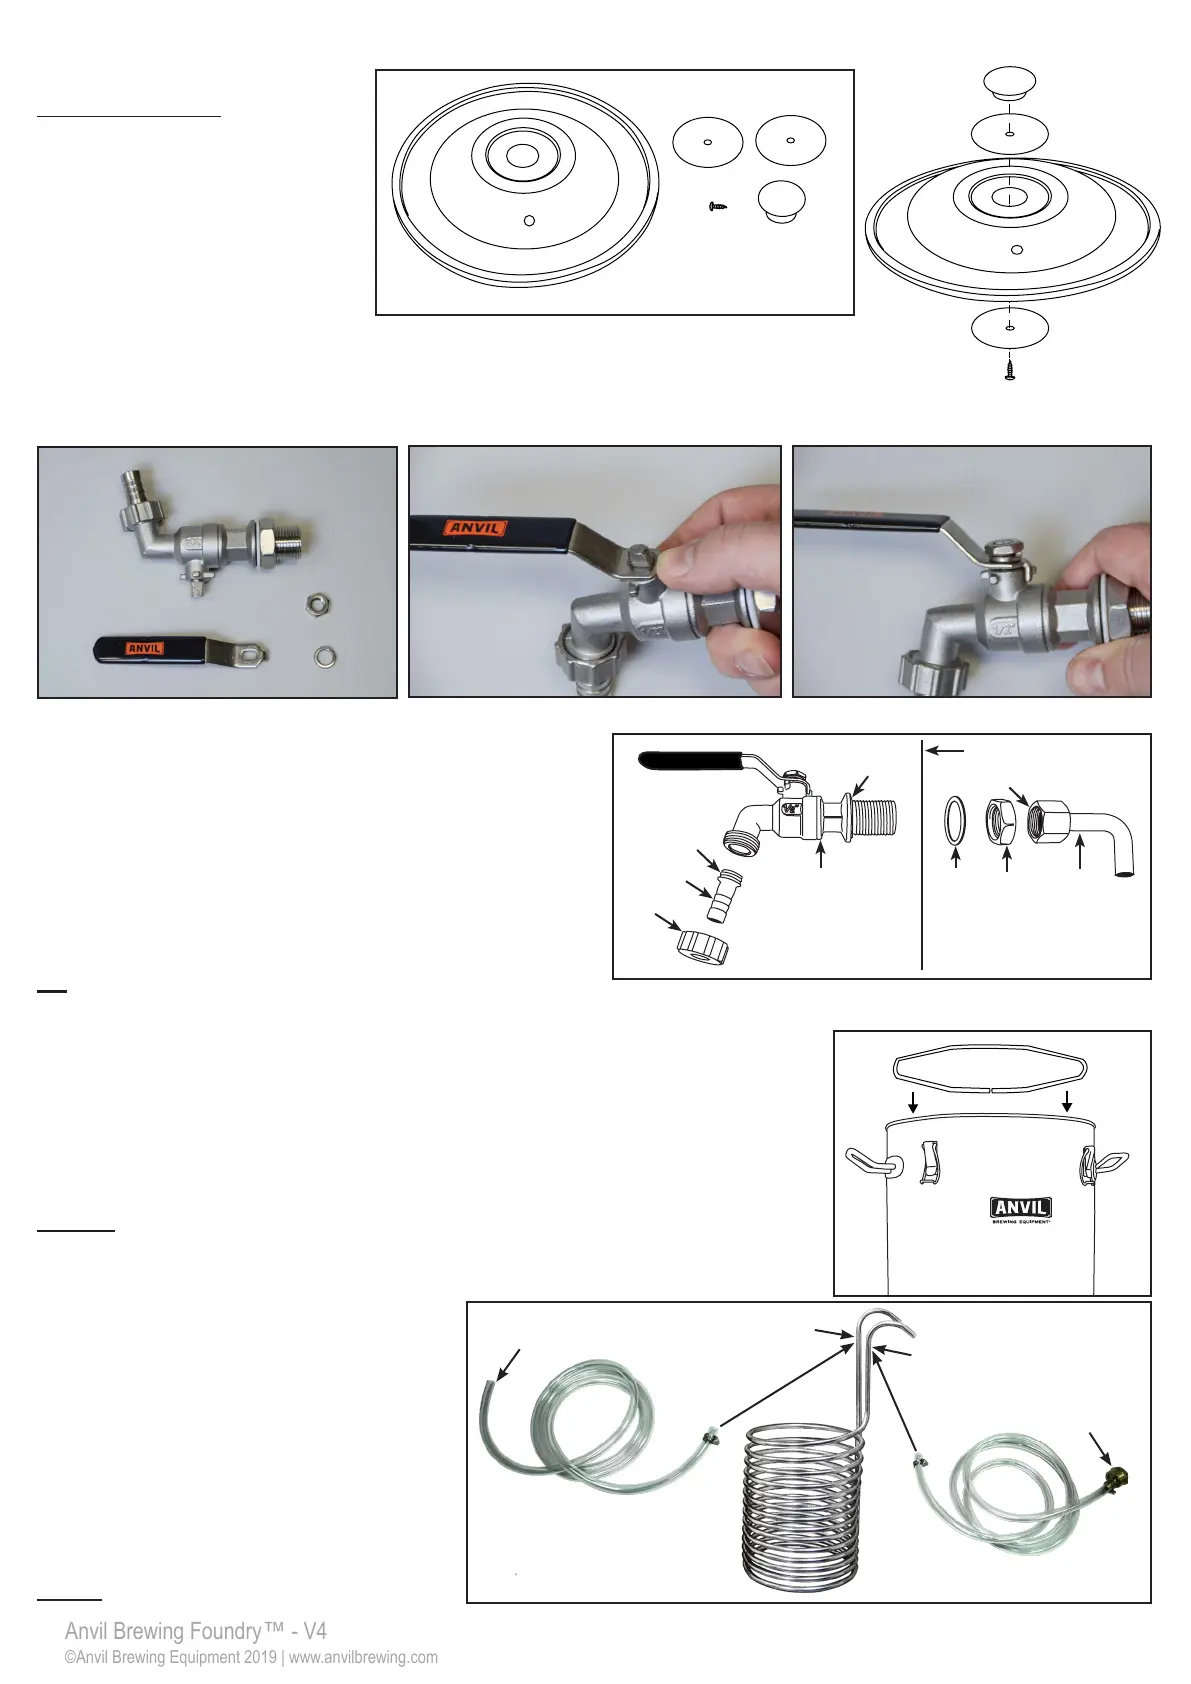
Immersion Chiller
Place the immersion chiller into your boiling wort
5 to 10 minutes before the end of your boil to
sanitize. Place the drain hose down the drain.
Once you’re ready to chill, send cold water
through the coil with the garden hose connection
until it reaches fermentation temperature.
Stir the wort with a sanitized spoon while cooling
to increase cooling speed.
Warning: Water coming out the drain hose will be hot.
Inlet
Outlet
Cold Water
Supply
Drain