This document serves as the user manual for the AOC 27G2SP/BK LCD Gaming Monitor, providing comprehensive instructions for its setup, adjustment, and maintenance, along with troubleshooting tips and specifications.
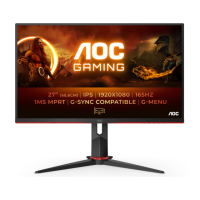
The AOC 27G2SP/BK is an LCD gaming monitor designed to deliver an immersive visual experience for gamers. Its primary function is to display high-quality graphics and video content from a connected computer or other video sources. The monitor supports various display modes and resolutions, optimized for different gaming genres and general computing tasks.
Usage Features:
The monitor offers a range of features to enhance the user experience:
- Adjustable Viewing Angle: For optimal viewing comfort, the monitor's angle can be adjusted. Users are advised to hold the stand firmly to prevent the monitor from toppling while making adjustments. The monitor supports a tilt range from -5° to 23°. It's crucial not to touch the LCD screen during angle adjustments to avoid damage. The manual specifically warns against tilting the monitor downward by more than -5 degrees to prevent panel peeling and advises grasping only the bezel when adjusting the angle.
- Connectivity: The AOC 27G2SP/BK provides multiple input options for connecting to various devices. These include HDMI-1, HDMI-2, DP (DisplayPort), and D-SUB (VGA) ports, along with an earphone jack and a power input. The manual details the steps for connecting the monitor to a PC, emphasizing the importance of connecting the power cord firmly, turning off and unplugging the computer before connecting signal cables, and then plugging in the power cords for both the computer and the display.
- Wall Mounting: The monitor is compatible with optional wall mounting arms. The manual outlines the procedure for wall mounting, which involves removing the base and following the wall mounting arm manufacturer's instructions. It also notes that VESA mounting screw holes may not be available for all models and advises checking with the dealer. Similar to angle adjustment, warnings are given to prevent screen damage during wall mounting, such as avoiding downward tilts exceeding -5 degrees and not pressing the screen.
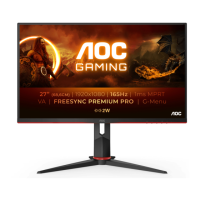
- Adaptive-Sync and AMD FreeSync Premium: For selective models, the monitor supports Adaptive-Sync and AMD FreeSync Premium functions, which work with DP/HDMI connections. These technologies help eliminate screen tearing and stuttering by synchronizing the monitor's refresh rate with the graphics card's frame rate, providing a smoother gaming experience. The manual lists compatible AMD Radeon graphics card series for these features.
- Hotkeys: The monitor features several hotkeys for quick access to common functions:
- Source/Auto/Exit: When the OSD (On-Screen Display) is closed, this button functions as a source hotkey. Pressing it continuously for about 2 seconds performs an auto-configure function (available for D-Sub models).
- Game Mode/<: When the OSD is closed, this key opens the game mode function, allowing users to select from various game modes like FPS, RTS, Racing, Gamer 1, Gamer 2, or Gamer 3, tailored for different game types.
- Dial Point/>: When the OSD is closed, this button shows or hides the Dial Point feature.
- Menu/Enter: When the OSD is not displayed, this button brings up the OSD or confirms a selection within the OSD.
- Power: This button turns the monitor on or off.
- OSD Setting: The OSD provides a comprehensive menu for adjusting various monitor settings. Users can navigate through functions using the
< or > buttons and confirm selections with the Menu/Enter button. The OSD includes categories such as Luminance, Image Setup, Color Setup, Picture Boost, OSD Setup, Game Setting, and Extra.
- Luminance: This section allows adjustment of Contrast (0-100), Brightness (0-100), Eco mode (Standard, Text, Internet, Game, Movie, Sports, Reading), Gamma (Gamma1, Gamma2, Gamma3), DCR (Off, On), and HDR Mode (OFF, HDR Picture, HDR Movie, HDR Game).
- Image Setup: This menu includes settings for Clock (0-100) to reduce vertical-line noise, Phase (0-100) to reduce horizontal-line noise, Sharpness (0-100), H. Position (0-100) for horizontal picture adjustment, and V. Position (0-100) for vertical picture adjustment.
- Color Setup: This section offers Color Temp. (Warm, Normal, Cool, sRGB, User with Red, Green, Blue gain adjustments), DCB Mode (Full Enhance, Nature Skin, Green Field, Sky-blue, Auto Detect, OFF), and DCB Demo (on or off).
- Picture Boost: This feature allows users to adjust a specific "Bright Frame" area on the screen. Settings include Bright Frame (on or off), Frame Size (14-100), Brightness (0-100), Contrast (0-100), H. position (0-100), and V. position (0-100). This is useful for enhancing specific parts of the screen for better viewing.
- OSD Setup: This menu allows customization of the OSD itself, including Language, Timeout (5-120 seconds), DP Capability (1.1/1.2), H. Position (0-100) and V. Position (0-100) for OSD placement, Volume (0-100), Transparence (0-100), and Break Reminder (on or off) to remind users to take breaks after continuous work.
- Game Setting: This section provides game-specific optimizations:
- Game Mode: Selects predefined modes like FPS, RTS, Racing, Gamer 1, Gamer 2, Gamer 3, or 'off' for no optimization. These modes are designed to improve image quality and response time for different game genres.
- Shadow Control: Adjusts the visibility of details in dark areas (0-100).
- Overdrive: Adjusts the response time (Weak, Medium, Strong, Boost, Off).
- Game Color: Provides 0-20 level adjustment for saturation.
- LowBlue Mode: Decreases blue light wave by controlling color temperature (Reading/Office, Internet, Multimedia, Off).
- MBR (Motion Blur Reduction): Adjusts motion blur reduction (0-20).
- Adaptive-Sync/AMD FreeSync Premium: Toggles these features on/off.
- Frame Counter: Displays V frequency on the selected corner (works with AMD graphic cards).
- Note: MBR and Overdrive Boost are only available when Adaptive-Sync/AMD FreeSync Premium is off and the vertical frequency is up to 75 Hz.
- Extra: This menu includes Input Select, Auto Config. (yes or no), Off timer (0-24hrs), Image Ratio (Wide, 4:3), DDC/CI (yes or no), and Reset (yes or no, ENERGY STAR® or no).
- LED Indicator: The monitor's LED indicator shows its current status: White for Full Power Mode and Orange for Active-off Mode.
- Plug and Play DDC2B Feature: The monitor is equipped with VESA DDC2B capabilities, allowing it to communicate its identity and display capabilities to the host system.
Maintenance Features:
Proper maintenance ensures the longevity and optimal performance of the monitor:
- Cleaning: The manual advises regular cleaning of the cabinet with a soft cloth and mild detergent, cautioning against strong detergents that could damage the cabinet. When cleaning, users should ensure no detergent leaks into the product and use a soft cleaning cloth to avoid scratching the screen surface. Crucially, the power cord must be disconnected before cleaning.
- General Safety Precautions:
- Power Source: The monitor should only be operated from the power source indicated on its label. It is equipped with a three-pronged grounded plug for safety; if the outlet doesn't accommodate it, an electrician should install the correct outlet or an adapter should be used safely. The unit should be unplugged during lightning storms or prolonged periods of disuse to protect against power surges. Overloading power strips and extension cords should be avoided to prevent fire or electric shock. For satisfactory operation, only UL-listed computers with appropriate receptacles (100-240V AC, Min. 5A) should be used. The wall socket should be easily accessible.
- Installation: The monitor should not be placed on unstable carts, stands, tripods, brackets, or tables. Only manufacturer-recommended accessories should be used. Objects should never be pushed into the monitor's slots, and liquids should not be spilled on it. The front of the product should not be placed on the floor. Adequate space around the monitor (at least 4 inches/10cm on sides and top, 12 inches/30cm at the back) is necessary for proper air circulation to prevent overheating.
- Other: If the monitor emits a strange smell, sound, or smoke, the power plug must be disconnected immediately, and a Service Center contacted. Ventilating openings should not be blocked. The monitor should not be subjected to severe vibration or high impact during operation or transportation.
Troubleshooting:
The manual includes a troubleshooting section to help users resolve common issues:
- Power LED Not ON: Check if the power button is ON, and the power cord is properly connected to a grounded power outlet and the monitor.
- No Images on Screen: Verify power cord connection and power supply. Check if the signal cable (VGA, HDMI, or DP) is correctly connected. If the power is on, reboot the computer to see the initial screen; if it appears, boot in safe mode and change the video card frequency. If "Input Not Supported" appears, adjust the resolution and frequency to what the monitor can handle. Ensure AOC Monitor Drivers are installed.
- Fuzzy Picture/Ghosting: Adjust Contrast and Brightness Controls, or press auto-adjust. Avoid using extension cables or switch boxes; plug the monitor directly into the video card output.
- Picture Bounces/Flickers/Wave Pattern: Move electrical devices causing interference. Use the maximum refresh rate for the resolution.
- Monitor Stuck in "Active Off-Mode": Ensure the computer's power switch is ON, the video card is snugly fitted, and the monitor's video cable is properly connected and not bent. Check if the computer is operational by observing the CAPS LOCK LED.
- Missing Primary Colors: Inspect the monitor's video cable for damage and ensure proper connection.
- Screen Image Not Centered/Sized: Adjust H-Position and V-Position, or press the AUTO hotkey.
- Color Defects: Adjust RGB color or select the desired color temperature.
- Horizontal/Vertical Disturbances: Use Windows 7/8/10 shut-down mode to adjust CLOCK and FOCUS, or press auto-adjust.
- Regulation & Service: Refer to the Regulation & Service Information in the CD manual or on www.aoc.com for support.
This comprehensive guide ensures users can effectively set up, operate, and maintain their AOC 27G2SP/BK LCD Gaming Monitor for an optimal gaming and computing experience.