17
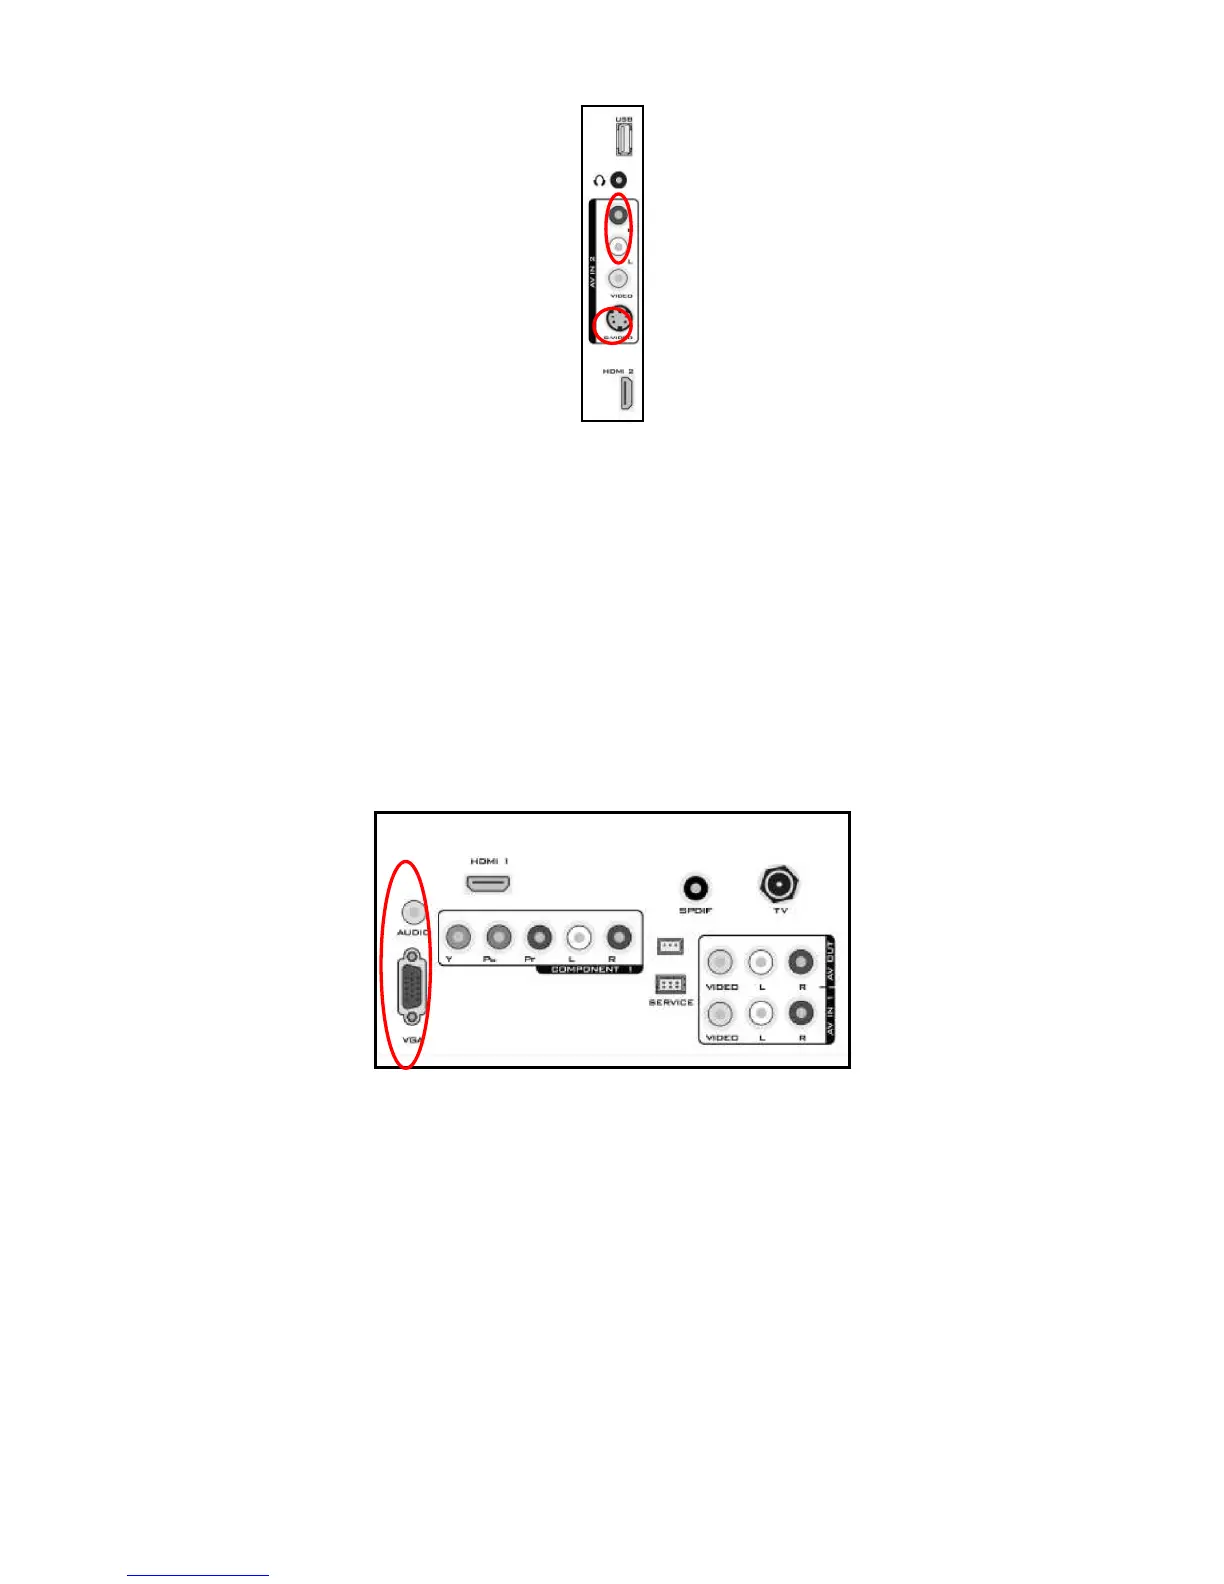
Connecting Your VCR or Video Camera
1. Turn off the TV and VCR or Video Camera.
2. Connect the S-Video jack on the rear of your VCR or Video Camera to the S-Video jack in the AV group on the
rear of the TV.
3. Connect an audio cable (white and red connectors) cable to the audio output connectors associated with the
S-Video output on your VCR or Video Camera and connect the other end to the audio connectors associated with
the AV input on the rear of the TV.
4. Turn on the TV and VCR or Video Camera.
5. Select AV-2 using the SOURCE button on the Remote control or the INPUT keypad on the side of the TV or
directly by pressing the VIDEO button on the Remote Control.
NOTE
Refer to your VCR or Video Camera user manual for more information about the video output requirements of the
product.
Connecting to a PC
1. Turn off the TV and PC.
2. Connect a 15-pin D-Sub RGB (VGA) cable to the RGB output of your PC and the other end to the VGA input at
the rear of the TV.
3. Connect the Audio Out on your computer to the AUDIO input at the rear of the TV.
4. Turn on the TV and PC.
5. Select VGA using the SOURCE button on the Remote control or the INPUT keypad on the side of the TV or
directly by pressing the HDMI/PC button on the Remote.
NOTE
For the best picture quality when connecting a computer through VGA, set your computer timing mode to native
resolution of panel. Please refer to the PC or graphic card’s user guide for additional information on how to set the
timing mode and the video output requirements of the product.
 Loading...